Generator Power Connections Made Safe: Extension Cords, Cables & Transfer Gear (2025)
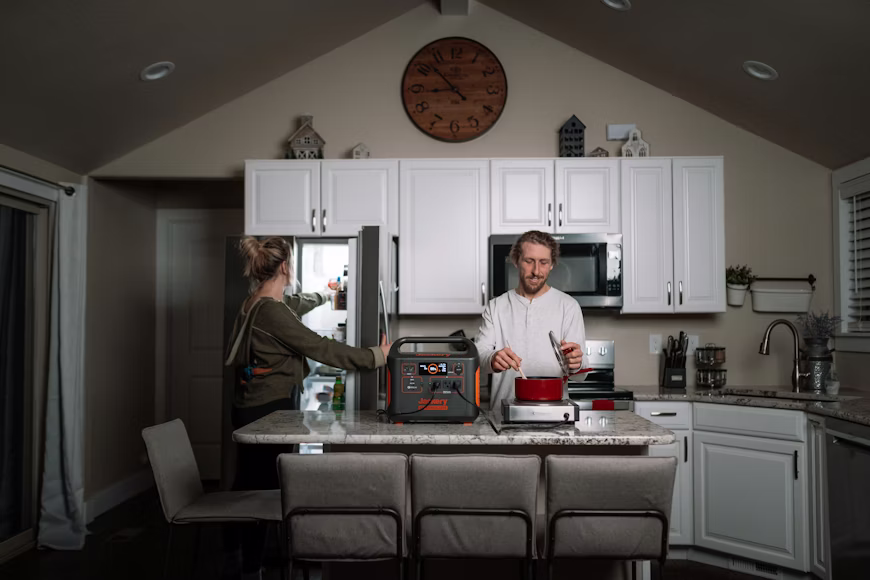
When the grid collapses, every second counts. The first instinct is to yank that generator cord and bring your home back to life — but most generator accidents don’t come from the generator itself. They come from the cords.
This post contains affiliate links. I may earn a small commission at no extra cost to you. Learn more.
A $1,200 dual-fuel machine might run beautifully, but if you push that power through a cheap 16-gauge extension cord, you’re asking for melted insulation, scorched outlets, or a house fire. The problem isn’t just heat — it’s voltage drop. Every foot of undersized wire wastes watts that should be running your freezer, lights, and tools.
This guide takes the guesswork out of generator wiring. You’ll see how to safely move power from your generator to your appliances or home panel — with the same discipline professionals use in off-grid systems.
We’ll walk through the full chain:
Generator → Cord → Power Inlet Box → Transfer Switch → Circuits & Essentials
If you’re choosing a generator for the first time, compare current models in our Best Survival Generators 2025 guide.
Together, these guides connect to the central hub: 🧭 Grid-Down Survival Power: The 2025 Off-Grid Energy Playbook.
🔧 Recommended Generator Connection Gear (2025)
If you’re setting up a generator safely, these are the three items that matter most:
• 30A Generator Cord (10-Gauge, L14-30) — handles full load without overheating
• Weatherproof Power Inlet Box — keeps cords outside and CO out
• Manual Transfer Switch or Interlock Kit — prevents deadly backfeed
(Each is covered in detail below.)
Safe generator power connections are the difference between a controlled backup system and a preventable emergency.
Understanding the Power Flow
Electricity isn’t complicated — until you ignore the flow. Think of it like water pressure: a restriction anywhere in the pipe reduces flow everywhere else.
The route:
Generator → Extension Cord → Power Inlet Box / Transfer Switch → Breaker Panel → Circuits → Appliances
Every link has a maximum load rating. If one piece fails — wrong gauge cord, weak plug, wet connector — the entire system becomes unstable.
- Generator: Produces alternating current at 120 or 240 volts. Dual-fuel models handle both gas and propane, but voltage stability depends on load balance.
- Cords: The arteries of your setup. They carry amperage from generator to load. The smaller the wire, the hotter it runs.
- Inlet Box: The weatherproof “gateway” from outside power into your panel.
- Transfer Switch: Routes electricity safely into selected circuits and keeps the grid isolated.
- Appliances: The endpoint — where heat, motors, and electronics demand clean current.
💡 Quick insight: If your fridge motor sounds strained or your lights dim when you add another appliance, that’s not your generator struggling — it’s your cords dropping voltage.
Extension Cords 101: The Unsung Lifeline
Extension cords are more than convenience. They’re power arteries that must handle heavy, continuous loads safely in the rain, snow, or blistering heat.
Gauge and Amperage
Wire thickness determines safe current. The lower the AWG number, the thicker and stronger the wire.
Rule of thumb: never trust cords below 12-gauge for generator work.
| Gauge | Max Amps | Typical Use | Notes |
|---|---|---|---|
| 10-Gauge | 30A | 240V / high load | For 30A generators or long runs |
| 12-Gauge | 20A | 120V mid-load | Most appliances and tools |
| 14-Gauge | 15A | Light-duty | Unsafe for extended generator use |
A 14-gauge cord might power a drill, but run a fridge on it for hours and the insulation softens from heat. That’s how fires start.
Pro ratio: For every extra 25 ft of cord, step one gauge thicker.
Distance and Voltage Drop
The longer the cord, the higher the resistance — and the lower the voltage at the far end.
At 50 ft, a 12-gauge cord can lose 5–10% of your voltage. That’s enough to make sensitive equipment brown out or motors fail to start.
Keep cords under 50 ft when possible, or upgrade to 10-gauge for full-length runs.
Avoid connecting two or more cords together — each connection adds resistance and failure points.

Outdoor Ratings
Outdoor cords must carry SJTW or STW markings. These cords resist UV rays, moisture, and abrasion. They have thicker rubber insulation and molded ends to keep water out. Indoor cords crack and absorb moisture — dangerous even when dry.
Field-Tested Options
✅ Champion 25-ft 30A Generator Cord (L14-30): Heavy 10-gauge twist-lock line; ideal for 7,500W setups.
✅ Southwire 50-ft 10-Gauge Outdoor: Flexible in cold weather; lighted ends confirm live current.
✅ Camco PowerGrip 30A RV Cord: Textured grips for easy removal under load; built for tight spaces.
💡 Prepper Tip: Label each cord with length, gauge, and amp rating. During a blackout, you won’t want to be guessing which line is safe.
Plug Types & Adapters: Matching the Right Ends
Your generator’s outlet type decides your cord and inlet box. Plug mismatch is one of the most common beginner mistakes.
Common Plug Styles
- L14-30 (Twist-Lock 30A/240V): Four-prong plug found on most 4–8kW generators; locks firmly to prevent vibration disconnects.
- TT-30 (30A/120V RV Plug): Three-prong design common on small inverter units.
- 5-15R / 5-20R: Standard household outlets; fine for lights or tools, never for whole-house power.
Never “force fit” near matches. Even a slight difference in pin spacing signals a different voltage. Wrong fit equals instant short.
Adapter Use
Adapters can bridge incompatible gear temporarily. Use only when both sides share equal or greater amp rating.
- Parkworld L14-30P → 5-15R: Lets you run small lights/tools off a 30A source.
- Conntek 14302 Twist-Lock: Converts L14-30P male to 5-20R female for short-term setups.
- Leviton 30A Kit: Heavy-duty plug replacement set for custom cords.
Treat adapters as stopgaps — never as permanent wiring. They’re backup tools, not long-term solutions.
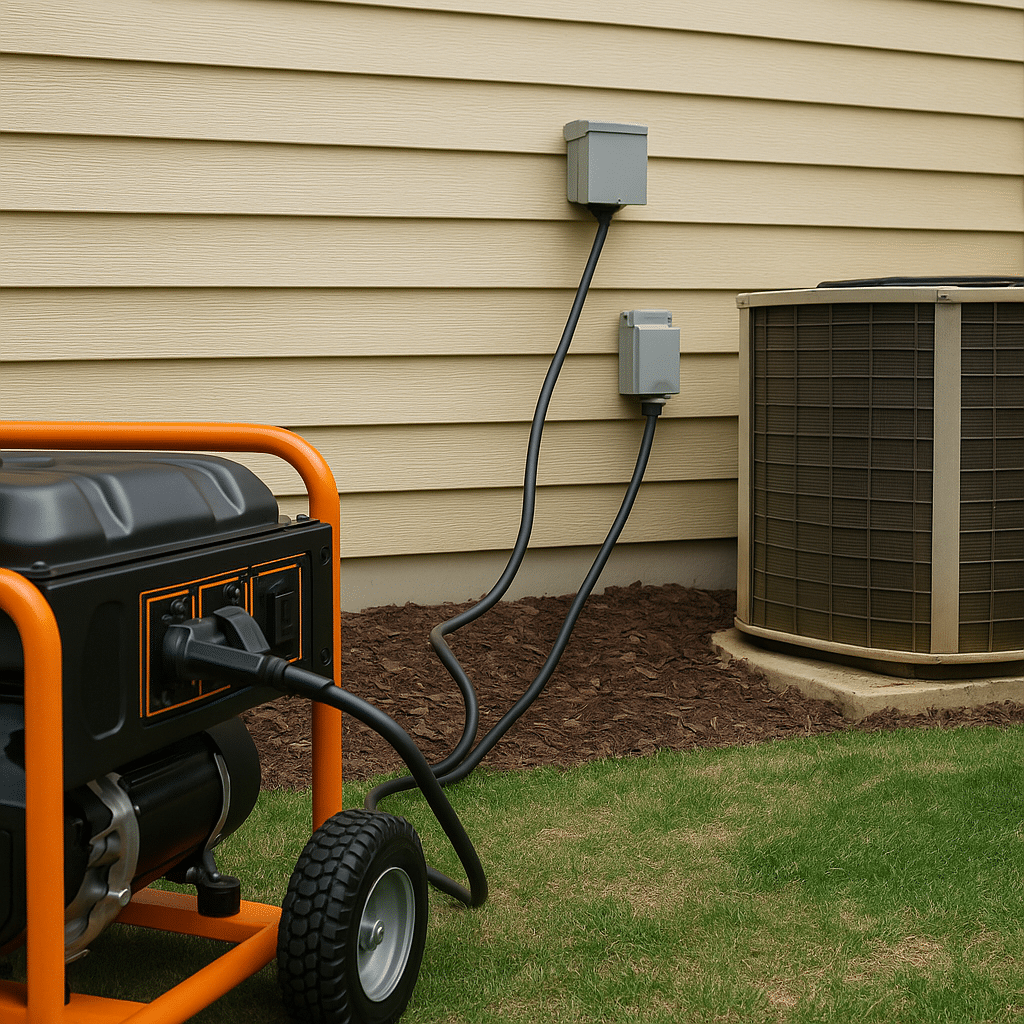
Power Inlet Boxes: The Safe Wall Port
A power inlet box is your permanent connection point. Instead of running a cord through a door or window, you simply plug into a weather-sealed port wired directly to your transfer switch.
Why It Matters
It keeps carbon monoxide outside, prevents water intrusion, and gives you a clean, professional-grade way to connect power fast. It also keeps your home compliant with electrical code — something insurance companies love after a storm claim.
✅ Keeps generator exhaust outdoors
✅ Eliminates cord clutter
✅ Allows instant connection without re-routing wiring each time
Choosing the Right Box
- Amperage: Match generator output — 30A for mid-range, 50A for large setups.
- Connector Type: Match generator plug — L14-30, CS6365, etc.
- Material: Choose steel or aluminum housing over plastic for durability and grounding.
- Placement: Mount near your main breaker panel for short wire runs and minimal voltage drop.
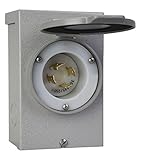
Trusted Models
- Reliance PB30 30A (L14-30): Galvanized, prewired, weatherproof — best in class.
- Generac 6343 50A: Heavy-duty, easy wiring access.
- Midwest U013P 30A: Cost-effective but reliable for small homes.
🔧 Installation Tip: Run 10/3 with ground in metal conduit. Seal every penetration to prevent water or pest entry. Always verify if your generator requires a floating or bonded neutral — wiring it wrong can trip breakers or create stray voltage.
Best Overall Setup for Most Homes
If you only want to do this once and do it right:
• 30A L14-30 generator
• 10-gauge 25-ft cord
• Reliance PB30 inlet box
• 6–10 circuit manual transfer switch
This setup covers refrigeration, heat, lighting, and communications safely without overcomplicating things.
Transfer Gear: The Brain of Safe Power
Transfer gear is the most misunderstood part of generator setups — yet it’s what keeps linemen alive. It also protects you legally — improper backfeeding can void insurance coverage and result in civil liability. Without it, your generator’s power can flow backward into the grid, electrifying dead lines and creating lethal current far from your house.
Why Transfer Gear Is Essential
It physically isolates your generator from the grid while feeding power to chosen circuits. That separation prevents backfeed, keeps voltage stable, and maintains insurance compliance.
Your Two Options
Manual Transfer Switch
A subpanel wired to key circuits (fridge, sump pump, furnace).
You flip each breaker manually from “Line” to “Gen.”
✅ Easy operation during an outage
✅ Watt meters for balancing loads
✅ Ideal for households running under 10 circuits
Interlock Kit
A metal slide plate installed on your main panel that mechanically blocks the main breaker when the generator breaker is active.
✅ Lower cost and simpler installation
✅ Safe and code-compliant when fitted correctly
⚠️ Must be panel-specific (brand & model must match exactly)
Important: Interlock kits are not universal. Always match the kit to your exact breaker panel model. Using the wrong interlock can fail inspection or create unsafe conditions.
Proven Options
• **Primary Pick (Manual Transfer Switch):** Reliance 310D 30A Kit — comes prewired with 10 circuits and wattmeters.

• **Interlock Alternative:** Square D QO Interlock — panel-specific solution for standard Square D breaker panels.
(Text reference only — choose model to match your panel.)
• **Compact Option:** Connecticut Electric 6-Circuit — good fit for cabins and small essential loads.
💡 Operation Tip: Always turn off main breaker first, connect your inlet cord, start the generator, and flip breakers one by one. Reverse that order to shut down safely.
Fuel Type & Runtime Strategy
Your fuel dictates how long you can run and how much voltage you sustain.
Gasoline
- Delivers full rated power.
- Short shelf life (add fuel stabilizer).
- Carburetors gum up without regular cycling.
- Produces carbon monoxide — outdoor use only.
Gas is ideal for mobile use or when refueling is easy, but not for long-term storage.
Propane
- Clean burn, minimal maintenance.
- 10–15% less wattage output than gasoline, but steadier voltage.
- Stores indefinitely in sealed tanks.
- Excellent for steady 24/7 backup in cold or humid environments.
Dual-Fuel
Combines both advantages: propane for safety and shelf life, gasoline for emergency output spikes.
💡 Keep one tank and one full gas can at all times — rotate stock every 6 months.
Pro tip: Plan your fuel like ammunition. Measure gallons-per-hour at half load so you can forecast runtime by nightfall.
DIY Testing & Maintenance
A backup system that’s never tested isn’t backup — it’s a gamble.
Monthly Mini-Test
- Start generator and let it warm up.
- Connect one cord, run at half load for 10 minutes.
- Inspect cords for warmth, cracks, or brittleness.
- Check voltage at far end with a multimeter.
- Coil and store once cool.
Annual Load Test
Once a year, simulate a real outage.
- Run all planned circuits for one hour at 75% load.
- Swap to propane mid-test to ensure both fuels function.
- Record watt draw and runtime to verify efficiency.
💡 Clean plug terminals with contact cleaner and a dab of dielectric grease. Keeps oxidation and moisture at bay.
Real-World Scenarios
1️⃣ Urban Blackout – Essentials Mode
Quick-response setup during city grid loss.
Generator: 3,500W dual-fuel inverter
Cord: 25-ft 12-gauge
Loads: Refrigerator (700W), lights (100W), router (100W)
Runtime: 4 hours per ½ gal gas
✅ Place generator 20 ft from home.
✅ Use outdoor outlet cover for cords.
✅ Turn off sensitive electronics while starting/stopping engine.
2️⃣ Suburban Grid-Down – Whole-Home Lite
Powering critical systems during multi-day outage.
Generator: 7,500W
Transfer Switch: 10-circuit
Inlet: 30A L14-30
Fuel: Propane (20 lb tank ≈ 10 hrs)
Loads: Fridge, freezer, well pump, furnace, lighting, Wi-Fi (~3,200W continuous).
✅ Flip circuits in priority order.
✅ Label each with watt draw.
✅ Run 8–10 hrs per fuel cycle; cool 30 mins before refueling.
3️⃣ Rural Off-Grid Basecamp
For cabins or homesteads far from utilities.
Generator: 10kW dual-fuel
Transfer: 50A whole-home
Backup: Solar inverter + battery
✅ Ground each building separately.
✅ Alternate generator and solar use to stretch fuel.
✅ Maintain 2-week propane supply minimum.
Common Mistakes & Easy Fixes
| Mistake | Result | Fix |
|---|---|---|
| Undersized cords | Melted insulation | Use 10-/12-gauge only |
| Window cords | CO entry, rain damage | Install power inlet box |
| Backfeeding via outlets | Electrocution hazard | Use transfer switch/interlock |
| Ignoring grounding | Stray current shocks | Add ground rod + test continuity |
| Overloading circuits | Breaker trips, motor damage | Label wattage, rotate loads |
💡 After every outage, clean plugs, wipe cords, and log runtime hours — that maintenance habit prevents surprise failures later.
Pro Prepper Loadouts
Basic Blackout Kit
- 2.5kW inverter generator
- 25-ft TT-30 cord
- LED lanterns, chargers, small appliances
Perfect for apartments or bug-out vehicles — lightweight and quiet.
Mid-Tier Home Backup
- 3.5–7.5kW dual-fuel
- 30A L14-30 cord + PB30 inlet box
- 6–10 circuit manual switch
Maintains refrigeration, sump, heat, and basic communications during extended outages.
Full Grid-Down System
- 10kW+ generator or hybrid solar setup
- 50A transfer switch
- Dedicated ground rod + surge suppression
- Propane and fuel rotation plan
💡 Keep a laminated chart near your breaker panel listing wattage per appliance — when chaos hits, you won’t have time to calculate.
Final Takeaway: Power Without Risk
Your generator’s power is only as safe as the cords that carry it. You don’t need a master electrician to build a reliable survival system — you just need to match components, stay disciplined, and test regularly.
Quick Recap:
✅ 10- or 12-gauge outdoor SJTW cords only
✅ Match plug types (L14-30, TT-30, 50A)
✅ Install a weatherproof inlet box
✅ Add transfer gear for grid isolation
✅ Ground, label, and test monthly
Follow those rules and your generator will deliver steady power — not risk.
Further Reading
- 👉 Grid-Down Survival Power: The 2025 Off-Grid Energy Playbook
- 👉 Top 7 Dual-Fuel Generators for Survival Power (2025)
- 👉 Whole-Home Transfer Switches for Portable Generators (Safest Setup 2025)
- 👉 Emergency Preparedness Archives – The Savvy Survivalist
Because when the grid fails, your setup — not luck — keeps you alive.