
Grid-Down Survival Power: The 2025 Off-Grid Energy Playbook (Generators, Solar, Cooling, Comms)
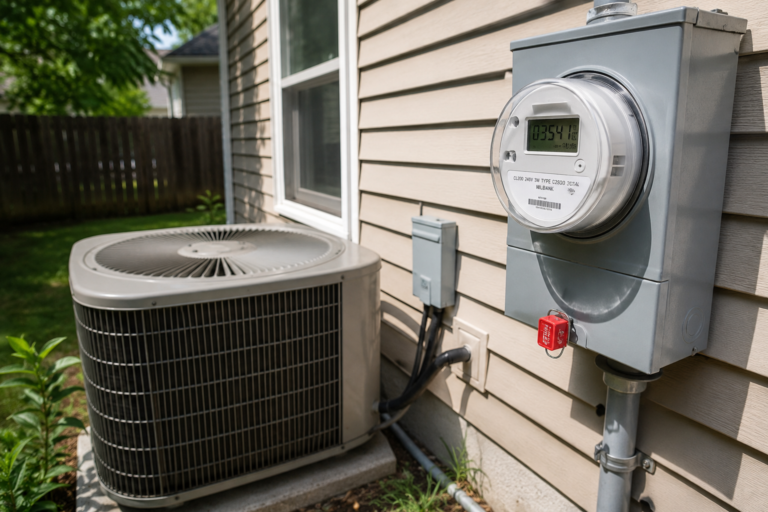
When the power grid fails, everything changes — instantly. The hum of daily life vanishes. No lights. No air conditioning. No running water. Wildfires, heatwaves, and crumbling infrastructure are making blackouts more common and more severe across the country. What used to be a freak event is now a seasonal threat.
This post contains affiliate links. I may earn a small commission at no extra cost to you. Learn more.
Power is only part of the equation — here’s how to communicate without phones or internet when networks fail.
For a deeper breakdown of blackout cooling strategies, see How to Stay Cool Without Power During a Blackout.
Ask yourself one question: Can your survival plan run for 72 hours without the grid?
That’s the true test of readiness. Can you keep food cold, lights on, and communication open when everything else goes dark? This isn’t about comfort — it’s about control, safety, and survival.
This playbook walks you through the modern prepper’s off-grid foundation — from dual-fuel generators to solar power stations, cooling systems, and comms. Whether you’re facing a 3-day blackout or a long-term collapse, this guide will help you build a power plan that doesn’t quit when the grid does.
Recommended Gear: See our complete Emergency Power & Lighting Gear List for recommended solar generators, backup batteries, lanterns, flashlights, and blackout-ready power systems.
This off-grid energy playbook is one piece of a larger readiness system.
For the full framework covering water storage, evacuation planning, and long-term blackout survival, see the Emergency Preparedness Master Plan.
🔋 Choose Your Primary Power Source
Your entire grid-down setup starts here. Decide how you’ll generate and store power when the lines go silent. There are two main paths — gas/dual-fuel generators or solar power stations. Each has its place depending on how long you’re planning to stay off-grid and what you need to run.
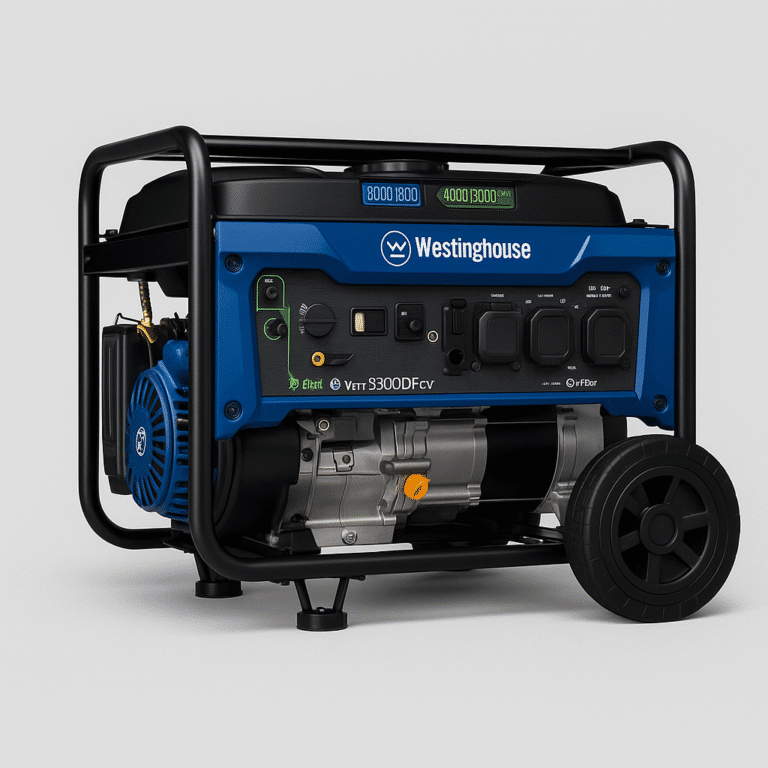
⚙️ Option 1: Gas / Dual-Fuel Generators
Generators are still the undisputed kings of raw wattage. Dual-fuel models can run on propane or gasoline, giving you flexibility when one resource dries up. For preppers in cold or cloudy climates, this is your baseline.
- Pros: Instant power, high output (2000–9000W), can run tools & appliances simultaneously.
- Cons: Requires fuel storage, noisy, not safe indoors, needs routine maintenance.
- Best for: Long blackouts, off-grid cabins, rural properties.
If you want specific models tested for blackout scenarios, see our guide to the Best Survival & Off-Grid Generators
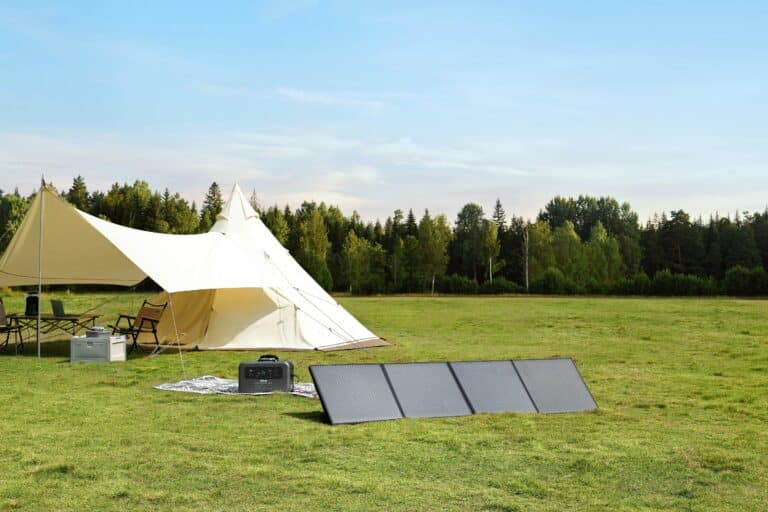
🔌 Option 2: Solar Power Stations
Modern solar generators (a.k.a. power stations) have changed the game. Silent, clean, and maintenance-free, they can run lights, fans, comms gear, and even small refrigerators with the right solar panel array. Pair one with folding panels and you’ve got infinite runtime.
If you’re unsure how large a system you actually need, read our guide explaining what size solar generator you need for a blackout based on appliances like refrigerators, CPAP machines, and household loads.
- Pros: Silent, emission-free, works indoors, recharges via solar, wall, or car.
- Cons: Limited surge capacity, slower recharge under clouds, high upfront cost.
- Best for: Apartment dwellers, RVs, short blackouts, stealth preppers.
See guide: Best Solar Powered Survival Gear & Kits
⚖️ Generator vs. Solar Power Station
| Feature | Dual-Fuel Generator | Solar Power Station |
|---|---|---|
| Startup Time | Instant (manual or remote) | Instant (plug-and-play) |
| Fuel Source | Propane or Gasoline | Solar, AC wall, or car |
| Indoor Safe | ❌ No | ✅ Yes |
| Noise Level | 70–85 dB (loud) | 0 dB (silent) |
| Maintenance | Oil changes, fuel stabilizer | None |
| Average Runtime | 8–16 hrs/tank | Continuous with sunlight |
| Output Range | 2000–9000W | 300–4000W |
Once you’ve chosen how you’ll generate power, the next step is knowing exactly what to do in the first 72 hours.
Anyone building a serious blackout backup system should also use the Emergency Power Planner to calculate realistic watt usage, battery sizing, refrigerator runtime expectations, and long-term emergency power priorities.
⚡ Quick Start: Your 72-Hour Power Plan
When the grid drops, the first 72 hours decide how comfortable (and capable) you’ll be. Use this fast-track plan to keep light, power, water, comms, and cooling online with minimal gear and zero panic.
72-Hour Priorities
Checklist: The Big Five
- Light: 2× headlamps + 1× area lantern (USB-rechargeable) + spare CR123/AA
- Power: 1× 500–1000 Wh power station or small dual-fuel generator + fuel
- Water: 3 gal/person + gravity filter (see water guide)
- Comms: NOAA/SOLAR radio + phone power bank + whistle/signal panel
- Cooling: USB fans + shade + evaporative cooling cloths
Pack these into one accessible tote. Test recharge cycles monthly.
72-Hour Load Baseline
Step-by-Step: Stand Up Power in 10 Minutes
- Stabilize lighting: Deploy lantern in common room; headlamps on hooks by doors.
- Centralize charging: Put all phones/power banks on the power station (or generator + charger).
- Cold chain decision: If you’ll save the fridge, run in 2–3 hr on / 3–4 hr off cycles; keep it closed.
- Cooling plan: Set two USB fans in cross-flow; move sleeping to the coolest room; prep damp cooling cloths.
- Water discipline: Fill all containers; stage gravity filter at sink; ration 1 gal/person/day.
- Comms check-in: NOAA radio alerts on; text family status, then radios quiet to save power.
Recommended Internal Guides
What to Stage Right Now (10-Item Micro-Kit)
- 1000 Wh power station or dual-fuel generator (propane preferred for storage)
- 100–200 W folding solar panel (XT60/MC4 cables ready)
- 2× headlamps + 1× lantern (USB-C)
- NOAA/SOLAR radio with hand-crank
- 2× 10 000–20 000 mAh power banks
- USB fans (2) + cooling cloths/neck wraps
- Water: 3 gal/person + gravity filter + collapsible jugs
- Extension cords + power strip (indoor-safe)
- Fuel: 2–4 BBQ propane tanks or treated gasoline (outdoor use only)
- Firecraft kit for backup heat/light (see Fire Starters)
Pro Move: Run a full 12-hour home “blackout drill” this weekend. Log watt-hours used and refine your loadout.
🔥 Jackery Explorer 1000 Plus
Reliable, compact, and beginner-friendly. Great for lights, comms, and cooling setups. Expandable battery option.
Buy on Amazon

Best overall balance of capacity, recharge speed, and price for most households.
⚡ EcoFlow Delta 2 Max
Ultra-fast charging and modular expansion. Runs refrigerators, fans, and tools quietly indoors.
Buy on Amazon

🔋 Bluetti AC200MAX
Pro-grade off-grid capacity. Handles 2kW continuous load — perfect for full-time preppers and cabin setups.
Buy on Amazon

Pro Tip: Run a hybrid system — generator for heavy loads, solar for daily essentials. It cuts noise, saves fuel, and gives redundancy.
☀️ Solar Panels & Charging
Solar is your silent, infinite-fuel runtime extender. Get the math right and you’ll keep lights, fans, and comms running indefinitely — even rotate a fridge. Here’s the simple, no-BS way to size panels and predict charge times.
For a deeper breakdown of hybrid backup systems that combine
solar panels and battery stations, see our guide to solar generator hybrid backup systems.
Watt-Hour Basics
1) Sizing Loads (What you use)
- Wh used = Watts × Hours. Example: a 10W fan × 8h = 80Wh.
- Runtime ≈ (Battery Wh × DoD) ÷ Load W. For LiFePO₄, use DoD = 0.9.
- Always include inverter loss and charger/controller loss (see #3).
2) Panel Output (What you get)
- Daily solar Wh ≈ Panel W × Peak Sun Hours × Efficiency.
- Peak Sun Hours (PSH) average: 3–6 in most U.S. locations (season/weather dependent).
🖼️ How long to charge a 1,000Wh power station with a 100W panel?
Assuming ~70% real-world efficiency (clouds, angle, heat) and continuous sun-equivalent.
| Panel Setup | Effective Input (W) | Hours of Full Sun to ~100% | Typical Days (at 4 PSH) |
|---|---|---|---|
| 100W Panel | ~70W | ~14–15 hours | ~3–4 days |
| 200W Panels | ~140W | ~7–8 hours | ~2 days |
| 400W Panels | ~280W | ~3.5–4 hours | ~1 day |
🔢 Quick Formulas You’ll Actually Use
- Device runtime (hrs) ≈ (Battery Wh × 0.9) ÷ Device W
- Daily solar (Wh) ≈ Panel W × PSH × 0.7
- Charge time (hrs) ≈ Battery Wh ÷ (Panel W × 0.7)
Swap 0.7 for 0.5–0.8 depending on conditions (stormy ↔︎ ideal).
- Example A: 1,000Wh station + 200W panel → 1,000 ÷ (200×0.7) ≈ ~7.1 hrs of sun.
- Example B: 2,000Wh station + 400W panel → 2,000 ÷ (400×0.7) ≈ ~7.1 hrs of sun.
- Example C: Daily harvest from 400W at 4 PSH = 400×4×0.7 ≈ 1,120Wh/day.
🧰 Panel & Cable Tips (Don’t Skip These)
- Prefer MC4 connectors; keep cable runs as short as possible to reduce voltage drop.
- Use the right adapter for your station (XT60/Anderson/8mm). Keep one spare.
- Tilt toward the sun; wipe dust/pollen; avoid panel shade at all costs.
- In heat waves, elevate panels for airflow — hot panels produce fewer watts.
Deep dive gear list: Best Solar Gear for Summer Survival & Camping
🟧 200W Folding Panel (MC4)
High-yield sweet spot for 1kWh stations. Pairs with Jackery/EcoFlow/Bluetti via adapters.
Shop 200W Panels
🟧 400W Array (2×200W)
“Daily-driver” array for fridges + fans. Expect ~1.1–1.4kWh/day in average sun.
Get MC4 Branches
Pro Move: Run solar by day and save battery for night. Schedule fridge cycles in daylight to offload battery drain.
🧊 Cooling & Comfort Without Grid
Beat the heat with airflow, shade, evaporative cooling, and smart scheduling. You don’t need AC to stay functional — you need a low-power stack that keeps core temps down and sleep quality up.
Low-Power Cooling Stack
1) Shade & Heat Rejection
- Close blinds on sun-facing windows; hang reflective emergency blankets on the outside when safe.
- Move living/sleeping to the lowest, shadiest room; use a tarp/reflective fly to shade windows.
Defer cooking to mornings/evenings; cook outside when possible.
2) Airflow & Cross-Breeze
- Place two USB fans: one draws cool air in, one pushes warm air out (doorway or opposite window).
- Sleep with a fan 2–3 ft from torso for best evaporative effect.
3) Evaporative Cooling
- Use cooling neckwraps/cloths at pulse points (neck, wrists, groin).
- Mist skin lightly; run fan across damp shirt or sheet for a few minutes.
Fan Runtime (Realistic)
Assuming a 1,000Wh LiFePO₄ station at 90% usable capacity (~900Wh).
| Fan Draw | Approx. Runtime | Use Case |
|---|---|---|
| 5W USB fan | ~180 hours | Personal cooling / sleep |
| 10W USB fan | ~90 hours | Small room airflow |
| 20W portable fan | ~45 hours | Cross-breeze pair (×2) |
🚨 Emergency Cooling Hacks
- Freeze water bottles when power is available; move to fridge to extend safe temps during outages.
- DIY swamp-cool: a damp towel hung in front of a fan (best in dry climates).
- Cold zone: foot bath with cool water + fan across legs for rapid perceived relief.
- Night purge: open windows 30–60 min before sunrise with fans exhausting hot air.
- Electrolytes: mix 1L water + ½ tsp salt + 1 tbsp sugar + squeeze of citrus to prevent cramping.
Safety: Never run gas generators indoors or in garages. Watch for heat illness signs: headache, dizziness, rapid pulse, confusion.
Recommended Internal Guides
USB Fan (5–10W)
High runtime on small stations; ideal for sleeping and desk-level cooling.
Shop USB Fans
Cooling Towels / Neckwraps
Instant evaporative relief at pulse points. Pair with fan for best effect.
Shop Cooling Towels
Pro Move: Consolidate sleeping to one “cool room.” Two fans + shade + neckwraps will outperform scattered fans across the house.
🔥 Lighting & Firecraft Integration
In a blackout, light equals control and safety. Build a three-layer system so you’re never blind: Area → Task → Backup. Then add firecraft as your zero-power fallback for heat, signaling, and morale.
Lighting Layers
1) Area — Lanterns
- Goal: Light a whole room safely with diffused illumination.
- Spec: 300–600 lm, warm mode (2700–3500K) for eye comfort, USB-C rechargeable.
- Mount: Center of room at chest height; bounce off white ceiling for max spread.
2) Task — Headlamps
- Goal: Hands-free work: cooking, repairs, first aid.
- Spec: 200–400 lm with low/med/high + red mode for night vision.
- Power: Prefer 18650/14500 or USB-C; avoid coin cells for main lights.
3) Backup — Candles/Match
- Use container candles (spill-proof) away from curtains/children/pets.
- Stage a stormproof match kit + ferro rod with tinder tabs.
- Never sleep with open flame. Ventilate.
🔋 Runtime Cheat Sheet (Realistic)
Assume a 1,000Wh LiFePO₄ station (~900Wh usable) powering USB-rechargeable lights.
| Device / Setting | Draw | Approx. Runtime | Notes |
|---|---|---|---|
| Lantern @ 300 lm | 4–5W | ~180–225 hrs | Warm mode is easier on eyes; hang or bounce. |
| Headlamp @ 100 lm | 1–2W | ~450–900 hrs | Use low/medium for tasks; reserve high for brief bursts. |
| Candle (container) | — | 4–9 hrs each | No battery, but fire risk. Never unattended. |
🔥 Firecraft: When Batteries Fail
- Ignition: Ferro rod + magnesium, stormproof matches, and a refillable butane lighter.
- Tinder: Cotton + petroleum jelly, fatwood, commercial tabs (vac-sealed).
- Heat/Signal: Use stoves/fire pits outdoors; signal with smoke by day, light by night.
Deep dive: Firecraft Pillar • Fire Starters That Work in Extreme Heat
Area Lantern (300–600 lm)
Room-filling, warm tint, USB-C. Hang it, bounce it, or set it on a table.
Shop Lanterns
Task Headlamp (Red Mode)
Hands-free tasks, night-vision friendly. Go USB-C or 18650 for easy recharging.
Shop Headlamps
Stormproof Fire Kit
Ignition redundancy that laughs at wind and rain. Add tinder tabs and ferro rod.
Build Fire Kit
Read & Return: Link the lantern/headlamp reviews back to this pillar with anchors like “lighting layers” to strengthen topical authority.
📡 Comms & Alerts
Information is life support during a blackout. You need alerts to know what’s coming, local comms to coordinate, and a fallback signaling plan if networks die. Build redundancy: radio → signal → sound → light.
Essential Stack
1) NOAA / Weather & Emergency Alerts
- Solar/hand-crank radio with NOAA and SAME alerts; leave on standby for warnings.
- Program SAME codes for your county to avoid alert fatigue.
- Keep it near your sleeping area; test weekly.
Guide: Emergency Solar Radio
2) Local Team Comms (Neighborhood/Family)
- FRS/GMRS handhelds for short-range coordination (streets/blocks).
- Standardize channel plan & brevity codes; store in each go-bag.
- HAM (VHF/UHF) extends range via repeaters (license required).
Skills: How to Signal for Help
📶 Comms Hierarchy
- Radio (NOAA → FRS/GMRS → HAM)
- Signal (panels, mirrors, flares)
- Sound (whistle, air horn)
- Light (strobe, SOS headlamp)
📻 What Radio for What Job?
| Radio Type | Range (typical) | License | Best Use |
|---|---|---|---|
| NOAA/SOLAR | N/A (receive only) | No | Weather & emergency alerts, news |
| FRS | 0.5–1 mile urban / 1–2+ open | No | Family/close-range coordination |
| GMRS | 1–3 miles urban / 5–10+ open (repeaters) | Yes (family covered) | Neighborhood teams, vehicles |
| HAM (VHF/UHF) | Citywide / region (repeaters) | Yes | Community nets, disaster info |
🔋 Power Budget for Comms
- NOAA/solar radio on standby: 0.5–1W (negligible, keep on).
- Charging 2× handhelds daily: 10–20Wh total.
- Phone + power bank rotation: 50–100Wh/day depending on use.
Emergency Solar Radio
Weather alerts, AM/FM, flashlight, hand-crank + solar. Leave on SAME standby.
Read Guide
How to Signal for Help
When voice fails: mirrors, panels, whistles, strobes, ground-to-air signals.
Read Guide
FRS/GMRS Handhelds
Simple, durable, family-ready handheld radios. Standardize channels & call signs.
Shop Radios
Safety & Legal: Monitor first, transmit second. Follow local regulations for GMRS/HAM; never jam emergency channels.
💧 Water & Food During Blackouts
Power loss turns basic needs into urgent logistics. Water stops flowing, fridges warm up, and cooking options vanish fast. The key is a 72-hour water buffer and no-cook food strategy — systems that don’t rely on electricity, fuel, or luck.
Water Survival Stack
1) Storage
- Baseline: 1 gallon per person per day (drinking, cooking, hygiene).
- 72 hours = 3 gallons/person. Multiply for family and pets.
- Use stackable containers, collapsible jugs, or 5–7 gallon cubes with spigots.
- Rotate and sanitize every 6 months; add a splash of unscented bleach (1 tsp/5 gal) for long-term storage.
2) Purification
- Use a gravity filter (e.g., Berkey-style or Sawyer setup) for bulk water without pumping.
- Backup: boil (rolling 1 min) or chlorine tabs (4–8 mg/L).
- Keep a spare straw filter in every bug-out bag.
Full breakdown: Ultimate Water Purification Guide • Long-Term Water Storage
Food Survival Stack
1) Cold Chain Triage
- Keep fridge/freezer closed — food lasts ~24–48 hrs if unopened.
- Use frozen bottles/blocks to extend safe temps.
- After 4 hrs above 40°F, discard meat, dairy, eggs.
2) No-Cook Meals
- Canned meats, beans, fruits, nut butters, energy bars, instant oats (soak, don’t boil).
- Use manual can opener, collapsible bowl, and spork in your blackout tote.
- Rotate stock quarterly — eat what you store, store what you eat.
More tips: Hot-Weather Camping Food
📋 Power-Free Food & Water Checklist
- 🔹 3 gal/person water (stored or filtered)
- 🔹 Gravity or straw filter
- 🔹 Water purification tabs or bleach
- 🔹 72-hour food supply (canned, dry, or MRE)
- 🔹 Manual can opener
- 🔹 Trash bags + biodegradable soap
- 🔹 Paper towels + sanitizing wipes
- 🔹 Collapsible water jug + spigot
- 🔹 Refillable bottles + electrolyte mix
Gravity Filter Kit
Hands-off purification for days. No pump, no power, no nonsense.
Shop Filters
Emergency Food Bucket
Grab-and-go nutrition for blackouts and storms. Long shelf life, no cooking needed.
Shop Food Kits
Water Storage Cubes
Stackable, BPA-free, built for emergencies. Easy pour spigot included.
Shop Water Cubes
Pro Move: Keep a gravity filter filled and ready at all times. When the grid drops, the water you already filtered becomes your head start.
🚿 Hygiene & Off-Grid Comfort
Morale collapses when hygiene does. You don’t need hot running water — you need a low-power wash system, biodegradable soap, and a graywater plan that won’t wreck your site or violate local rules.
Low-Power Hygiene Stack
1) Water Delivery
- USB shower pump + 5–7 gal bucket (2–8W draw). Keeps flow steady without pressurizing the whole house.
- Solar shower bag for passive heating; hang from a rafter/tree at shoulder height.
- Gravity tap (cube/jerry can with spigot) for handwashing and dishes.
Full tutorial: DIY Off-Grid Shower
2) Soap & Sanitation
- Biodegradable soap for body/dishes; hand sanitizer for quick turns.
- No-rinse wipes for partial baths (face, pits, groin, feet).
- Toilet plan: lined bucket + gel/absorbent + tight lid; store outside living area.
Stay fresh guide: Staying Fresh While Camping
🔋 Power & Water Budget (Realistic)
| Device / Task | Draw / Use | Per-Use Consumption | Notes |
|---|---|---|---|
| USB shower pump | ~6W (5V/1.2A) | ≈ 6–12 Wh for a 1–2 min rinse | Use “Navy shower”: wet → soap (off) → quick rinse. |
| Solar shower bag (gravity) | 0W | 1–2 gal per shower (throttle nozzle) | Warm in sun; hang high for better pressure. |
| Handwashing station | 0W (gravity) | ~0.1–0.2 gal/use | Foot pump or spigot saves water. |
🌿 Graywater Basics (Do It Right)
- Use biodegradable soap; avoid dumping in streams/lakes. Disperse 200 ft from water sources.
- Strain food particles; bury strained waste in cathole (6–8″).
- Direct graywater to soil/landscaping, not pavement. Avoid vegetable beds unless your local regs allow.
- Local laws vary. In cities/HOAs, containerize and dispose per guidance after the event.
DIY Off-Grid Shower
Build a no-nonsense shower bucket with USB pump, prefilter, and quick stow.
Read Guide
Staying Fresh While Camping
No-rinse routines, wipe strategy, clothing rotation, and smell control.
Read Guide
USB Shower Pump
Rechargeable, submersible, flow control. Perfect for buckets and totes.
Shop Pumps
Pro Move: Stage a “wash tote” with pump, hose, nozzle, soap, wipes, microfiber towels, and spare USB cable. When the grid drops, hygiene is plug-and-play.
🧰 Loadout: What to Buy First
Here’s where theory becomes action. Whether you’re on a tight budget or building a full off-grid setup, use this tier system to prioritize purchases that actually move the needle on survival power, comfort, and communication.
Tier 1: Bare essentials that get you through 72 hours.Tier 2: Intermediate setup for long weekend or 1–2 week outages.Tier 3: Full off-grid capability for home or cabin systems.
💡 Tier 1 — Essentials (< $200)
- Compact solar radio with hand-crank + phone charging port
- 2× LED headlamps + 1× USB lantern
- 10,000–20,000mAh power bank (USB-C)
- Basic first-aid kit + fire-starting gear
- 3-day water and no-cook food supply
Goal: Maintain light, comms, and morale for three days — zero noise, zero fuel.
🔋 Tier 2 — Core Survival Setup (< $1,000)
- 500–1,000Wh solar power station (LiFePO₄ preferred)
- 100–200W folding solar panel with MC4 connectors
- 2× USB fans + cooling neckwraps
- Rechargeable LED lights + lanterns (USB-C)
- NOAA radio + GMRS handhelds for team comms
Goal: Sustain 7–10 days off-grid while powering essentials and recharging through solar.
⚙️ Tier 3 — Full Setup (2–4kWh or Dual-Fuel)
- 2–4kWh expandable power station or dual-fuel generator
- 400–800W solar array + MC4 branch connectors
- Dedicated “energy tote”: cords, adapters, multimeter, and spare fuses
- UPS backup for fridge/freezer or CPAP (if medical)
- Fuel storage (propane or treated gasoline) + rotation schedule
Quick Rule: Upgrade in order — first light, then comms, then power. You can survive cold and dark, but you can’t survive blind and disconnected.
🧮 Tools & Extras
Lock in your plan with quick-reference tools, a simplified generator vs. power station recap, and a watt-hour calculator you can wire up later for interactive use.
⚖️ Generator vs. Power Station — At a Glance
| Decision | Pick This If… | Why |
|---|---|---|
| Dual-Fuel Generator | You need 2–9kW for fridges + tools, cloudy winters, long blackouts | High surge, cheap watts, propane storage flexibility (outdoor use only) |
| Solar Power Station | You want silent, indoor-safe power for lights/fans/comms + small fridge | Zero emissions/maintenance, recharges via solar, modular & stealthy |
| Hybrid (Best) | You want redundancy + fuel savings | Run heavy loads on generator; use solar for daily essentials |
Deep dives: Best Survival & Off-Grid Generators 2025 • Best Solar Powered Survival Gear & Kits
🔢 Watt-Hours You Actually Need
Use this quick planner to size your battery for 24 hours. Multiply by 3 for a 72-hour target. (We’ll make this interactive soon.)
Common Loads (edit as needed)
Daily Total (example)
Want this interactive? We can add an input form and auto-sum fields later.
Multimeter (DC/AC)
Check panel voltage, cable loss, and battery health. Prevents “why isn’t it charging?” surprises.
Shop Multimeters
MC4 Branch & Extension Kit
Parallel two 200W panels safely; keep runs short to reduce voltage drop.
Shop MC4 Kits
Heavy-Duty Outdoor Cord
12/14-gauge, weather-rated. Don’t choke your watts with thin cables.
Shop Cords
Pro Move: Print two checklists — one for home, one for the go-bin. Update quarterly after a short “blackout drill.”
❓ FAQ
How long will a 1,000 Wh power station last?
Short answer: Divide usable watt-hours by your device watts.
- Formula: Runtime (hrs) ≈ (Battery Wh × 0.9) ÷ Load W
- Example — 10W fan: (1000 × 0.9) ÷ 10 ≈ 90 hours
- Example — 80W average fridge (cycled): (1000 × 0.9) ÷ 80 ≈ ~11 hours of compressor time (spread over 1–2 days with on/off cycling)
Tip: Add solar (100–400W) to extend runtime and recharge by day.
Can you run a fridge indoors on solar?
Yes — with a power station sized for the average draw + surge, and enough panel input to recharge daily.
- Typical: 60–120W average (surge 600–1200W). Choose a station with ≥1200W surge.
- Solar budget: 300–600W of panels harvest ~0.8–1.7kWh/day (at 4 PSH × 0.7 efficiency), enough to cover fridge + lights/fans.
- Keep doors closed, pre-chill water bottles, and run defrost sparingly.
Are dual-fuel generators safe indoors?
No. Never run gasoline or propane generators indoors, in garages, or near open windows/doors due to deadly carbon monoxide.
- Operate outdoors only, at least 20 feet from structures with exhaust pointing away.
- Use outdoor-rated cords; install CO alarms in sleeping areas.
- For indoor power, use a solar power station and recharge it via generator outdoors if needed.
How many panels do I need to charge a battery?
Use this quick math to size solar for your battery capacity and sun hours.
- Formula: Panels (W) ≈ Battery Wh ÷ (PSH × 0.7) (0.7 ≈ real-world efficiency)
- Example — 1,000Wh, 4 PSH: 1000 ÷ (4 × 0.7) ≈ ~360W → two 200W panels
- Example — 2,000Wh, 4 PSH: 2000 ÷ (4 × 0.7) ≈ ~720W → ~700–800W array
- Clouds/heat? Add 25–50% headroom or plan for multi-day charging.
Building a reliable blackout power setup? See our recommended emergency power and lighting gear here.
For the complete layered approach to power, evacuation, and shelter planning, review the Emergency Preparedness Master Plan.
🏁 Conclusion: Power Is Preparedness
When the grid goes down, panic hits fast — but not for you. You’ve built the systems, tested the gear, and proven that your home can function when the lights go out. That’s what separates survival from struggle.
Modern preparedness isn’t about hoarding — it’s about functionality. Lights that run, fans that cool, radios that talk, and water that flows even when the neighborhood goes black. That’s off-grid power in action. Whether your setup starts with a single power bank or ends with a solar array and dual-fuel generator, you’re now in control.
Start small. Test big. Refine constantly. When the next blackout hits, you’ll already be running while everyone else is waiting for the grid to come back on.
Pro Move: Run your own grid-down weekend every 90 days. Every failure you find in training is one you won’t face in reality.
📚 Further Reading
Best Solar Powered Survival Gear & Kits — Compare portable power stations, solar panels, and field-tested off-grid setups.
Two-Week Power Outage Guide — Step-by-step plan to keep your home running through extended blackouts.
Stay Cool Without Power — Proven ways to beat extreme heat when the grid fails — fans, shade, and DIY cooling hacks.
Emergency Solar Radio Guide — Stay informed when cell towers and internet go down — reliable comms that don’t quit.
Fire Starters That Work in Extreme Heat — From ferro rods to magnesium blocks, the ignition tools that never fail.
Ultimate Water Purification Guide — The complete hub for filters, storage, and safe hydration off-grid.
Urban Blackout Survival Plan — Turn a powerless city into a livable space when infrastructure collapses.