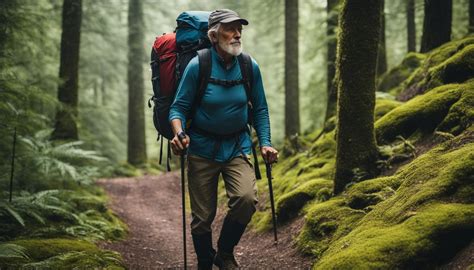

How to Organize Camping Gear: 15 Smart Packing Tips
Learning how to organize camping gear can make the difference between a smooth camping trip and constantly digging through bags to find something you need. Whether you’re packing for a weekend at a campground or carrying everything on a multi-day backpacking trip, a good organization system saves space, reduces frustration, and helps protect your equipment.
This post contains affiliate links. I may earn a small commission at no extra cost to you. Learn more.
The key is to organize your camping supplies by purpose, accessibility, weight, and protection from the weather. Your first-aid kit, rain gear, and water should be easy to reach, while sleeping equipment and other items you won’t need until camp can be packed farther inside your bag.
In this guide, we’ll cover 15 practical camping gear organization tips, explain how to pack a backpack correctly, and show you how to keep everything organized before, during, and after your trip.
Quick Answer: What’s the Best Way to Organize Camping Gear?
The easiest way to organize camping gear is to divide equipment into categories, protect moisture-sensitive items, and pack according to when you’ll need each item.
- Group similar equipment: Keep clothing, cooking supplies, shelter equipment, and first-aid supplies together.
- Use packing cubes and dry bags: Separate smaller items and protect gear that must stay dry.
- Keep essentials accessible: Water, snacks, rain gear, navigation tools, and first aid should be easy to reach.
- Distribute weight correctly: In a hiking backpack, position heavier items near your back and around the middle of the pack.
- Use a packing checklist: Check your equipment before leaving and again when breaking camp.
- Organize your campsite: Give every item a designated storage location.
Best rule: Pack for the order in which you’ll use your gear, not simply according to what fits first.
Why Organizing Camping Gear Matters
Camping involves more than bringing a tent and sleeping bag. Even a short trip may require clothing, food, water, cooking equipment, lighting, toiletries, safety supplies, and tools.
Without a consistent system, it’s easy to forget something important or waste time searching for equipment.
Good camping gear organization provides several benefits:
- Faster setup: Find tent components and sleeping equipment without unpacking everything.
- Better weather protection: Keep clothing and sleeping bags dry.
- Improved safety: Access first aid, lighting, and navigation equipment quickly.
- Less wasted space: Avoid bulky, inefficient packing.
- Better weight distribution: Carry a backpack more comfortably.
- Less forgotten equipment: Use consistent storage locations and checklists.
- Longer gear life: Clean, dry, and store equipment properly between trips.
Most importantly, a good organization system should be simple enough that you can use it consistently.
15 Smart Ways to Organize Camping Gear
1. Sort Your Camping Gear Into Categories
Before packing anything, lay out your camping equipment and divide it into categories.
A practical system includes:
- Shelter: Tent, rainfly, stakes, poles, groundsheet, and guylines.
- Sleep system: Sleeping bag, sleeping pad, pillow, and sleeping clothes.
- Clothing: Base layers, insulating layers, socks, underwear, and rain gear.
- Cooking: Stove, fuel, cookware, utensils, and cleaning supplies.
- Food and water: Meals, snacks, bottles, and water treatment supplies.
- Safety: First aid, navigation, emergency communication, and signaling equipment.
- Tools: Knife, multitool, repair supplies, and other necessary equipment.
- Personal items: Toiletries, sunscreen, insect repellent, and medications.
Grouping gear before packing makes it easier to identify missing items, duplicates, and equipment you don’t need.
2. Use Packing Cubes for Clothing
Packing cubes are one of the simplest ways to keep camping clothing organized.
Instead of placing loose clothing throughout your backpack or storage bin, divide it into smaller groups.
For example:
- One cube for shirts and base layers
- One for underwear and socks
- One for sleepwear
- One for extra clothing
Compression packing cubes can reduce bulk, but they don’t significantly reduce the actual weight of your clothing.
Standard packing cubes are not necessarily waterproof. If keeping clothing dry is critical, place them inside a waterproof pack liner or suitable dry bag.
3. Protect Essential Gear With Waterproof Bags
Rain, wet ground, condensation, and accidental spills can damage equipment or leave you without dry clothing.
Use appropriate waterproof storage for items that must remain dry, including:
- Sleeping bags
- Extra clothing
- Electronics
- Paper maps and documents
- Moisture-sensitive supplies
Dry bags are particularly useful for separating wet and dry equipment. A waterproof pack liner can also protect the contents of a backpack.
However, not every bag advertised as water-resistant is fully waterproof. Check the manufacturer’s specifications and closure instructions.
For electronics, consider additional protection, especially when heavy rain or water crossings are possible.
4. Keep Frequently Used Equipment Easy to Reach
One of the biggest packing mistakes is burying essential equipment underneath everything else.
Items you may need while hiking should be accessible without completely unpacking your bag.
These typically include:
- Water
- Snacks
- Rain jacket
- First-aid kit
- Navigation equipment
- Headlamp
- Sunscreen and insect repellent
- Emergency communication device
Use exterior pockets, hip-belt pockets, or the upper section of your backpack when suitable.
Don’t bury your rain jacket at the bottom simply because the weather forecast looks favorable. Conditions can change unexpectedly.
5. Pack Heavy Items Close to Your Back
Proper weight distribution is especially important when backpacking.
For many conventional internal-frame backpacks, heavier items generally belong close to your back and around the middle of the pack, rather than hanging far from your body.
This helps keep the load more stable and reduces the feeling that the backpack is pulling you backward.
A typical packing arrangement is:
- Bottom: Sleeping bag and other lightweight equipment needed at camp.
- Middle, near your back: Dense food, cookware, and other heavy equipment.
- Middle, toward the outside: Lighter clothing and equipment that can cushion harder items.
- Top: Frequently needed layers and other accessible supplies.
- Exterior pockets: Water, snacks, navigation, and other items you need quickly.
Pack design, body shape, terrain, and personal comfort can affect the ideal arrangement. Follow your backpack manufacturer’s recommendations and adjust the load as needed.
6. Separate Clean, Dirty, and Wet Clothing
Keeping clothing organized becomes harder after the first day of camping.
Bring a separate bag for dirty clothes and another for wet items when necessary.
Never leave damp clothing sealed in an airtight bag for extended periods. Dry it as soon as practical to reduce odors and mildew.
When backpacking, you may be able to use a lightweight mesh bag to separate dirty clothing without adding much weight.
7. Build a Dedicated Camping Kitchen Kit
Instead of collecting cookware from different places every time you camp, keep a dedicated kitchen kit.
Depending on your camping style, it might contain:
- Camping stove
- Cooking pot or pan
- Utensils
- Reusable dishes
- Can opener if needed
- Food preparation tools
- Biodegradable soap where appropriate
- Cleaning cloth and small towel
- Trash bags
For car camping, a labeled storage bin can hold most of these supplies.
For backpacking, use a compact cookware system. Some stoves and accessories can nest inside a compatible cooking pot.
Always follow stove and fuel storage instructions. Do not operate camping stoves inside tents or other enclosed spaces because of fire and carbon monoxide hazards.
8. Organize Food by Meal and Day
Food organization becomes easier when you create a meal plan before packing.
Instead of mixing everything together, group supplies by breakfast, lunch, dinner, and snacks.
For a three-day camping trip, you might organize meals into labeled bags or containers for each day.
This approach helps you:
- Check that you have enough food
- Reduce unnecessary packaging
- Find ingredients faster
- Estimate how much food remains
- Avoid carrying duplicate items
When backpacking, consider food weight, calorie needs, cooking requirements, and available water.
In wildlife habitat, follow local food-storage requirements. Some locations require approved bear-resistant canisters or other specified methods. A regular odor-resistant bag is not a substitute for an approved bear-resistant container.
9. Use Labeled Storage Bins for Car Camping
Car camping offers more storage flexibility than backpacking.
Instead of placing everything in one oversized container, use several manageable bins organized by purpose.
A practical arrangement might include:
- Kitchen bin: Cookware, utensils, and cleaning supplies
- Camp setup bin: Stakes, guylines, mallet, and repair items
- Personal supplies bin: Toiletries, sunscreen, and insect repellent
- Lighting and tools bin: Lanterns, batteries, and small tools
Choose bins that fit your vehicle and can be lifted safely when full.
Transparent containers make contents easier to see, while labels help everyone return items to the correct location.
10. Keep Your First-Aid Kit in a Consistent Location
First-aid supplies should never be buried beneath heavy camping equipment.
Choose a location that is easy to access and tell everyone in your group where the kit is stored.
For backpacking, this may be a dedicated compartment near the top of your pack.
For car camping, keep the kit in a clearly labeled container or accessible bag.
Check expiration dates, replace used supplies, and ensure that any necessary personal medications are available.
A first-aid kit is most useful when paired with appropriate first-aid training.
11. Organize Small Items in Pouches
Small camping supplies are among the easiest items to lose.
Instead of allowing them to collect at the bottom of a backpack, group them into lightweight pouches.
Examples include:
- Electronics pouch: Charging cables, power bank, and adapters
- Repair pouch: Patch kit, cordage, and small replacement parts
- Hygiene pouch: Toothbrush, toiletries, and personal care items
- Fire-starting pouch: Lighter, matches, and appropriate fire-starting supplies
Choose pouches that are easy to distinguish by color, size, or label.
Keep sharp tools properly sheathed, and store fuel and ignition materials according to their safety instructions.
12. Secure Gear Without Overloading Exterior Straps
Backpacks often include compression straps, attachment loops, and external storage points.
These features can be useful, but attaching too much equipment outside your pack creates problems.
Loose gear can:
- Catch on branches
- Shift your balance
- Get wet or damaged
- Fall off during a hike
- Make narrow trails harder to navigate
Keep heavy items inside the pack whenever possible.
External attachment points are generally better suited to properly secured items such as a compatible foam sleeping pad or other lightweight equipment.
Don’t hang exposed knives, hatchets, or other sharp tools loosely from your backpack.
13. Create a Consistent Campsite Organization System
Camping gear organization shouldn’t stop once you arrive at the campsite.
Give each type of equipment a designated location.
For example:
- Store sleeping equipment inside the tent.
- Keep cooking supplies together in a designated kitchen area.
- Place lighting where it can be reached after dark.
- Keep footwear in a protected, accessible location.
- Maintain a designated area for dirty or wet equipment.
- Keep food and scented items stored according to campground and wildlife requirements.
A simple rule works well: After using an item, return it to the same place.
This makes it easier to find supplies and reduces the chance of leaving something behind.
14. Pack Only What You Actually Need
One of the most effective ways to organize camping gear is to reduce the amount you bring.
Start with the essentials, then add equipment based on the trip’s duration, weather, location, and activities.
Ask yourself:
- Will I realistically use this item?
- Does another piece of equipment already perform the same function?
- Is the extra weight or space justified?
- Could leaving it behind create a safety problem?
Avoid eliminating essential safety supplies just to make your pack lighter.
For a detailed equipment list, see our complete guide to what to pack for camping.
15. Clean, Dry, and Repack Your Gear After Every Trip
One of the most overlooked camping organization habits happens after returning home.
Instead of leaving your equipment packed away until the next trip, take time to inspect and maintain it.
- Remove all food, trash, and perishable items.
- Clean cookware and food containers.
- Dry tents, tarps, and other damp equipment completely.
- Air out sleeping bags and sleeping pads.
- Inspect tent poles, stakes, zippers, and guylines.
- Replace missing or damaged equipment.
- Restock first-aid and hygiene supplies.
- Store everything in its designated location.
Follow manufacturer recommendations for storing sleeping bags, tents, and inflatable equipment. Many insulated sleeping bags should be stored loosely rather than left tightly compressed for long periods.
Drying equipment before storage is especially important for preventing mildew and unnecessary deterioration.
How to Pack a Camping Backpack: Simple Packing Order
If you’re carrying your camping equipment on your back, use the following table as a general starting point.
| Backpack Area | What to Pack | Why |
|---|---|---|
| Bottom | Sleeping bag, sleepwear, and other lightweight camp-only items | Keeps less frequently needed equipment out of the way |
| Middle, close to back | Food, cookware, and dense equipment | Helps keep heavier weight close to your body |
| Middle, outer side | Clothing and other lighter items | Fills gaps and cushions heavier equipment |
| Top | Rain gear, insulating layer, and accessible supplies | Makes frequently needed items easier to reach |
| Exterior pockets | Water, snacks, navigation, first aid, and headlamp | Provides quick access without unpacking |
After packing, put the backpack on and walk around for several minutes. Adjust the shoulder straps, hip belt, sternum strap, and load lifters if your pack has them.
A properly fitted hip belt helps transfer a substantial portion of the load to your hips rather than relying entirely on your shoulders.
If the backpack feels unstable or pulls backward, adjust the weight distribution before beginning your hike.
Car Camping vs. Backpacking: Different Organization Strategies
The best camping organization system depends on how you travel.
| Category | Car Camping | Backpacking |
|---|---|---|
| Storage | Labeled bins and duffel bags | Lightweight pouches and pack compartments |
| Cooking | Dedicated kitchen bin | Compact stove and nesting cookware |
| Sleeping equipment | Larger sleeping bags and mattresses | Compact sleep system |
| Main priority | Convenience and easy access | Weight, balance, and space efficiency |
| Extra equipment | More room for comfort items | Only items that justify their weight |
Car campers should focus on keeping bins manageable and campsite supplies accessible. Backpackers should pay closer attention to pack weight, equipment volume, and how each item affects comfort on the trail.
How to Choose a Camping Backpack That Stays Organized
A well-designed camping backpack makes organization easier, but the number of pockets isn’t the only factor worth considering.
Choose the Right Capacity
Backpack capacity is typically measured in liters.
As general starting points:
- 20–35 liters: Often suitable for day hikes or minimal overnight setups.
- 35–50 liters: May work for lightweight overnight or short backpacking trips.
- 50–65 liters: Common for multi-day backpacking with a conventional equipment load.
- 65 liters or more: May be useful for bulky cold-weather equipment, extended trips, or additional shared gear.
These are approximate ranges, not strict requirements. The right capacity depends on your equipment’s packed volume and your trip.
Prioritize Fit and Support
Look for a backpack that fits your torso length and hip measurements.
Useful features may include:
- Adjustable shoulder straps
- Supportive hip belt
- Sternum strap
- Appropriate frame or suspension system
- Ventilated back panel
- Accessible water bottle pockets
- Compression straps
For longer hikes, fit and load support generally matter more than having dozens of compartments.
Consider Weather Protection
Many camping backpacks are water-resistant rather than completely waterproof.
A pack rain cover can help, but wind-driven rain or prolonged exposure may still allow moisture inside.
Protect critical equipment with an appropriate pack liner or waterproof storage bags.
Avoid Excessive External Attachments
Attachment loops and straps can be useful, but equipment hanging loosely outside a pack can snag, swing, or fall off.
Choose a backpack that accommodates most of your gear securely.
Recommended Camping Backpack
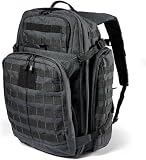
A well-organized backpack can make packing and accessing camping equipment much easier. If you prefer a rugged backpack with multiple storage compartments, consider the following option for camping, outdoor activities, or emergency preparedness. Compare its capacity, fit, and empty weight with your intended use before purchasing.
Camping Gear Organization Checklist
Use this checklist before leaving home and again when packing up your campsite.
Shelter and Sleeping Equipment
- Tent, poles, stakes, and rainfly
- Groundsheet if needed
- Sleeping bag
- Sleeping pad
- Pillow or suitable alternative
Clothing
- Weather-appropriate clothing layers
- Extra socks and underwear
- Rain jacket
- Sleepwear
- Appropriate footwear
- Bag for dirty clothing
Food and Cooking
- Planned meals and snacks
- Drinking water and suitable treatment equipment
- Camping stove and compatible fuel
- Cookware and utensils
- Food storage appropriate for local wildlife
- Cleaning supplies
- Trash bags
Safety and Essentials
- First-aid kit and personal medications
- Navigation equipment
- Headlamp and spare power source
- Emergency communication or signaling supplies
- Knife or multitool
- Sun protection and insect repellent
- Repair supplies
- Fire-starting supplies where appropriate
For a more complete equipment checklist, visit our 20-item camping packing guide.
How to Store Camping Gear at Home
Organizing camping equipment between trips makes packing faster and helps protect your investment.
Choose a Dry Storage Area
Store equipment in a clean, dry location away from excessive heat, moisture, and direct sunlight.
Garages, closets, and dedicated storage rooms can work, depending on temperature and humidity conditions.
Label Containers by Category
Use the same categories at home that you use while camping.
For example, a kitchen bin can remain packed with clean, dry cooking supplies between trips, while a separate bin holds tent accessories and repair items.
Store Sleeping Bags Properly
Many insulated sleeping bags should be stored loosely in a large breathable storage sack rather than tightly compressed.
Follow the manufacturer’s recommendations for the specific insulation type.
Dry Tents Before Storage
Never store a damp tent for an extended period.
Allow the tent body, rainfly, and groundsheet to dry completely before packing them away.
Keep a Gear Inventory
A simple list of what you own can help prevent unnecessary purchases and make missing equipment easier to identify.
Update the inventory when something breaks, gets used up, or needs replacement.
Common Camping Gear Organization Mistakes
Even experienced campers can develop packing habits that make trips harder than necessary.
Avoid these common problems:
- Overpacking: Carrying unnecessary equipment adds weight and takes up valuable space.
- Burying emergency supplies: First aid, navigation, and rain gear should remain accessible.
- Packing heavy gear too far from your back: This can make a backpack feel unstable.
- Relying only on a rain cover: Important items may still need waterproof protection.
- Leaving loose gear outside your pack: Equipment can snag or become lost.
- Mixing food with personal items: Separate supplies to reduce contamination and simplify storage.
- Forgetting campsite organization: Even a perfectly packed bag becomes frustrating if everything is scattered after setup.
- Storing wet equipment: Moisture can lead to mildew, odors, and deterioration.
- Skipping a final inventory: Small tools, tent stakes, and accessories are easy to leave behind.
Frequently Asked Questions About Organizing Camping Gear
What is the best way to organize camping gear?
Sort equipment into categories, use suitable storage bags or bins, and pack according to how frequently each item will be needed. Keep essential supplies accessible and protect moisture-sensitive gear.
Should heavy camping gear go at the bottom of a backpack?
Not necessarily. In many internal-frame backpacks, heavier items are best positioned near the middle of the pack and close to your back. Lightweight sleeping equipment often goes near the bottom.
Are packing cubes useful for camping?
Yes. Packing cubes help separate clothing and smaller items, making equipment easier to find. However, most packing cubes are not waterproof unless specifically designed for that purpose.
How do you keep camping gear dry?
Use appropriate waterproof bags, a pack liner, or other protective storage for essential items. A backpack rain cover provides additional protection but may not keep everything dry during prolonged exposure.
How should I organize camping gear in my car?
Use labeled bins for cooking equipment, shelter accessories, personal supplies, and tools. Keep items needed during travel or campsite setup accessible rather than buried beneath luggage.
How do you organize camping gear for a family?
Use shared bins for communal equipment and individual bags or packing cubes for each person’s clothing and personal supplies. Assign consistent locations for first aid, lighting, and other frequently needed items.
How should camping equipment be stored between trips?
Clean and dry all equipment before storage. Keep supplies organized by category, store sleeping bags according to manufacturer instructions, and maintain an inventory of items that need replacement.
How can I reduce the amount of camping gear I carry?
Start with a packing checklist, remove unnecessary duplicates, choose equipment suited to your trip, and evaluate whether each item justifies its weight and space. Do not eliminate essential safety supplies simply to reduce pack weight.
Final Thoughts: Keep Your Camping Organization System Simple
Knowing how to organize camping gear isn’t about buying the most expensive backpack or filling every available compartment. It’s about creating a practical system that keeps important equipment protected, accessible, and easy to find.
Start by sorting gear into categories, use appropriate storage bags, distribute weight correctly, and pack according to when you’ll need each item.
Once you arrive at camp, continue using the same system so equipment doesn’t become scattered or lost.
Finally, clean, dry, and inspect everything after each trip. A few minutes of organization now can save considerable time the next time you head outdoors.
The best camping setup is one you can pack, unpack, and maintain without unnecessary effort.
Related Camping and Outdoor Guides
- What to Pack for Camping: Complete 20-Item Checklist
- 10 Essential Camping Items for Beginners
- The Ultimate Hiking Checklist
- Family-Friendly Camping Checklist
- Camping With Pets: Summer Safety Tips
- 11 Hammock Camping Tips
- Survival Camping Guide
Stay prepared. Stay sharp. Stay savvy.