
Bushcraft Techniques: Starting a Fire in Wet Weather
Starting a fire in wet weather is one of the toughest—and most important—bushcraft skills. When temperatures drop and everything is soaked, fire stops being comfort and becomes survival: heat, safe water, cooked food, signaling, and morale. This guide shows exactly how to build reliable fires in rain, snow, and swampy woods using proven site selection, shelter-first setup, smart tinder processing, and tools that still work when soaked. Wet-weather fire building is a test of preparation and technique—this walkthrough gives you both.
This post contains affiliate links. I may earn a small commission at no extra cost to you. Learn more.
This guide is part of a complete skills system. For step-by-step training across fire, water, navigation, and shelter, see the Survival Skills Guide.
Wet Weather Fire Kit Essentials (Tools That Actually Work in the Rain)


If you’re building a rain-proof fire kit, these four tools cover ignition, processing, and redundancy. Don’t rely on one method — stack them.
Fire tools should also be part of every evacuation kit.
See our guide to building a 72-hour bug-out bag to make sure you always have reliable fire gear when leaving home quickly.
Why Fire Matters in Wet Conditions
In wet weather, fire becomes a multi-tool for survival. It prevents hypothermia by raising core body temperature, dries soaked gear, purifies questionable water sources, and provides a crucial psychological boost in stressful situations. If you’re collecting water in the wilderness, you’ll also need reliable purification methods. Our guide to survival water purification methods covers filters, boiling, and field purification techniques. When everything is damp, even minor injuries can spiral into life-threatening situations without warmth and sanitation. Fire also deters predators, insects, and helps signal rescuers when visibility is low. In cold rain or snow, your body loses heat faster than you realize, and without a heat source to counteract that loss, hypothermia can set in within minutes. A reliable fire makes it possible to cook high-calorie meals that restore energy reserves and keeps spirits high when morale is under assault. In short, fire in the rain isn’t a luxury—it’s life insurance.
The Bushcraft Fire Mindset
Before attempting to light a flame in wet conditions, a survivalist needs to shift from casual camping to tactical bushcraft thinking. Fire starts in the mind, not just in the tinder bundle. Mental preparedness means accepting that it will be harder, slower, and require more materials than in dry conditions. Anticipate failure, plan redundancies, and think through your fire layout before a single spark is thrown. Choosing the right location—under dense conifers, beside rock outcrops, or using natural terrain as cover—will keep you drier while working. Always gather three to five times more material than you’d expect, with emphasis on the smallest, driest pieces. Treat moisture management as a combat scenario: isolate dry materials, protect your flame with windbreaks, and use every available advantage to keep your fire alive. This mindset, more than any single tool, is the secret weapon of the experienced survivalist.
Once your mindset is locked in, the next step is mastering the hands-on process below.
Step-by-Step: Building a Fire in Wet Weather
1. Gather & Prepare Wood
Even in soaked forests, dry wood can be harvested using specific techniques. Start by ignoring ground debris—almost all of it is waterlogged and unreliable. Instead, look upward and around at eye-level. Collect dead branches still attached to trees, especially conifers like pine and fir. These branches tend to dry out faster due to exposure to wind and sun, even if rain is falling. Fatwood, found in the resin-soaked heart of pine stumps and knots, is naturally waterproof and ignites easily. Birch bark is another exceptional resource due to its flammable oils. Carry a sturdy bushcraft knife to split logs and reveal the dry heartwood inside. Feather sticks made from these cores ignite far more reliably than anything exposed to the elements. Without dry wood, even the best tinder won’t matter—so this step is the cornerstone of your fire-building success.
A dependable fixed blade makes processing wet wood dramatically easier:
Sources of Dry Wood:
- Dead branches hanging under pine or fir limbs
- Inside rotting logs (often dry in the center)
- Feather sticks carved from heartwood
- Inner bark layers of birch or cedar
- Hollow trees and protected stumps
2. Build a Fire-Resistant Base
To avoid losing precious heat to soaked soil, snow, or mud, a fire needs to be elevated. Constructing a dry base ensures your tinder and kindling won’t wick moisture from the ground before they even catch flame. Start by laying down a layer of bark—birch or pine if available—or use flat rocks, dry wood slabs, or even your own firewood if you have enough. This platform acts as a thermal barrier and ensures airflow from below. Without it, your fire will struggle to breathe and smolder out prematurely. In snowy terrain, this also prevents the base from melting into a puddle. If your fire grows strong enough, it can even dry out a damp base beneath it, but only if you’ve lifted it properly first. Think of this layer as the foundation of a house: if it collapses, so does everything built on top of it.
3. Select the Right Tinder
In wet environments, the success of a fire hinges on high-quality tinder. When the world around you is soaked, tinder becomes your spark insurance policy. Natural tinder like birch bark and fatwood shavings are prized because they contain resins and oils that continue to ignite even when damp. Fluffy plant materials such as cattail fluff or milkweed down can also work, but they must be gathered and stored dry beforehand. The smart bushcrafter carries manmade tinder as backup: petroleum jelly-soaked cotton balls, wax-dipped cotton rounds, and dryer lint are all top choices. Store them in waterproof containers, vacuum-sealed bags, or even old film canisters. Don’t assume one source is enough—build redundancy into your kit. Even a few teaspoons of dry tinder can make the difference between a cold night and a survivable one. Reliability is key, and preparation beats improvisation.
Natural Options:
- Birch bark
- Fatwood shavings
- Cattail fluff
- Pine resin and pitch
Manmade Options:
- Waxed cotton balls
- Petroleum jelly + cotton
- Dryer lint
- Commercial fire tabs
For true wet-weather reliability, spark and flame redundancy matter:
When conditions are soaked and temperatures drop, having both spark and sustained flame dramatically increases your success rate.
4. Use Reliable Ignition Sources
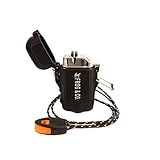
Ignition is the moment of truth in firecraft—especially when everything around you is damp and unforgiving. Not all fire starters are created equal, and in wet conditions, most cheap options fail. Ferro rods are a survivalist’s go-to because they work wet or dry and produce sparks hot enough to ignite waxy or oily tinder. Magnesium blocks are effective when scraped into fine powder and can sustain a flame long enough to dry surrounding materials. Jet flame lighters, especially windproof or stormproof models, are excellent secondary options. Stormproof matches, with their ability to burn in rain or even underwater for a few seconds, should be part of every survival kit. The key is redundancy: always carry at least two or three methods of ignition. If one fails—or gets soaked—you still have a fighting chance.
Reliable Ignition Options:
- Ferro rod – works wet, throws ultra-hot sparks
- Magnesium block – hot burn boost for damp tinder
- Butane jet lighter – wind-resistant flame
- Stormproof matches – burn even in rain
5. Choose the Right Fire Lay
When it comes to fire lays, structure is everything—especially when moisture is the enemy. The right configuration allows your tinder to breathe, your kindling to dry, and your fuel to catch. The tipi lay is fast to ignite and provides vertical airflow. It’s ideal for getting a quick, strong burn from smaller materials. The log cabin lay creates a more stable and long-lasting fire; it surrounds the flame and allows for gradual feeding of fuel. The lean-to lay is a wet-weather favorite because it uses a larger stick or piece of bark as a windbreak over the tinder. Always start with the driest material in the center, progressing outward to larger, slightly damp wood. If needed, partially dry kindling by placing it close to, but not in, your initial flame. Mastering fire lays is a skill that builds with every fire you make, and in the rain, precision makes the difference.
If modern ignition tools fail, traditional friction methods still work.
Learn them in the
Primitive Fire-Starting Guide.
How to Find Dry Material When Everything is Wet
Wet conditions don’t mean there’s no dry material—only that it’s hidden. In survival scenarios, success comes from knowing where to look and how to process what you find. The key is to seek dry zones protected from direct rainfall or ground moisture. Look under dense pine canopies, inside hollow logs, or within the cores of fallen trees. Even in a heavy downpour, the inner layers of bark and wood remain drier than what’s exposed. If materials feel damp, they can often be dried by body heat, near an existing flame, or shaved down to the dry core. Always prioritize wood that snaps instead of bends—it’s a sign the inner fibers are dry. And don’t overlook small details: even the inside of your backpack or clothing may offer a few dry resources if you plan ahead. In bushcraft, the difference between soaked and salvageable is measured in inches—not miles.
Techniques to Burn Damp Material:
- Build a fire platform to isolate from wet ground
- Use high-heat ignition sources like magnesium or plasma
- Dry damp sticks by layering them close to the flame
- Create a tinder sandwich by enclosing dry materials inside damp bark
Processing Wet Wood:
- Split larger logs with a bushcraft knife or hatchet
- Scrape shavings from dry cores
- Use natural resins like fatwood and pine pitch
- Dry twigs with body heat by tucking them in clothing
Advanced Bushcraft Fire Tactics
Advanced bushcraft fire tactics are essential when conventional methods fail. Feather sticks, carved from the dry heartwood of split logs, provide a high-surface-area tinder bundle that’s perfect for catching a spark. These delicate curls hold flame even in breezy or damp conditions. Pine resin, harvested from conifers, can be molded into fireballs that burn long and hot—especially when combined with dry fibers or cloth. Another method is the “Dakota fire hole:” a low-visibility, wind-resistant setup that funnels air through underground vents. This makes for an efficient, hot-burning fire that is shielded from wind and rain. In extreme weather, layering these techniques provides the best shot at success. Use feather sticks to catch flame, resin to sustain it, and a fire hole to protect and amplify it. Bushcraft is about adapting to the environment and using every trick in the book to maintain control of the one thing that matters most: fire.
Wet Weather Fire Kit Checklist
A proper wet-weather fire kit is compact, waterproof, and redundant. At minimum, it should contain several types of tinder (natural and manmade), multiple ignition sources, and moisture-proof storage. Carry fatwood, waxed pads, and petroleum cotton balls in a vacuum-sealed pouch or metal tin. Include a ferro rod and striker, a stormproof lighter, and a backup pack of stormproof matches. Add commercial fire paste or tinder tabs for emergencies. A laminated card with diagrams of different fire lays can be helpful under stress or when teaching others. Keep all of this gear sealed in a dry bag or ziplock with silica gel packs to prevent condensation. Your fire kit should live in your pack’s most accessible pocket—because when you need it, you won’t have time to dig. The smartest survivalists build these kits ahead of time and update them seasonally to ensure nothing degrades or becomes ineffective.
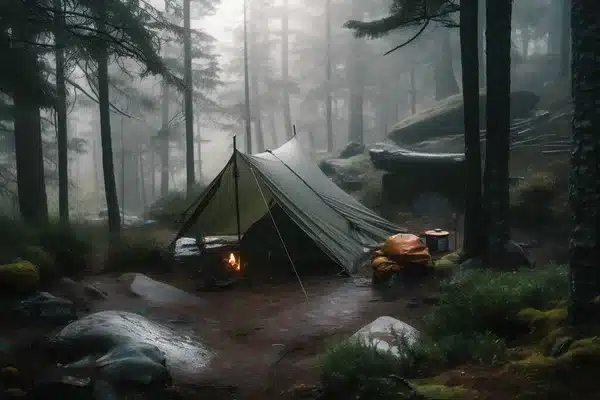
Real-World Example: Fire in the Rain
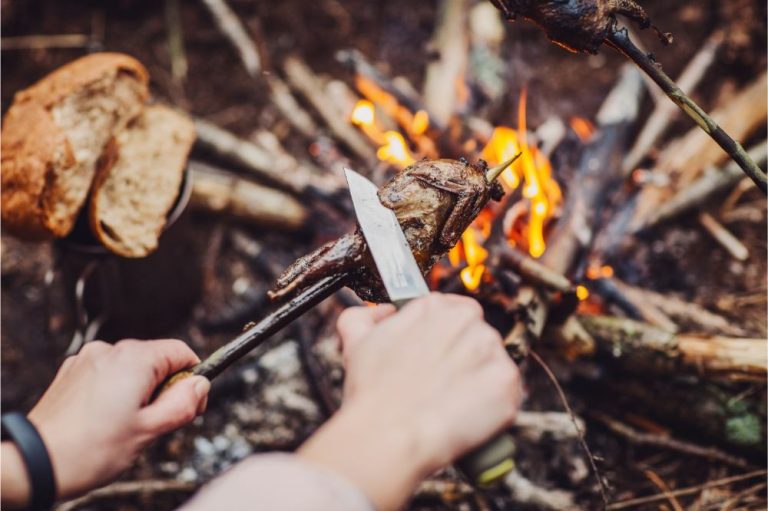
Imagine a remote forest deep in the mountains. The wind howls, and the rain has been falling for hours. Everything is slick with moisture, and the temperature is dropping. In this moment, fire is the difference between a long, miserable night and a life-threatening emergency. First, shelter is secured under dense spruce trees. A fire platform is built from bark and flat stones. A small split log reveals dry wood inside. Feather sticks are carved and stacked with waxed cotton tinder. A ferro rod produces sparks that finally catch. Smoke curls upward, then ignites into flame. Damp twigs, held close, begin to dry and burn. Slowly, a full fire is built—stable, hot, and resilient. Clothes are dried, water is boiled, and food is cooked. Stored survival foods also become far more useful once you have a reliable heat source.
See our guide to survival foods that last the longest to build a pantry that works with off-grid cooking. “This isn’t a hypothetical”—it’s a real scenario many wilderness experts train for. Mastering fire in wet conditions means being ready when it counts the most.
🔥 Related: Wet wood punishes sloppy tinder. See Does All Wax Burn? Survival Fire Hacks You Didn’t Know About for materials that actually catch when everything’s damp.
Final Word: Master the Wet Flame
Mastering fire in wet weather is the mark of a capable survivalist. With knowledge, the right gear, and practiced technique, wet forests and downpours become training grounds—not roadblocks. Building that first flame in the storm doesn’t just dry socks — it builds confidence, capability, and the kind of grit that gets remembered. Every spark you make in adversity prepares you for the next challenge. In a real-world survival situation, fire can be the single most empowering and lifesaving skill you bring to the table. Commit to learning it, rehearsing it, and refining it until it becomes second nature. Because survival isn’t about comfort, it’s about control. Fire also works alongside reliable lighting during wilderness emergencies.
Our guide to emergency lighting for power outages covers lanterns and flashlights that keep camps and shelters safe at night.