
Ultimate Water Purification Guide
Water purification survival skills are essential when emergencies disrupt access to safe drinking water. Whether you’re preparing for a prolonged power outage, natural disaster, evacuation, or wilderness survival situation, knowing how to make questionable water safer can help protect you and your family from serious illness.
This post contains affiliate links. I may earn a small commission at no extra cost to you. Learn more.
This Ultimate Water Purification Guide explains how to treat water when normal drinking water supplies become unavailable. You’ll learn how boiling, portable water filters, chemical disinfectants, ultraviolet light, and distillation work, along with the limitations of each method.
Not every water treatment method protects against the same contaminants. A backpacking filter may remove bacteria and parasites but allow viruses to pass through. Boiling can inactivate disease-causing microorganisms but cannot remove dissolved chemicals or heavy metals. Choosing the wrong treatment for a contaminated water source can create a false sense of security.
For a dependable emergency water plan, you need to understand what each purification method removes, when to use it, and when to avoid a water source entirely.
Quick Answer: What Is the Best Way to Purify Water in an Emergency?
For water that may contain disease-causing microorganisms, bringing it to a rolling boil for one minute is one of the most reliable emergency disinfection methods. At elevations above 5,000 feet, boil for three minutes.
If boiling is not possible, use a water filter or disinfectant appropriate for the suspected contamination and follow the manufacturer’s instructions. Some situations require both filtration and disinfection.
Important: Water contaminated with fuel, pesticides, toxic chemicals, or radioactive materials may not be made safe by boiling, ordinary camping filters, or common disinfectants. Use a different water source when hazardous contamination is suspected.
This guide is part of our complete Water Purification & Storage Systems Hub, where we cover emergency water treatment, safe storage, and practical backup systems.
For additional guidance, explore our Top Water Purification Methods for Survival and How to Purify Water in the Wild Without Boiling.
Water purification should also be part of your broader household emergency strategy. Visit our Emergency Preparedness Master Plan to organize your water, food, backup power, communication, and evacuation supplies.
Recommended Amazon Gear: Browse our Emergency Water Storage & Filtration Gear List on Amazon for portable filters, water containers, treatment supplies, and emergency water equipment.
Featured Emergency Water Filtration Equipment

Check the product’s current specifications and availability before purchasing. No single water treatment device is suitable for every contamination scenario.
Why Water Purification Is Essential for Emergency Survival
Safe drinking water supports normal body temperature, circulation, digestion, and other essential functions. During an emergency, dehydration can develop more quickly when temperatures are high, physical activity increases, or illness causes vomiting or diarrhea.
There is no universal rule that everyone can survive exactly three days without water. How quickly dehydration becomes dangerous depends on environmental conditions, activity level, age, health, and access to fluids.
Water purification is important because drinking untreated water can expose you to microorganisms that cause gastrointestinal illness. During a disaster, severe diarrhea or vomiting can increase fluid loss at a time when medical treatment and replacement drinking water may be difficult to obtain.
The Hidden Dangers in Untreated Water
Water can appear clear, smell normal, and still contain harmful contaminants. Potential hazards include:
- Bacteria: Disease-causing organisms such as certain strains of E. coli, Salmonella, and Vibrio cholerae can contaminate water and cause illness.
- Protozoan parasites: Giardia and Cryptosporidium can cause diarrhea, abdominal discomfort, and dehydration.
- Viruses: Norovirus, hepatitis A, and other viruses can spread through fecally contaminated water. Many ordinary backpacking microfilters do not remove viruses.
- Chemical contaminants: Pesticides, petroleum products, industrial chemicals, and other substances may enter water sources after flooding, spills, or infrastructure failures.
- Heavy metals: Lead, arsenic, and other metals can occur in some water supplies and require treatment specifically designed to reduce them.
- Sediment and debris: Mud, organic material, and suspended particles can interfere with certain treatment methods and make water difficult to process.
Because these hazards require different treatment approaches, identifying the likely source of contamination is an important first step.
Why Water Safety Becomes More Difficult During Disasters
Under normal conditions, public water systems use treatment, disinfection, and monitoring to help maintain drinking water safety. However, severe storms, flooding, damaged pipelines, equipment failures, and prolonged power outages can disrupt those protections.
When local officials issue a boil-water advisory, follow their specific instructions. A boil-water advisory generally addresses microbial contamination and does not necessarily mean boiling can correct chemical contamination.
During an evacuation, natural water sources may also be affected by livestock waste, sewage, stormwater runoff, or other pollutants.
Never assume that water from a clear stream, pond, lake, rain barrel, or roadside ditch is safe to drink without appropriate treatment.
Important Water Safety Rule
Choose the safest available source first, then apply the appropriate treatment.
Commercially bottled water and properly stored drinking water are preferable to questionable surface water during emergencies. If you must use an alternative source, consider whether biological, chemical, or other contamination is possible.
Do not rely on ordinary boiling, household bleach, or backpacking filters to make water safe when fuel, toxic chemicals, or radioactive contamination is suspected.
What This Water Purification Guide Covers
There is no single water purification method that works best in every situation. Each approach has advantages, limitations, and equipment requirements.
In the following sections, we’ll examine:
- Boiling: How to disinfect water using heat and when boiling is not sufficient.
- Portable filtration: The differences between pump, straw, and gravity-fed water filters.
- Chemical disinfection: How iodine, chlorine dioxide, and properly selected household bleach can be used for emergency water treatment.
- Distillation: How vapor collection can separate water from salts and certain other contaminants, along with its limitations.
- Ultraviolet treatment: How portable UV devices and solar disinfection work under suitable conditions.
- Improvised methods: What basic cloth, sand, and charcoal filtration can and cannot accomplish.
- Method comparison: How to choose treatment equipment based on the type of contamination, available resources, and emergency scenario.
We’ll also cover practical equipment considerations and ways to build a layered emergency water treatment system without depending entirely on one device.
Let’s begin with one of the most dependable methods for treating microbiologically contaminated water: boiling.
Boiling Water for Survival: How to Make Water Safe to Drink
Boiling is one of the most reliable emergency water disinfection methods. When done correctly, it inactivates disease-causing bacteria, viruses, and protozoan parasites that may be present in untreated water.
Unlike portable water filters, boiling does not depend on filter pore size or replaceable cartridges. All you need is a suitable heat source, a heat-safe container, and enough fuel to bring the water to a rolling boil.
However, boiling disinfects water; it does not remove chemical contaminants, heavy metals, salts, or other dissolved pollutants. If you suspect fuel, pesticides, industrial chemicals, or radioactive contamination, find a different water source.
How to Boil Water Safely During an Emergency
For emergency disinfection of water that may contain harmful microorganisms, follow these steps:
- Choose the safest available source. Avoid water with signs of chemical pollution, fuel, unusual odors, or industrial contamination.
- Remove visible sediment. If the water is cloudy, allow particles to settle, then carefully pour the clearer water into another container. You can also strain it through a clean cloth, paper towel, or coffee filter.
- Bring the water to a rolling boil. Heat the water until large bubbles continuously break the surface.
- Maintain the rolling boil for one minute. At elevations above 5,000 feet, boil for three minutes.
- Allow the water to cool naturally. Keep it covered to prevent dirt, insects, or other contaminants from entering.
- Store it in a clean, sanitized container. Use a tightly fitting lid and avoid touching the inside of the container or cap.
Emergency Boiling Times
- At or below 5,000 feet: Maintain a rolling boil for 1 minute.
- Above 5,000 feet: Maintain a rolling boil for 3 minutes.
Begin timing only after the water reaches a full rolling boil. These guidelines address biological contamination, not hazardous chemicals or dissolved metals.
When Boiling Water Is the Best Option
Boiling is particularly useful when you have access to a dependable heat source and need drinking water for a household, campsite, or emergency shelter.
Common situations include:
- Extended power outages: When public water systems are disrupted and authorities recommend boiling tap water.
- Wilderness survival: When streams or lakes may contain disease-causing microorganisms and you have a safe place to heat water.
- Emergency basecamps: When several people need treated water for drinking and food preparation.
- Backup water treatment: When portable filters are damaged, frozen, clogged, or unavailable.
Boiling can also serve as a secondary disinfection method when your primary filtration system does not provide adequate protection against viruses.
Advantages of Boiling Water
- Broad microbial protection: Proper boiling inactivates bacteria, viruses, and protozoan parasites, including Giardia and Cryptosporidium.
- Simple equipment: Requires a heat-safe container and a reliable heat source.
- No replacement cartridges: Unlike portable filters, boiling does not require disposable filtration components.
- Flexible batch sizes: You can treat small or large quantities depending on your equipment and fuel supply.
- Dependable backup: Provides an alternative when other treatment equipment fails.
Limitations of Boiling Water
Although boiling is highly effective against microorganisms, it has important limitations.
- Does not remove chemical contamination: Petroleum products, pesticides, heavy metals, and many other dissolved substances may remain in the water.
- Does not desalinate: Boiling seawater does not remove dissolved salt. Collecting and condensing steam through a proper distillation system is a separate process.
- Requires fuel: Wood, propane, electricity, or another heat source is necessary.
- Takes time: Heating, boiling, and cooling large quantities of water can be slow.
- Creates burn hazards: Hot containers, open flames, and boiling water require careful handling.
- Does not prevent recontamination: Treated water can become unsafe if stored in dirty containers.
Important: Never Boil Chemically Contaminated Water as a Safety Solution
Boiling does not reliably remove toxic chemicals, fuels, heavy metals, or radioactive contaminants. Evaporation can also increase the concentration of certain nonvolatile contaminants in the water that remains.
If a water source may be contaminated by industrial runoff, agricultural chemicals, flood-related fuel spills, or other hazardous substances, use an alternative drinking water supply and follow local public health guidance.
Recommended Equipment for Boiling Water Outdoors
A durable metal cooking pot is a useful addition to an emergency preparedness kit. Stainless steel and other cookware designed for direct heating can be used with a compatible camping stove or other appropriate heat source.
Choose equipment based on the number of people in your household, the amount of water you need to treat, and the fuel you can safely store.
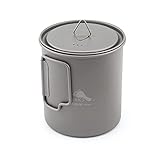
Equipment tip: Follow the cookware manufacturer’s heating instructions. Do not place ordinary plastic water bottles, sealed containers, or cookware not designed for direct heat over a flame.
Practical Tips for Boiling and Storing Emergency Water
- Pre-filter cloudy water: Removing sediment before boiling makes the water clearer and easier to handle, although cloth filtration alone does not disinfect it.
- Keep treated water covered: Protect cooled water from insects, dust, dirty utensils, and unwashed hands.
- Use separate clean and untreated water containers: Clearly distinguish between them to prevent accidental cross-contamination.
- Improve flat-tasting water: After cooling, pour boiled water between two clean containers to improve its taste.
- Plan for fuel consumption: Heating several gallons daily may require a substantial supply of firewood, propane, or another fuel source.
- Practice safe stove use: Never operate charcoal grills, camp stoves, or other outdoor combustion equipment inside homes, tents, garages, or enclosed shelters because of carbon monoxide poisoning risks.
If you cannot safely build a fire or use a stove, other treatment options may be more practical. Read our How to Purify Water in the Wild Without Boiling guide for alternatives.
You can also explore Natural Water Purification Methods to learn which improvised techniques can help prepare water for further treatment and which methods should not be trusted on their own.
Bottom line: Boiling is an excellent emergency disinfection method for water threatened by microorganisms. However, it cannot make every contaminated water source safe. A dependable preparedness plan combines safe water sourcing, appropriate treatment, and sanitary storage.
Water Filtration Methods for Emergency Survival
Portable water filters are among the most practical tools for obtaining drinking water during wilderness emergencies, evacuations, and prolonged power outages. Unlike boiling or chemical disinfection, most portable filters work by physically trapping contaminants as water passes through a specialized filter element.
Many backpacking filters are designed to remove bacteria, protozoan parasites, and suspended particles. However, most standard portable microfilters do not reliably remove viruses, dissolved chemicals, heavy metals, or salt.
The level of protection depends on the specific filter design, pore size, and manufacturer’s verified performance claims. Some advanced water purifiers offer additional protection against viruses, while specialized systems may reduce certain chemical contaminants.
For a broader comparison of available treatment options, read our Top Water Purification Methods for Survival guide.
Quick Answer: Which Survival Water Filter Is Best?
- Pump filters: Best when collecting water from shallow streams, small pools, or difficult-to-reach sources.
- Straw filters: Best for lightweight emergency kits and individual drinking needs.
- Gravity filters: Best for families, basecamps, and treating larger quantities of water with minimal physical effort.
Choose a filter based on the likely contaminants, number of people, water source, and manufacturer’s verified treatment capabilities.
Pump Water Filters for Survival
Pump water filters use a manually operated pump to draw untreated water through a filter cartridge. Depending on the model, the filter element may use hollow-fiber membranes, ceramic materials, or other filtration media.
These systems are particularly useful when the available water source is too shallow to fill a large container or when you need to transfer treated water directly into bottles.
How Pump Water Filters Work
- Place the intake hose into the water source, keeping it away from heavy sediment when possible.
- Position the clean-water outlet over a sanitized drinking water container.
- Operate the pump according to the manufacturer’s instructions.
- Allow filtered water to collect without touching the clean outlet to contaminated surfaces.
- Clean or maintain the filter as directed after use.
Most standard backpacking pump microfilters remove bacteria and protozoa but do not reliably remove viruses. Additional disinfection may be necessary when viral contamination is a concern.
Advantages of Pump Water Filters
- Access to shallow water: Intake hoses can collect water from sources that are difficult to scoop directly.
- Controlled filtration: You can pump treated water directly into a clean bottle or reservoir.
- Reusable equipment: Many models allow filter cleaning or cartridge replacement.
- Practical for small groups: Suitable for preparing drinking water for several people, depending on flow rate and filter capacity.
Limitations of Pump Water Filters
- Require manual pumping and physical effort.
- Can be bulkier than straw or squeeze filters.
- Filter elements may clog when treating muddy or sediment-heavy water.
- Moving parts, seals, and hoses may require maintenance.
- Most ordinary microfilters do not remove viruses or dissolved chemical contaminants.
Recommended Pump Water Filtration Equipment
When choosing a pump filter, compare its treatment claims, flow rate, replacement cartridge availability, and maintenance requirements. Check whether the product is classified as a water filter or a microbiological water purifier.

Prepper Tip: Protect Your Pump Filter
Allow muddy water to settle before filtering when practical. Follow the manufacturer’s cleaning instructions and carry replacement components if available. Never allow a wet hollow-fiber filter to freeze, as internal damage can compromise its performance.
Straw Water Filters for Bug-Out Bags
Straw-style water filters are compact, lightweight devices designed for personal water treatment. Many allow you to drink directly from a water source by drawing water through a built-in filter element.
Their small size makes them useful for bug-out bags, hiking kits, vehicle emergency supplies, and lightweight survival equipment.
However, a straw filter is not automatically a complete water purification system. Many popular models are designed to remove bacteria and protozoa but do not reliably remove viruses, chemical contaminants, or dissolved metals.
How Straw Water Filters Work
Most straw filters use a hollow-fiber membrane or another specialized filter medium to physically block particles and microorganisms larger than the filter’s effective pore size.
To use one safely:
- Inspect the filter for damage and check its expiration or service-life guidance, if applicable.
- Use the filter only with water sources that are appropriate for its treatment capabilities.
- Follow the manufacturer’s instructions for priming and drinking.
- Keep the clean drinking end away from untreated water and dirty surfaces.
- Clean, dry, and store the filter according to its instructions.
Advantages of Straw Water Filters
- Lightweight: Easy to carry in a backpack, emergency kit, or vehicle.
- Compact: Takes up very little storage space.
- Simple operation: Many models require no batteries or pumping mechanism.
- Useful emergency backup: Provides an additional treatment option when primary equipment is unavailable.
- Affordable options: Many basic models cost less than larger filtration systems.
Limitations of Straw Water Filters
- Most are intended primarily for individual drinking needs.
- Some designs cannot easily fill separate clean-water containers.
- Most ordinary straw microfilters do not remove viruses.
- They generally do not remove dissolved salts, fuel, pesticides, or heavy metals.
- Some models are difficult to use with shallow water sources.
- Wet hollow-fiber membranes can be damaged by freezing.
Recommended Straw Water Filter for Emergency Kits
Look for a compact filter with clearly documented treatment performance, maintenance instructions, and a practical service life. Avoid assuming that every filter advertised for survival use provides the same level of protection.
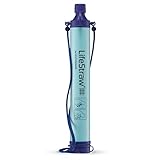
Prepper Tip: Pair a Straw Filter With a Water Container
Carry a lightweight collapsible water container or bottle alongside your straw filter. Some filters can connect to compatible bottles or gravity systems, while others are intended only for direct drinking. Check the specific model before relying on it for stored drinking water.
Gravity Water Filters for Families and Basecamps
Gravity-fed water filters are designed to treat water using gravity rather than manual pumping. Untreated water is placed in an elevated reservoir, then flows through a filter element into a separate clean container.
These systems are particularly useful for emergency shelters, family camping, homesteads, and longer-term situations where several people need drinking water.
Gravity filters come in different designs, including hanging bag systems and countertop filtration units. Their treatment capabilities vary considerably, so it is important to review the specifications of each model.
How Gravity Water Filters Work
- Fill the untreated-water reservoir with water from an appropriate source.
- Hang or position the reservoir according to the manufacturer’s instructions.
- Connect the filter and clean-water collection system.
- Allow gravity to move the water through the filter.
- Collect the treated water in a clean, sanitized container.
- Prevent the untreated-water reservoir, tubing, and dirty connections from contacting the clean-water outlet.
Depending on the model, a gravity filter may use hollow-fiber membranes, ceramic elements, activated carbon, or multiple treatment stages.
Important: A gravity-fed design does not automatically mean the system removes viruses or hazardous chemicals. Its effectiveness depends on the actual filtration technology and verified performance.
Advantages of Gravity Water Filters
- Hands-free operation: No continuous pumping is required.
- Useful for groups: Many systems can treat several liters in a batch.
- Convenient at basecamp: Water can filter while you perform other tasks.
- Low energy requirements: Most portable gravity systems require no electricity.
- Flexible configurations: Available in lightweight hanging designs and larger countertop systems.
Limitations of Gravity Water Filters
- May require a suitable place to hang or elevate the reservoir.
- Flow rates can decrease as filters collect sediment.
- Some systems are too bulky for lightweight bug-out bags.
- Filters and hoses require cleaning and proper storage.
- Most basic backpacking gravity microfilters do not reliably remove viruses or dissolved chemical pollutants.
- Wet hollow-fiber elements can be damaged by freezing.
Recommended Gravity Water Filtration Equipment
For household emergency planning, compare reservoir capacity, flow rate, filter lifespan, replacement element availability, and the manufacturer’s documented contaminant-reduction claims.


Prepper Tip: Use a Layered Water Treatment Setup
A gravity filter can serve as your primary system for preparing drinking water at a campsite or shelter. Keep a compact personal filter and a separate disinfection option as backups.
For long-term emergencies, also maintain a supply of properly stored drinking water so your household is not completely dependent on finding and treating surface water.
Which Emergency Water Filter Should You Choose?
The best filtration method depends on your emergency plan and the water sources you expect to encounter.
| Filter Type | Best Use | Main Advantage | Main Limitation |
|---|---|---|---|
| Pump Filter | Shallow water sources and small groups | Controlled water collection | Requires manual pumping |
| Straw Filter | Bug-out bags and individual use | Lightweight and compact | Limited clean-water collection options |
| Gravity Filter | Families and emergency basecamps | Hands-free batch filtration | Requires setup and adequate space |
Water Filtration Safety: What Filters Cannot Do
One of the most important things to understand about emergency water filtration is that clear-looking filtered water is not necessarily safe drinking water.
Many standard portable filters are effective against bacteria and protozoan parasites but do not reliably remove viruses. Most also do not remove dissolved chemical contamination, including fuel, pesticides, or heavy metals.
Activated carbon can reduce certain chemicals, tastes, and odors when incorporated into an appropriately designed system, but its presence alone does not guarantee protection against every contaminant.
For additional protection against microorganisms, a compatible disinfection method may be necessary after filtration. Follow the filter and disinfectant manufacturers’ instructions, particularly when treating water that may contain viruses.
Critical Water Safety Warning
Do not rely on ordinary backpacking filters to make water safe after a chemical spill, fuel leak, industrial accident, or other suspected hazardous contamination.
During a disaster, commercially bottled water or properly stored drinking water is generally a safer choice than questionable floodwater or runoff.
For a complete emergency preparedness strategy, combine portable filtration with dependable water storage. Read our Long-Term Water Storage Guide for practical ways to maintain a household water reserve.
Bottom line: Pump filters offer flexibility, straw filters provide lightweight portability, and gravity filters are convenient for treating water at a family campsite or shelter. Choose equipment based on verified contaminant-reduction capabilities rather than filter style alone, and maintain a separate disinfection method when appropriate.
Chemical Water Purification Methods for Emergency Survival
Chemical water treatment provides an important backup when boiling is impractical and portable water filters are unavailable. Properly selected disinfectants can inactivate many disease-causing microorganisms in drinking water without requiring electricity or a heat source.
Three common emergency water disinfection options are iodine, chlorine dioxide, and unscented household bleach. Each has different treatment capabilities, contact times, health considerations, and limitations.
Although chemical treatment is often called water purification, most common disinfectants do not physically remove sediment, heavy metals, fuel, pesticides, or other hazardous chemical contaminants.
Quick Answer: Which Chemical Water Treatment Is Best?
- Iodine: A compact, short-term emergency option for certain bacteria and viruses, but unreliable against Cryptosporidium and subject to health restrictions.
- Chlorine dioxide: A useful portable treatment option with broader microbial effectiveness when the product is used at the correct concentration and for the required contact time.
- Household bleach: An inexpensive emergency disinfection option for suitable water sources when the correct unscented product and dosage are used.
Important: Always follow the specific treatment product’s label or current public health guidance. Treatment time can vary significantly depending on water temperature, clarity, and the microorganisms involved.
Iodine Tablets for Emergency Water Treatment
Iodine has been used for emergency drinking water disinfection for many years. It is commonly sold as tablets or liquid preparations intended for treating small quantities of water while hiking, camping, or evacuating.
Iodine can inactivate many bacteria and viruses when used correctly. However, it is not a dependable treatment for all protozoan parasites, particularly Cryptosporidium.
How Iodine Water Treatment Works
Iodine is a chemical disinfectant that interferes with the biological functions of susceptible microorganisms. The effectiveness of treatment depends on the iodine formulation, concentration, water temperature, and contact time.
For commercially prepared drinking water treatment tablets:
- Choose the safest available water source and avoid suspected chemical contamination.
- If the water is cloudy, allow sediment to settle and pre-filter it through a clean cloth or coffee filter.
- Add the number of tablets specified on the product label for the amount of water being treated.
- Mix or shake according to the manufacturer’s directions.
- Wait the full contact time specified on the label before drinking.
- Follow any additional product instructions for treating bottle caps, threads, and other surfaces that may have contacted untreated water.
Do not assume that every iodine product uses the same dosage or treatment time. Cold or cloudy water may require additional precautions.
Advantages of Iodine Water Treatment
- Compact: Tablets take up very little room in an emergency kit.
- Lightweight: Convenient for backpacking and evacuation supplies.
- No fuel required: Treatment does not depend on a stove or open flame.
- Simple storage: Commercial tablets are easy to organize and rotate according to their expiration dates.
- Useful short-term backup: Can provide an alternative when a suitable filter or boiling equipment is unavailable.
Limitations and Health Precautions
- Not reliable against Cryptosporidium.
- May be less effective against some other protozoan parasites than boiling or appropriately selected filtration.
- Can leave an unpleasant taste or odor.
- Not appropriate for prolonged routine drinking water treatment.
- Should generally be avoided during pregnancy and by people with thyroid conditions, iodine sensitivity, or other relevant medical concerns unless a qualified healthcare professional advises otherwise.
- Does not remove chemical contaminants, heavy metals, or dissolved salts.
Prepper Tip: Check Your Iodine Tablets Before an Emergency
Read the label before storing iodine tablets in your bug-out bag. Verify the expiration date, dosage instructions, health warnings, and the types of microorganisms the product is intended to address.
Do not add vitamin C or other substances during the disinfection contact period, because they may interfere with iodine treatment. Follow the manufacturer’s instructions for any taste-neutralizing product after treatment is complete.
Chlorine Dioxide Tablets for Water Purification
Chlorine dioxide is a chemical disinfectant commonly used in portable drinking water treatment products. When used correctly, appropriately formulated chlorine dioxide tablets can inactivate bacteria, viruses, and certain protozoan parasites.
One important advantage is that some chlorine dioxide products are designed to address Cryptosporidium, a parasite that is resistant to ordinary chlorine and iodine treatment.
However, the required treatment time can be much longer for Cryptosporidium than for bacteria or viruses.
How Chlorine Dioxide Water Treatment Works
Chlorine dioxide works through oxidation, disrupting essential structures and processes within susceptible microorganisms.
For commercially prepared chlorine dioxide drinking water tablets:
- Collect water from the safest available source.
- Allow cloudy water to settle and remove visible sediment before treatment.
- Add the number of tablets specified by the manufacturer for the volume of water.
- Mix according to the product instructions.
- Allow the full required treatment time for the microorganisms of concern.
- Keep the treated water protected from recontamination.
Some chlorine dioxide tablet products specify approximately 30 minutes for certain bacteria and viruses but up to 4 hours for Cryptosporidium. These are not universal treatment times; always follow the label for your specific product.
Advantages of Chlorine Dioxide Tablets
- Broad microbial protection: Properly formulated products can address several types of waterborne pathogens.
- Portable: Tablets are lightweight and easy to store in emergency kits.
- No electricity or fuel: Useful when boiling is unavailable.
- Backup capability: Can complement portable filtration when additional disinfection is appropriate.
- Potential Cryptosporidium protection: Certain products are effective when used with the specified extended contact time.
Limitations of Chlorine Dioxide Treatment
- Some organisms require several hours of treatment.
- Cold, cloudy, or heavily contaminated water can complicate treatment.
- Does not remove sediment or dissolved hazardous chemicals.
- Requires the correct product dosage and full contact time.
- Tablets have storage and expiration requirements.
- May be more expensive per treated gallon than household bleach.
Recommended Emergency Water Treatment Tablets
When shopping for portable chemical treatment, choose products specifically labeled for disinfecting drinking water. Check the treatment volume, contact times, expiration date, and documented microbial effectiveness.

Prepper Tip: Plan for Treatment Time
Chlorine dioxide can be a useful emergency backup, but it is not always an instant solution. If your product requires several hours to address Cryptosporidium, prepare your next supply of drinking water well before you need it.
How to Disinfect Emergency Drinking Water With Household Bleach
When commercially prepared water treatment products are unavailable, certain types of unscented household chlorine bleach can be used for emergency drinking water disinfection.
Bleach contains sodium hypochlorite, which can inactivate many bacteria and viruses when used at an appropriate concentration and given sufficient contact time.
However, household bleach is not reliable against Cryptosporidium and does not remove hazardous chemical contaminants, dissolved metals, or salt.
What Type of Bleach Is Safe for Emergency Water Disinfection?
Use only regular, unscented liquid chlorine bleach that contains sodium hypochlorite and is suitable for emergency water disinfection under current public health guidance.
Do not use:
- Scented or fragranced bleach.
- Splashless or thickened bleach formulations.
- Bleach containing additional cleaning agents.
- Color-safe or non-chlorine bleach.
- Products with an unknown sodium hypochlorite concentration.
- Pool chemicals or industrial disinfectants as substitutes for household drinking water treatment instructions.
Read the product label carefully. Bleach concentrations vary, and the correct dosage depends on the sodium hypochlorite percentage.
Emergency Bleach Dosage for Drinking Water
The following amounts reflect commonly published U.S. EPA emergency guidance for regular, unscented household liquid bleach containing 6% or 8.25% sodium hypochlorite.
| Water Volume | 6% Bleach | 8.25% Bleach |
|---|---|---|
| 1 quart / 1 liter | 2 drops | 2 drops |
| 1 gallon | 8 drops | 6 drops |
Important: These quantities apply only to the specified bleach concentrations and suitable emergency water sources. Drop size can vary. For cloudy, colored, or very cold water, EPA guidance calls for doubling the specified amount after removing as much sediment as possible.
For the latest official instructions, consult the U.S. Environmental Protection Agency’s Emergency Disinfection of Drinking Water guidance.
Step-by-Step Emergency Bleach Disinfection
- Evaluate the water source. Do not attempt to make water safe with bleach if fuel, pesticides, industrial chemicals, or radioactive contamination is suspected.
- Remove sediment. Allow cloudy water to settle, then carefully pour off the clearer portion or filter it through clean cloth or a coffee filter.
- Check the bleach label. Confirm that it is regular, unscented sodium hypochlorite bleach with a known concentration.
- Measure the correct amount. Use the applicable official dosage for the bleach concentration and water volume.
- Mix thoroughly. Stir or shake the treated water as directed.
- Wait at least 30 minutes. Keep the container covered during the contact period.
- Check the odor. The water should have a slight chlorine odor. If it does not, EPA guidance advises repeating the dosage and waiting an additional 15 minutes.
- Store safely. Transfer the treated water to a clean, sanitized, covered drinking water container if necessary.
Critical Bleach Safety Warning
Never mix bleach with ammonia, acids, vinegar, or other cleaning products. Dangerous gases can be released.
Do not use concentrated, industrial, scented, splashless, or unknown bleach products with the dosage table above.
Bleach disinfection does not make chemically contaminated water safe and is not reliable against Cryptosporidium.
Advantages of Household Bleach Treatment
- Inexpensive and widely available.
- Can disinfect suitable emergency water supplies without electricity.
- Effective against many bacteria and viruses when correctly used.
- Practical for treating multiple gallons when the correct concentration and dosage are known.
Limitations of Household Bleach Treatment
- Does not reliably inactivate Cryptosporidium.
- Does not remove pesticides, fuel, heavy metals, or other dissolved chemicals.
- Incorrect concentrations or dosing can make treatment ineffective or unsafe.
- Bleach gradually loses strength during storage, especially when exposed to heat or sunlight.
- May leave a noticeable chlorine taste or odor.
Prepper Tip: Rotate Emergency Bleach Supplies
Keep bleach in its original labeled container and store it according to the manufacturer’s directions. Because sodium hypochlorite degrades over time, check its age and concentration before relying on it for emergency drinking water treatment.
Commercial water treatment tablets with documented shelf lives may be more convenient for compact emergency kits.
Chemical Water Treatment Comparison
Each chemical disinfectant has different strengths and limitations. Use this comparison to help determine which option belongs in your emergency water treatment plan.
| Treatment | Best Use | Main Limitation | Typical Contact Time |
|---|---|---|---|
| Iodine | Short-term portable backup | Not reliable for Cryptosporidium; health restrictions | Product-specific; often 30 minutes or longer |
| Chlorine Dioxide | Portable emergency disinfection | Extended treatment time for some parasites | Product-specific; sometimes up to 4 hours for Cryptosporidium |
| Household Bleach | Emergency treatment of suitable household water | Not reliable for Cryptosporidium; concentration matters | At least 30 minutes under applicable EPA guidance |
When Should You Use Chemical Treatment Instead of Boiling or Filtering?
Chemical disinfectants can be useful when carrying a stove is impractical, fuel is unavailable, or a portable filter cannot provide the microbial protection needed.
However, chemical treatment should not be viewed as a universal solution. For water containing significant sediment, pre-filtration may improve treatment conditions. When protozoan parasites are a concern, boiling or an appropriately rated filter may be preferable to iodine or household bleach.
For a broader breakdown of emergency water treatment options, visit our Top Water Purification Methods comparison.
Bottom line: Iodine, chlorine dioxide, and household bleach can all serve specific emergency water disinfection purposes, but they are not interchangeable. Select the appropriate product, follow verified dosage and contact-time instructions, and never rely on chemical disinfection to remove hazardous pollutants.
Water Distillation for Survival: How It Works and When to Use It
Water distillation is a purification method that separates water from many dissolved contaminants through evaporation and condensation. Unlike ordinary boiling, which primarily disinfects water by heating it, distillation collects the resulting water vapor and converts it back into liquid.
When performed with appropriate equipment, distillation can remove dissolved salts, many heavy metals, and numerous other nonvolatile contaminants. It also provides protection against disease-causing microorganisms because bacteria, viruses, and protozoan parasites generally do not travel with properly separated water vapor.
However, distillation does not reliably remove every chemical contaminant. Certain volatile organic compounds can evaporate with the water and enter the collected distillate.
For emergency preparedness, distillation is most useful when you need to remove dissolved salts or other contaminants known to be effectively separated by the process.
Quick Answer: Can Distillation Make Contaminated Water Safe to Drink?
Properly performed distillation can remove salt, many dissolved minerals, heavy metals, and microorganisms from water.
It is particularly useful for desalinating seawater with suitable equipment.
Important: Distillation is not a universal treatment for chemical spills, petroleum contamination, industrial runoff, or unknown hazardous substances. Use a verified safe drinking water source when those hazards are suspected.
How Water Distillation Works
Distillation uses the difference between the behavior of water and many dissolved contaminants during heating and condensation.
In a properly designed distillation system, water is heated until vapor forms. That vapor is directed into a separate cooling area, where it condenses into liquid water.
Many dissolved salts, metals, and nonvolatile contaminants remain in the original container rather than entering the collected water.
The Basic Water Distillation Process
- Heat the source water. Use a suitable heating vessel designed for distillation.
- Generate water vapor. As the water heats, vapor rises from the liquid.
- Separate the vapor. Direct it through a suitable condenser or collection system while preventing untreated water droplets from entering the clean-water path.
- Cool the vapor. The vapor condenses back into liquid water.
- Collect the distillate. Store the resulting water in a clean, sanitized, food-safe container.
The equipment must be designed to prevent contaminated source water from splashing, leaking, or carrying over into the collection container.
Ordinary boiling without vapor collection is not distillation. When you boil a pot of water and allow the steam to escape, dissolved salts and metals generally remain in the pot.
What Contaminants Can Distillation Remove?
Distillation can be effective against several categories of contaminants, although performance depends on the system design and the substances present.
- Dissolved salts: Proper distillation can separate water from sodium chloride and other salts, making it useful for seawater desalination.
- Many heavy metals: Lead and numerous other nonvolatile dissolved metals generally remain behind during distillation.
- Bacteria: Proper vapor separation prevents bacteria from entering the collected distillate.
- Viruses: Properly operated distillation systems can separate viruses from the collected water.
- Protozoan parasites: Organisms such as Giardia and Cryptosporidium do not normally travel with properly separated water vapor.
- Many dissolved minerals: Distillation removes much of the mineral content that contributes to water hardness.
Distillation can also reduce certain other nonvolatile contaminants, but the effectiveness should not be assumed without knowing the contaminant and the treatment system’s capabilities.
What Distillation Cannot Reliably Remove
One of the biggest misconceptions about distilled water is that the process removes absolutely everything except pure water.
In reality, some contaminants can evaporate along with water or be carried into the collection system.
- Volatile organic compounds: Some solvents and industrial chemicals may travel with water vapor.
- Fuel-related contaminants: Gasoline and petroleum contamination can contain volatile substances that ordinary distillation equipment may not adequately separate.
- Certain pesticides: Removal depends on the chemical properties of the specific substance and the equipment used.
- Unknown chemical mixtures: Water contaminated by spills or industrial runoff may contain multiple substances requiring specialized treatment.
- Contamination from equipment: Unsafe materials, dirty condensers, or poor connections can introduce contaminants into collected water.
Critical Safety Warning: Do Not Distill Unknown Chemical Wastewater
Never assume that homemade distillation will make water contaminated by gasoline, industrial chemicals, pesticides, or hazardous floodwater safe to drink.
Some contaminants can vaporize with the water, and certain chemicals can create additional hazards when heated.
If chemical contamination is suspected, use bottled water, properly stored drinking water, or a treatment system specifically verified for the contaminants involved.
When Water Distillation Is Most Useful in a Survival Situation
Although distillation requires more equipment and energy than many portable filtration methods, it can be valuable in specific emergency situations.
1. Desalinating Seawater
Seawater contains too much dissolved salt to drink safely. Ordinary boiling does not remove that salt, and most backpacking water filters cannot desalinate water.
A properly designed distillation system can separate water vapor from dissolved salts, allowing the condensed vapor to be collected as freshwater.
This makes distillation a potential emergency option in coastal locations where seawater is available but freshwater supplies are limited.
However, desalination equipment must be properly constructed and operated, and the resulting water should be protected from contamination during collection and storage.
2. Removing Dissolved Minerals From Suitable Water Sources
Water with high concentrations of dissolved minerals may benefit from distillation when the specific contaminants are known to be removable by the process.
For example, distillation can reduce dissolved salts and hardness minerals that ordinary camping microfilters do not remove.
However, an unusual taste, odor, or appearance does not identify the contaminant. Water with unknown contamination should not automatically be considered safe after distillation.
3. Long-Term Emergency Preparedness
A properly designed water distiller may serve as a secondary treatment system for households preparing for extended disruptions.
Electric countertop distillers are generally more practical when reliable power is available. Non-electric systems require a suitable heat source and enough fuel to operate.
For long-term preparedness, consider the amount of water your household needs each day, the system’s production rate, and the energy required to operate it.
Distillation is generally too slow and energy-intensive to serve as the only water source for a family unless the equipment and fuel supply have been planned accordingly.
Types of Water Distillation Systems for Emergency Preparedness
There are several ways to produce distilled water, but they differ considerably in practicality and output.
Countertop Electric Water Distillers
Electric countertop distillers heat water and use a condenser to collect the resulting vapor as liquid water.
They can be useful for routine household water treatment but require electricity. During an extended blackout, operating one from a generator, inverter, or battery system may consume substantial energy.
Before relying on an electric distiller during a power outage, compare its wattage and operating time with your available backup power capacity.
Non-Electric Water Distillation Equipment
Some distillation systems use an external heat source such as a compatible stove or burner.
These may be more suitable for off-grid use, but they still require safe equipment, fuel, adequate ventilation, and careful handling of hot surfaces.
Only use equipment and materials designed for the temperatures and intended purpose. Never heat a sealed system that can build dangerous pressure.
Solar Water Distillation
Solar distillation uses sunlight to evaporate water and collect condensation. Simple solar stills can demonstrate the process without electricity or combustion fuel.
However, their water production is typically limited and depends on sunlight, temperature, collection area, and environmental conditions.
A small improvised solar still should not be considered a dependable primary drinking water source, especially in hot conditions where dehydration risk is high.
Advantages of Water Distillation
- Removes dissolved salts: Useful for desalinating seawater with appropriate equipment.
- Reduces many dissolved minerals and metals: Can address contaminants that ordinary backpacking filters do not remove.
- Provides microbial protection: Properly separated vapor does not normally carry bacteria, viruses, or protozoan parasites.
- Does not require chemical disinfectant tablets: Uses a physical separation process.
- Useful as a specialized backup: Can complement other emergency water treatment and storage methods.
Disadvantages of Water Distillation
- High energy demand: Heating and evaporating water requires substantial energy.
- Slow production: Small systems may produce only limited quantities of water.
- Equipment requirements: Reliable distillation requires safe heating, vapor collection, condensation, and storage components.
- Not effective against every chemical: Certain volatile contaminants may enter the distillate.
- Maintenance: Mineral deposits and residue can accumulate in the heating vessel.
- Limited portability: Many practical systems are less convenient than lightweight filters or treatment tablets.
Practical Tips for Emergency Water Distillation
- Use appropriate equipment: Choose food-safe materials and equipment designed for distillation.
- Prevent carryover: Keep untreated water droplets and residue from entering the condenser or collection container.
- Maintain clean storage: Store collected water in sanitized, covered containers.
- Plan your energy supply: Calculate how much electricity or fuel the system requires for your daily water needs.
- Do not heat sealed containers: Pressure buildup can cause serious injury.
- Follow combustion safety rules: Never operate outdoor fuel-burning stoves or burners inside enclosed living spaces.
- Avoid unknown chemical contamination: Use a different source rather than attempting to distill hazardous wastewater.
Prepper Tip: Store Water Before You Need to Produce It
Distillation can be a useful specialized backup, but it should not replace a dependable supply of stored drinking water.
For most households, properly stored drinking water and an appropriate filtration or disinfection system are more practical first-line preparations than relying entirely on distillation.
Learn how to establish a household reserve in our Long-Term Water Storage Guide.
UV Water Purification for Survival: Portable Devices and Solar Disinfection
Ultraviolet (UV) water purification is an emergency drinking water treatment method that uses ultraviolet radiation to inactivate harmful microorganisms. Unlike conventional filtration, UV treatment does not physically remove contaminants. Instead, it damages microbial genetic material and interferes with the organisms’ ability to reproduce or cause infection.
When used correctly, an appropriately designed UV water treatment device can inactivate bacteria, viruses, and certain protozoan parasites without adding chemical disinfectants to the water.
However, UV treatment does not remove sediment, dissolved chemicals, heavy metals, fuel, pesticides, or salt. It also depends on adequate UV exposure, suitable water clarity, and correct equipment operation.
For emergency preparedness, two common approaches are portable UV purification devices and solar water disinfection, also known as SODIS.
Quick Answer: Does UV Light Make Water Safe to Drink?
A properly operated UV water purifier can inactivate many disease-causing microorganisms when the water is sufficiently clear and the device delivers an adequate UV dose.
Portable UV devices can treat small quantities relatively quickly, while solar disinfection requires extended sunlight exposure.
Important: UV treatment does not remove hazardous chemicals or dissolved metals. Never assume that water contaminated by industrial runoff, fuel, pesticides, or other toxic substances becomes safe after UV exposure.
How UV Water Purification Works
UV water purification uses ultraviolet radiation to damage the genetic material of microorganisms. This prevents susceptible bacteria, viruses, and parasites from functioning or reproducing normally.
Many portable electronic water purifiers use UV-C radiation, which is especially effective for microbial inactivation when delivered at the appropriate intensity and exposure time.
Unlike boiling, UV treatment does not require heating the water. Unlike a conventional microfilter, it does not rely on physically trapping microorganisms.
However, the water must receive sufficient UV exposure. Suspended sediment, cloudy water, improper device operation, or inadequate treatment time can reduce effectiveness.
Portable UV Water Purifiers for Emergency Preparedness
Portable UV water purifiers are compact electronic devices designed to disinfect relatively small quantities of water. Some use a UV lamp or LED-based treatment system that operates on batteries or rechargeable power.
These devices are useful for hiking, camping, travel, and emergency preparedness when the available water is clear enough for effective treatment.
One advantage of portable UV purification is that an appropriately rated device can provide protection against microorganisms, including viruses, that many ordinary backpacking microfilters do not reliably remove.
How to Use a Portable UV Water Purifier
- Choose an appropriate water source. Avoid water suspected of containing fuel, pesticides, industrial chemicals, or other hazardous pollutants.
- Check water clarity. Follow the manufacturer’s requirements for turbidity and visible sediment.
- Pre-filter if necessary. Remove suspended particles using an appropriate filter or settling method before UV treatment.
- Use a compatible container. Follow the device instructions for container size, water volume, and placement.
- Run the full treatment cycle. Stir or move the device only as instructed by its manufacturer.
- Confirm successful operation. Check any status indicators or error messages before drinking.
- Prevent recontamination. Keep treated water in a clean container and protect it from contact with untreated water.
Treatment time varies by device and water volume. Some portable UV purifiers are designed to treat approximately one liter in a short cycle, but you should never substitute a general time estimate for the manufacturer’s instructions.
Advantages of Portable UV Purifiers
- Fast treatment: Many portable devices complete treatment in minutes when used correctly.
- Broad microbial protection: Appropriately rated equipment can inactivate bacteria, viruses, and protozoan parasites.
- No chemical tablets: Does not require adding iodine or chlorine dioxide to the water.
- Compact equipment: Many models are suitable for travel and emergency kits.
- No boiling fuel: Does not require a stove, firewood, or propane.
Limitations of Portable UV Purifiers
- Requires batteries, charging, or another dependable electrical power source.
- May be ineffective when water is too cloudy or contains excessive suspended particles.
- Does not remove chemical contaminants, heavy metals, or dissolved salts.
- Does not physically remove sediment or debris.
- Can fail if the lamp, electronics, or power supply is damaged.
- Does not provide ongoing protection against contamination introduced after treatment.
- Requires careful adherence to manufacturer instructions.
Recommended Portable UV Water Purification Equipment
When comparing portable UV water purifiers, consider their verified microbial treatment capabilities, battery requirements, supported water volumes, treatment indicators, and maintenance instructions.
Choose a device specifically designed and validated for drinking water disinfection rather than an ordinary UV flashlight or general-purpose UV lamp.

Prepper Tip: Keep Backup Power Available
If you include a portable UV purifier in your bug-out bag, store compatible spare batteries or maintain a reliable charging method.
For longer emergencies, keep an independent water treatment option, such as boiling equipment or appropriately selected disinfection tablets, in case the UV device fails.
Solar Water Disinfection (SODIS)
Solar water disinfection, commonly called SODIS, uses sunlight to help inactivate disease-causing microorganisms in water.
Unlike portable UV-C purifiers, SODIS relies on a combination of solar radiation and, under suitable conditions, heat-related effects.
The method generally involves placing relatively clear water in appropriate transparent containers and exposing them to sunlight for a specified period.
SODIS can be useful as a limited emergency option when conventional treatment equipment is unavailable, but its effectiveness depends on sunlight intensity, water clarity, container characteristics, and exposure time.
How to Use Solar Water Disinfection
For the commonly described SODIS method using suitable clear PET bottles:
- Choose the safest available source. Do not use water suspected of containing hazardous chemicals, fuel, or industrial contamination.
- Check water clarity. SODIS is intended for relatively clear water. Highly turbid water requires clarification before treatment and may remain unsuitable.
- Use an appropriate container. Select a clean, transparent, uncolored PET bottle in good condition, generally no larger than 2 liters, consistent with established SODIS guidance.
- Fill the bottle. Use the clear water and close the container securely.
- Place it in direct sunlight. Lay the bottle horizontally in an open location where it will receive strong sunlight.
- Allow sufficient exposure. Common SODIS guidance specifies at least 6 hours under suitable sunny conditions or 2 consecutive days under partly cloudy conditions.
- Keep the treated water protected. Drink directly from the treatment bottle or transfer it carefully into a clean container to avoid recontamination.
Do not rely on SODIS during prolonged heavy cloud cover, rainfall, or conditions that do not meet established sunlight exposure requirements.
The standard SODIS method is not a reliable way to remove chemical contaminants, and its microbial effectiveness is not identical to that of a properly rated portable UV-C purifier.
Advantages of Solar Water Disinfection
- No electricity required: Uses available sunlight.
- No fuel consumption: Does not require firewood, propane, or a stove.
- Minimal equipment: Can be performed with suitable transparent bottles.
- Low operating cost: Does not require regular chemical tablet purchases.
- Useful as an emergency alternative: May provide limited microbial treatment when better options are unavailable.
Limitations of Solar Water Disinfection
- Requires adequate sunlight and suitable weather conditions.
- Can take many hours or multiple days.
- Works best with clear water and appropriate containers.
- Does not remove dissolved chemicals, heavy metals, fuel, pesticides, or salt.
- Is not equally effective against every type of microorganism.
- Produces limited quantities of treated water per batch.
- Requires careful handling to prevent recontamination.
Prepper Tip: Do Not Depend on Solar Disinfection Alone
SODIS is best considered an emergency backup rather than the primary water treatment method for a household.
For dependable preparedness, maintain properly stored drinking water and an appropriate filtration or disinfection system that does not depend on favorable weather.
Portable UV Purification vs. Solar Disinfection
Although both methods use ultraviolet radiation, they differ significantly in treatment speed, equipment, and reliability.
| Feature | Portable UV Purifier | Solar Disinfection (SODIS) |
|---|---|---|
| Power Source | Battery or rechargeable electricity | Sunlight |
| Treatment Time | Usually minutes; device-specific | Typically 6 hours or longer under suitable conditions |
| Microbial Protection | Depends on verified UV dose and device rating | Depends on sunlight, water clarity, exposure, and organism |
| Removes Chemicals | No | No |
| Main Limitation | Power and equipment dependence | Weather and long exposure times |
| Best Use | Fast treatment of suitable clear water | Limited emergency backup when other methods are unavailable |
Important UV Water Treatment Safety Precautions
UV purification is effective only when the treatment conditions are appropriate. Before relying on either portable UV equipment or SODIS, consider the following precautions:
- Water clarity matters: Suspended particles can shield microorganisms from UV exposure.
- Use validated equipment: Ordinary UV flashlights, nail-curing lamps, and general-purpose UV devices are not substitutes for drinking water purifiers.
- Follow the full treatment cycle: Do not shorten manufacturer-specified exposure times.
- Protect your eyes and skin: Never look directly at an exposed UV-C lamp or deliberately expose skin to UV-C radiation.
- Prevent recontamination: UV treatment generally leaves no persistent disinfectant residual in stored water.
- Avoid chemically contaminated sources: UV disinfection does not make water safe after fuel spills or industrial chemical releases.
Critical Water Safety Warning
UV disinfection does not physically remove microorganisms, sediment, or hazardous pollutants. Its effectiveness depends on adequate UV exposure and suitable water conditions.
If water is visibly muddy, suspected of containing toxic chemicals, or affected by industrial or fuel contamination, do not assume that UV treatment alone makes it safe to drink.
Use commercially bottled water, properly stored drinking water, or a treatment system verified for the specific contaminants involved.
Improvised Water Purification Methods for Survival Emergencies
During a survival emergency, you may not have access to a commercial water filter, purification tablets, or reliable electricity. In these situations, knowing how to improvise basic water treatment equipment can help you manage limited resources.
However, there is an important difference between filtering water to remove visible debris and disinfecting water to make it safer to drink. Many homemade filtration methods can improve water clarity without reliably removing disease-causing microorganisms.
Improvised methods should generally be considered preliminary treatment steps or emergency backups rather than replacements for proven drinking water treatment equipment.
Quick Answer: Can You Purify Water Without Commercial Equipment?
You can use clean cloth, settling, or improvised sand filtration to reduce visible sediment. If you have a suitable heat-safe container and a dependable heat source, boiling can then provide effective microbial disinfection.
Solar disinfection may offer another option under specific conditions, but it requires suitable clear containers, relatively clear water, adequate sunlight, and the full recommended exposure period.
Important: Homemade charcoal filters, sand filters, and cloth filters should not be trusted to make untreated water safe to drink on their own.
DIY Charcoal and Sand Water Filters
One of the most commonly discussed survival water treatment techniques is a homemade filter made from layers of gravel, sand, cloth, and charcoal.
These materials can trap some suspended particles as water passes through them. Depending on the materials and construction, they may reduce visible debris and improve water clarity.
However, a homemade charcoal and sand filter is not equivalent to a commercially tested drinking water filter. It cannot be assumed to remove bacteria, viruses, protozoan parasites, or dissolved hazardous chemicals.
How a Basic Improvised Sand Filter Works
A simple improvised filter uses gravity to move water through layers of material that capture particles of different sizes.
- Cloth: Helps retain filter materials and catches larger debris.
- Gravel: Helps support the filter layers and may trap larger particles.
- Sand: Can capture some suspended sediment as water passes through.
- Charcoal: May reduce certain odors or impurities, but ordinary campfire charcoal is not equivalent to certified activated carbon filtration media.
The effectiveness of the filter depends on the cleanliness, size, arrangement, and condition of the materials. Improvised materials may also introduce contamination into the water.
How to Make a Basic Sediment Pre-Filter
This example is intended only to reduce visible particles before a separate, proven disinfection step.
- Choose a suitable container. Use a clean container that can safely hold the filter materials and allow water to drain through an opening.
- Place clean cloth near the outlet. This helps prevent loose material from washing out.
- Add rinsed gravel and sand. Arrange the materials so water passes through them before reaching the outlet.
- Pour untreated water slowly. Collect the water in a separate container designated for untreated water.
- Repeat if necessary. Additional passes may improve clarity, although they do not guarantee microbial safety.
- Disinfect the water afterward. Use boiling or another appropriate, verified treatment method before drinking.
Do not use unknown roadside soil, chemically treated materials, contaminated sand, or charcoal from painted or pressure-treated wood.
Advantages of Improvised Sand Filtration
- Can reduce some visible sediment and debris.
- May improve water clarity before boiling or other treatment.
- Uses relatively simple materials.
- Can help demonstrate basic filtration principles.
Limitations of Improvised Sand Filtration
- Does not reliably remove disease-causing microorganisms.
- Does not reliably remove dissolved chemicals, fuel, pesticides, or heavy metals.
- May introduce contamination from the filter materials.
- Requires additional treatment before the water can be considered suitable for drinking.
- Performance is inconsistent and cannot be verified by appearance alone.
Water Safety Warning: Clear Water Is Not Necessarily Safe Water
Water that looks clean after passing through a homemade filter can still contain harmful bacteria, viruses, and parasites.
Always use an appropriate disinfection method after improvised sediment filtration when microbial contamination is possible. Do not attempt to treat water with suspected hazardous chemical contamination using homemade filters.
Hot-Rock Boiling Without a Metal Cooking Pot
Hot-rock boiling is a traditional technique that uses heated stones to transfer heat into water held in a container that cannot be placed directly over a fire.
Historically, versions of this method have been used with suitable wooden, hide, or other heat-resistant vessels.
In theory, repeated heat transfer from hot stones can bring water to a boil. However, this is a difficult technique to perform safely and should not be treated as a dependable substitute for carrying proper cooking equipment.
How Hot-Rock Boiling Works
Heat is transferred from stones warmed by a fire into a separate water container. The stones gradually lose heat as the water temperature rises.
Reaching a true rolling boil may require repeated heating cycles, depending on the amount of water, the stones, and the container.
For emergency microbial disinfection, water must still reach a rolling boil and remain there for the appropriate time: one minute at elevations up to 5,000 feet, or three minutes above 5,000 feet.
Important Safety Risks
- Stone fracture: Some rocks can crack or break violently when heated, potentially causing burns or eye injuries.
- Steam burns: Moving very hot objects into water can produce splashing and steam.
- Container damage: Improvised vessels may leak, melt, or fail when exposed to extreme heat.
- Incomplete boiling: Heating water until it feels hot is not the same as maintaining a rolling boil.
- Unknown materials: Rocks and containers may introduce unwanted substances into the water.
Do not heat wet or unknown stones as a casual survival experiment. Avoid improvised plastic-lined containers and other materials that are not designed for contact with hot drinking water.
Is Hot-Rock Boiling Worth Relying On?
Hot-rock boiling is best understood as a historical survival technique rather than a preferred modern emergency water treatment method.
A lightweight stainless steel camping pot provides a safer, more practical way to boil water and should be included in emergency equipment whenever possible.
Prepper Tip: Carry a Metal Container
A small metal cooking pot or compatible single-wall metal camping cup can provide a dependable way to boil water when paired with a suitable heat source.
Never heat a sealed container or a double-wall insulated bottle over an open flame.
Cloth Filtration for Emergency Water Treatment
Cloth filtration is one of the simplest ways to remove visible particles from untreated water before further treatment.
A clean bandana, tightly woven cloth, or coffee filter can help catch insects, leaves, sediment, and larger suspended material.
However, ordinary cloth filtration does not reliably remove disease-causing bacteria, viruses, or protozoan parasites.
How to Pre-Filter Water With Cloth
- Choose a clean piece of tightly woven cloth or an appropriate coffee filter.
- Position it securely over a container designated for untreated water.
- Pour the water slowly through the material.
- Repeat with clean material if significant sediment remains.
- Use an appropriate disinfection method before drinking.
Cloth filtration is particularly useful before boiling or certain chemical treatment methods because it reduces visible debris that can complicate handling and disinfection.
Advantages of Cloth Filtration
- Uses materials commonly available in emergency kits.
- Can remove larger particles and visible debris.
- Requires no electricity or fuel.
- May improve water clarity before further treatment.
Limitations of Cloth Filtration
- Does not disinfect water.
- Does not reliably remove bacteria, viruses, or parasites.
- Does not remove dissolved chemicals or heavy metals.
- Can introduce contamination if the cloth is dirty.
Which Improvised Water Treatment Method Is Most Useful?
Improvised water treatment methods serve different purposes. Some help remove sediment, while others may provide microbial disinfection under specific conditions.
| Method | Primary Purpose | Main Limitation |
|---|---|---|
| Sand and Gravel Filter | Reduce visible sediment | Does not reliably disinfect water |
| Improvised Charcoal Filter | May reduce some impurities or odors | Unverified contaminant removal |
| Hot-Rock Boiling | Heat water for microbial disinfection | Burn, fracture, and equipment hazards |
| Solar Disinfection | Microbial treatment under suitable conditions | Requires clear water and sufficient sunlight |
| Cloth Filtration | Remove larger debris | Does not disinfect water |
How to Prepare for Water Treatment Equipment Failure
Rather than depending on improvised purification techniques, build redundancy into your emergency water plan.
- Store drinking water: Maintain a household reserve before emergencies occur.
- Carry a metal boiling container: Include appropriate cookware in your emergency kit.
- Keep a primary water filter: Select equipment with verified microbial treatment capabilities.
- Maintain a disinfection backup: Store suitable commercial treatment products and follow their instructions.
- Protect equipment from freezing: Wet hollow-fiber filters may be damaged by ice formation.
- Keep clean and untreated water separate: Prevent accidental cross-contamination.
- Learn treatment limitations: Understand which methods address microorganisms and which do not remove hazardous chemicals.
Prepper Tip: Practice Before an Emergency
Practice collecting, settling, pre-filtering, and boiling water using safe equipment before an actual emergency.
Do not use improvised water treatment experiments as proof that water is safe to drink. A clear appearance or improved taste does not establish microbial or chemical safety.
For additional techniques and treatment alternatives, read our How to Purify Water in the Wild Without Boiling guide.
Bottom line: Improvised filtration can help remove visible debris, and certain methods may support microbial disinfection under suitable conditions. However, homemade sand, charcoal, and cloth filters should never be trusted as complete drinking water purification systems. The safest emergency strategy is to combine appropriate water sourcing, proven treatment methods, and clean storage.
Water Purification Methods Compared: Which Is Best for Survival?
Choosing the best emergency water purification method depends on the water source, the contaminants involved, and the equipment available. Boiling, portable filtration, chemical disinfection, distillation, and ultraviolet treatment all have different strengths and limitations.
Some methods are designed to inactivate disease-causing microorganisms, while others physically remove particles or separate water from certain dissolved substances. No single method is suitable for every contamination scenario.
Use the comparison below to determine which water treatment options may be appropriate for your emergency preparedness plan.
Quick Answer: What Is the Most Reliable Emergency Water Treatment Method?
Boiling is one of the most dependable methods for disinfecting water that may contain harmful microorganisms, provided the water is not suspected of hazardous chemical contamination.
Portable filters are convenient for removing bacteria, protozoan parasites, and sediment, depending on the product. Many standard backpacking filters do not reliably remove viruses.
Chemical disinfectants and UV devices can provide additional microbial protection when used correctly.
Distillation can remove dissolved salts and many nonvolatile contaminants, but it requires more energy and does not reliably remove every hazardous chemical.
Emergency Water Purification Comparison Chart
The following table summarizes the typical capabilities of each treatment method. Actual performance varies by product, water quality, treatment conditions, and manufacturer specifications.
| Treatment Method | Microbial Protection | Chemical / Salt Removal | Treatment Time | Best Emergency Use |
|---|---|---|---|---|
| Boiling | Inactivates bacteria, viruses, and protozoa | Does not remove dissolved chemicals or salt | 1-minute rolling boil; 3 minutes above 5,000 feet, plus heating and cooling | Microbial disinfection at home or basecamp |
| Pump Filters | Many remove bacteria and protozoa; most standard microfilters do not remove viruses | Usually not; depends on specialized media | Flow-rate and product dependent | Shallow streams and small groups |
| Straw Filters | Many remove bacteria and protozoa; virus protection varies | Usually not | On-demand drinking | Individual emergency kits and bug-out bags |
| Gravity Filters | Depends on filter elements; many backpacking models remove bacteria and protozoa | Depends on system and certified claims | Flow-rate and capacity dependent | Families, shelters, and basecamps |
| Iodine Tablets | Effective against many bacteria and viruses; unreliable against Cryptosporidium | No | Product-specific; often 30 minutes or longer | Short-term portable backup |
| Chlorine Dioxide | Can address bacteria, viruses, and certain parasites with correct product and contact time | No | Product-specific; up to 4 hours for Cryptosporidium with some products | Portable microbial disinfection |
| Household Bleach | Effective against many bacteria and viruses; unreliable against Cryptosporidium | No | At least 30 minutes under applicable EPA guidance | Emergency household water disinfection |
| Distillation | Proper systems separate water from microorganisms | Removes salt and many nonvolatile contaminants; not all volatile chemicals | Often hours; system dependent | Desalination and specialized treatment |
| Portable UV Purifiers | Can inactivate bacteria, viruses, and protozoa with adequate UV dose | No | Usually minutes; device dependent | Clear water and lightweight emergency kits |
| Solar Disinfection (SODIS) | Variable microbial inactivation under suitable conditions | No | Typically 6 hours of suitable sun or 2 days under partly cloudy conditions | Limited emergency backup |
| Improvised Sand / Charcoal Filters | Not reliable for drinking water disinfection | Unverified and unreliable | Varies | Sediment removal before proven treatment |
| Cloth Filtration | Does not reliably remove pathogens | No | Minutes | Removing visible debris before treatment |
Note: This table describes general treatment capabilities, not guarantees for every product or water source. Always follow the manufacturer’s instructions and current public health guidance.
Best Water Purification Method by Survival Situation
The most practical method often depends on where you are, what equipment you have, and the likely contamination risks.
Best for a Long-Term Power Outage
Properly stored drinking water should be your first resource during a prolonged blackout. If additional water treatment becomes necessary and microbial contamination is the primary concern, boiling may be a dependable option when a safe heat source is available.
A gravity filtration system and suitable backup disinfection supplies can provide additional flexibility.
Best for a Bug-Out Bag
A compact portable filter is useful for reducing bacteria and protozoan parasites from appropriate freshwater sources. Because many backpacking microfilters do not reliably remove viruses, consider carrying an additional disinfection method.
Choose equipment that fits your expected water sources and evacuation conditions.
Best for a Family Emergency Shelter
A gravity-fed filtration system can be convenient for preparing larger batches of drinking water. However, its microbial and chemical treatment capabilities depend on the specific filter elements.
Maintain stored drinking water and a backup disinfection option rather than depending entirely on one filtration device.
Best for Treating Seawater
Seawater requires desalination before it can be used as drinking water. A properly designed distillation system can remove dissolved salt, although it requires substantial energy and suitable equipment.
Ordinary boiling, chlorine dioxide tablets, iodine, and standard backpacking filters do not remove seawater’s dissolved salt.
Best When You Have No Commercial Equipment
If microbial contamination is the primary concern, boiling in an appropriate heat-safe container is generally preferable to relying on homemade sand or charcoal filters.
Cloth filtration or settling can remove visible debris before boiling. Solar disinfection may be an alternative under specific conditions, but it is weather-dependent and has important limitations.
Why a Layered Water Treatment System Is Better
A dependable emergency water strategy uses multiple layers of protection rather than assuming one device can handle every problem.
- Start with the safest available water source. Prefer commercially bottled water or properly stored drinking water whenever possible.
- Evaluate likely contamination. Consider whether microorganisms, sediment, chemicals, or dissolved salts may be present.
- Remove sediment when necessary. Settling or pre-filtration can improve water clarity before appropriate treatment.
- Apply a proven treatment method. Choose boiling, filtration, disinfection, or specialized treatment based on the suspected contaminants.
- Protect treated water. Use clean, sanitized containers and prevent recontamination.
- Maintain a backup. Store alternative treatment supplies in case your primary equipment fails.
Prepper Tip: Build Redundancy Into Your Water Plan
For a practical household emergency setup, consider combining stored drinking water, an appropriately rated portable or gravity filter, and an independent disinfection method.
Do not assume that combining two inadequate methods automatically makes chemically contaminated water safe. Each treatment must be appropriate for the hazards involved.
Important Water Safety Reminder
Water affected by fuel spills, industrial chemicals, pesticides, or radioactive contamination may not be made safe by ordinary boiling, backpacking filtration, UV treatment, or household disinfectants.
If hazardous contamination is suspected, use an alternative water supply and follow guidance from local health or emergency management authorities.
Understanding these differences will help you select emergency water equipment that matches your household’s needs instead of relying on one treatment method for every situation.
Next, we’ll look at how to assemble a practical emergency water purification loadout with primary equipment, backup treatment supplies, and safe water storage.
Emergency Water Purification Kit: What to Include in Your Survival Loadout
A dependable emergency water purification kit should include more than a single portable filter. During a prolonged power outage, evacuation, or wilderness emergency, equipment can fail, water sources can become contaminated, and your household may need more drinking water than one device can conveniently produce.
The most practical approach is to build a layered water preparedness system that combines stored drinking water, reliable filtration equipment, backup disinfection supplies, and safe water containers.
This recommended setup is designed around common emergency preparedness needs rather than personal product testing. Always verify the specifications and treatment capabilities of individual products before relying on them.
Quick Answer: What Should Be in an Emergency Water Purification Kit?
- Stored drinking water: Your first source during an emergency.
- Primary water filter: A gravity, pump, or portable system appropriate for likely contaminants.
- Backup disinfection: Commercial water treatment tablets or suitable boiling equipment.
- Clean water containers: Separate containers for untreated and treated water.
- Maintenance supplies: Replacement filters, cleaning equipment, and manufacturer instructions.
- Portable backup: A lightweight personal filter for evacuation or travel.
No single item can address every type of contamination. The equipment must match the water source and the hazards involved.
1. Store Emergency Drinking Water Before You Need It
Stored drinking water is the foundation of a reliable emergency water plan. Having a reserve available means you are not immediately dependent on finding, collecting, and treating water during a disaster.
For basic emergency planning, the CDC recommends storing at least one gallon of water per person per day for three days. A two-week supply is preferable when space and resources allow.
Actual needs may be higher during hot weather, illness, pregnancy, or other circumstances. Pets also require their own water supply.
Example: Emergency Water for a Family of Four
| Emergency Duration | Minimum Water Supply |
|---|---|
| 3 Days | 12 Gallons |
| 7 Days | 28 Gallons |
| 14 Days | 56 Gallons |
| 30 Days | 120 Gallons |
These figures represent a basic planning minimum, not necessarily enough for every household’s drinking, cooking, and sanitation requirements.
For additional guidance, read our Long-Term Water Storage Guide.
2. Choose a Primary Emergency Water Filter
A primary water filter gives you a way to treat suitable freshwater sources when stored drinking water begins running low.
For a family or stationary emergency shelter, a gravity-fed system may be convenient because it can process larger quantities without continuous pumping.
For travel or shallow water sources, a pump filter may be more practical.
When selecting equipment, verify:
- Which microorganisms the filter is designed to remove.
- Whether the product provides verified virus protection.
- The filter’s rated capacity and expected flow rate.
- Replacement cartridge availability.
- Cleaning and backflushing requirements.
- Storage precautions, including protection from freezing.
Many standard backpacking microfilters remove bacteria and protozoan parasites but do not reliably remove viruses or dissolved hazardous chemicals.
Gravity Water Filter Option
A gravity system can be useful for treating water at a campsite, emergency shelter, or household backup station.
Pump Water Filter Option
A pump system can be useful when collecting water from shallow streams or other difficult-to-access freshwater sources.
3. Carry a Portable Personal Water Filter
Even if your household has a larger filtration system, a compact personal filter can provide a useful backup for travel, evacuation, and bug-out bags.
Straw-style filters are particularly convenient because they are lightweight and require little storage space.
However, most standard straw microfilters are not designed to remove viruses, dissolved salts, or hazardous chemical contamination.
Portable Filter Option
When assembling an emergency kit, consider pairing a personal filter with a compatible water bottle or collapsible container.
Check the specific filter design because not every straw filter can attach to a bottle or transfer treated water into a separate container.
4. Include Backup Water Disinfection Supplies
Every emergency water kit should include an independent way to disinfect suitable water if the primary filter becomes damaged, clogged, or unavailable.
Two practical options are commercial water disinfection tablets and equipment for boiling water.
Chemical Water Treatment Tablets
Commercial chlorine dioxide tablets can provide a portable disinfection option when used according to their labeling.
Some formulations are effective against bacteria, viruses, and Cryptosporidium, but treatment times vary considerably. Certain products require up to four hours of contact time for Cryptosporidium.
Always check the actual product’s active ingredient, treatment instructions, expiration date, and microbial claims.
Boiling Equipment
A suitable metal cooking pot or single-wall metal camping cup can provide another emergency disinfection option when a safe heat source is available.
For microbial disinfection, bring water to a rolling boil for one minute at elevations up to 5,000 feet or three minutes above that elevation.
Boiling does not remove dissolved chemicals, heavy metals, or salt.
Do not operate outdoor fuel-burning stoves or generators inside homes, tents, garages, or other enclosed spaces because of carbon monoxide hazards.
5. Keep Separate Containers for Clean and Untreated Water
Safe storage is just as important as effective treatment. Water can become contaminated again if clean equipment comes into contact with untreated water.
For a household emergency setup, maintain separate containers for:
- Untreated water: Water collected from streams, ponds, rainwater systems, or other sources that require evaluation and treatment.
- Treated drinking water: Water that has undergone an appropriate treatment process and is stored in a clean, sanitized, food-safe container.
Clearly label containers and avoid using the same hoses, scoops, or funnels for both types of water unless they have been properly cleaned and sanitized.
Never use containers that previously held pesticides, gasoline, solvents, or other hazardous chemicals for drinking water storage.
6. Add Water Filter Maintenance and Replacement Supplies
Water filtration equipment requires maintenance, particularly during extended emergencies.
Depending on your filter model, consider keeping:
- Replacement filter cartridges or elements.
- Manufacturer-approved backflushing tools.
- Spare seals, hoses, or connectors.
- Written operating and maintenance instructions.
- Compatible batteries or charging equipment for electronic treatment devices.
- Clean storage bags or protective cases.
Follow the manufacturer’s guidance for cleaning and replacement. Do not assume that a damaged filter remains effective simply because water still passes through it.
Important: Wet hollow-fiber filters may be permanently damaged if they freeze. Protect them from freezing temperatures and follow the manufacturer’s instructions if freezing may have occurred.
7. Consider a Portable UV Purifier as an Additional Backup
A portable UV purifier can provide another microbial disinfection option when the water is sufficiently clear and the device is operating correctly.
Appropriately rated UV devices can inactivate bacteria, viruses, and certain protozoan parasites without requiring chemical treatment tablets.
However, they depend on electricity or batteries and do not remove sediment, dissolved chemicals, or salt.
Portable UV Purification Option
A UV device is best treated as a supplemental option rather than the only treatment method in your emergency kit.
Recommended Emergency Water Loadout by Situation
Not every household needs the same equipment. The following setups provide a practical starting point for different emergency scenarios.
| Situation | Primary Water Supply | Backup Treatment |
|---|---|---|
| 72-Hour Emergency | Stored drinking water | Boiling equipment or suitable treatment tablets |
| Two-Week Power Outage | Stored water and appropriately rated household filtration | Boiling or compatible disinfection method |
| Bug-Out Bag | Carried drinking water | Portable filter and suitable treatment tablets |
| Family Emergency Shelter | Stored drinking water and gravity filtration | Boiling equipment and separate disinfection supplies |
| Remote Camping | Carried water and portable filtration | Boiling or appropriately selected chemical treatment |
Common Mistakes When Building a Survival Water Kit
Even a well-stocked emergency kit can fail if the equipment is used incorrectly or the water source contains contaminants that the treatment system cannot address.
- Relying on only one filter: A damaged or clogged filter can leave you without a treatment option.
- Ignoring virus protection: Many standard backpacking microfilters do not reliably remove viruses.
- Confusing clear water with safe water: Dangerous microorganisms may be present even when water looks clean.
- Overlooking chemical contamination: Ordinary boiling and backpacking filtration do not make water affected by fuel or industrial spills safe.
- Failing to store drinking water: Treatment equipment is not a substitute for a dependable emergency reserve.
- Allowing cross-contamination: Dirty hoses, caps, and containers can contaminate treated water.
- Neglecting maintenance: Filter elements, seals, and batteries require inspection and replacement.
Prepper Tip: Build Your Water Kit in Stages
If you’re working with a limited preparedness budget, prioritize stored drinking water and a dependable treatment method before purchasing specialized equipment.
Next, add a portable filter, a separate disinfection option, and additional clean storage containers.
Finally, expand your setup with spare parts, higher-capacity filtration equipment, and other backups appropriate for your household.
Important: Know When Your Water Kit Is Not Enough
Standard emergency filtration and disinfection methods are primarily intended to address microbial contamination in suitable water sources.
If water may contain industrial chemicals, fuel, pesticides, radioactive materials, or other hazardous substances, do not assume that combining ordinary filters, boiling, and treatment tablets will make it safe.
Use an alternative drinking water supply and follow instructions from local public health or emergency management authorities.
Bottom line: The best emergency water purification loadout combines a stored drinking water reserve, appropriately selected filtration equipment, independent disinfection supplies, and clean storage containers. A layered system provides more flexibility when equipment fails or conditions change, but every treatment method must be matched to the contaminants involved.
Conclusion: Building a Reliable Emergency Water Purification Plan
Clean drinking water is one of the most important resources you can have during a survival emergency. Whether you’re preparing for a prolonged power outage, evacuating your home, or spending time in the wilderness, knowing how to treat water can help protect you and your family from waterborne illness.
Throughout this guide, we’ve covered the major emergency water purification methods, including boiling, portable filtration, chemical disinfection, distillation, ultraviolet treatment, and improvised techniques.
Each method has advantages, but none should be considered a universal solution for every water source.
The most important lesson is simple: Choose your water treatment method based on the contamination risks, not just the equipment you have available.
Your Emergency Water Preparedness Checklist
Use this checklist to evaluate your household’s drinking water preparedness before the next emergency.
Emergency Water Supply Checklist
- ☐ Store at least one gallon of drinking water per person per day for a minimum of three days.
- ☐ Work toward a two-week water reserve when space and resources allow.
- ☐ Keep an appropriately rated portable or gravity water filter.
- ☐ Maintain a separate method for microbial disinfection.
- ☐ Include a suitable metal container for boiling water.
- ☐ Store clean, food-safe containers for treated drinking water.
- ☐ Keep untreated and treated water equipment separate.
- ☐ Check treatment tablet expiration dates and filter maintenance requirements.
Final Water Safety Reminder
Never assume that clear-looking water is safe to drink.
Boiling, filtering, and chemical disinfection are primarily used to address microbial contamination. They do not necessarily remove hazardous chemical pollutants.
During a disaster, follow local drinking water advisories and use commercially bottled or properly stored drinking water whenever the available source is unsafe or its contamination cannot be adequately addressed.
Further Reading: Emergency Water and Survival Preparedness
Water purification is only one part of a complete emergency preparedness plan. The following guides can help you improve your household’s water storage, treatment equipment, and long-term survival readiness.
- Top Water Purification Methods for Survival – Compare emergency water treatment options and equipment.
- How to Purify Water in the Wild Without Boiling – Explore alternatives when a safe heat source is unavailable.
- Natural Water Purification Methods – Learn about traditional techniques and their limitations.
- Long-Term Water Storage for Emergencies – Plan a dependable drinking water reserve for extended disruptions.
Water treatment is just one of the challenges families face when the power goes out. Food storage, backup electricity, sanitation, communication, and emergency supplies all become increasingly important during a prolonged disruption.
That’s why The Savvy Survivalist focuses on practical preparedness strategies that help households plan ahead rather than react after an emergency begins.
Final takeaway: The best emergency water purification strategy starts with stored drinking water, uses proven treatment methods appropriate for the contaminants involved, and includes backup equipment for unexpected failures. With the right preparation, your household can be better equipped to handle water disruptions during both short-term emergencies and prolonged disasters.