Root Cellar Alternatives for Homes Without a Basement
A traditional root cellar can preserve homegrown produce for months, but many homes have no basement, suitable hillside, or dry location for an underground storage room.
This post contains affiliate links. I may earn a small commission at no extra cost to you. Learn more.
A spare refrigerator, cool closet, unheated garage, buried container, insulated pit, or heavily mulched garden bed can provide similar storage on a smaller scale. The right choice depends on the crop because root vegetables generally need colder, more humid conditions than onions, garlic, pumpkins, and winter squash.
Most households will need two or more storage locations rather than one universal solution. This guide explains which root cellar alternatives work best for different crops and how to prevent freezing, sprouting, dehydration, mold, and pest damage.
Quick Answer
The best root cellar alternatives are a spare refrigerator, cool pantry, insulated garage cabinet, buried container, outdoor pit, or protected garden bed. Most households need more than one method because root vegetables require colder, more humid storage than onions, garlic, pumpkins, and winter squash.
✓ Key Takeaways
- Different crops require different combinations of temperature, humidity, darkness, and ventilation.
- A spare refrigerator is the easiest controlled option for a small harvest.
- Cool closets and pantries work best for onions, garlic, pumpkins, and winter squash.
- Garages, buried containers, pits, and mulched garden beds can handle larger harvests but require weather and moisture monitoring.
- Inspect stored produce regularly and remove anything that becomes moldy, leaking, soft, or foul-smelling.
What a Root Cellar Actually Does
A root cellar extends the storage life of fresh produce by slowing the natural processes that cause crops to lose moisture, sprout, soften, or decay. Traditional root cellars use the surrounding soil to moderate temperature, but being underground is not what makes the system work. The real goal is to create stable storage conditions that match the needs of the harvested crop.
Temperature is the first consideration. Most root vegetables last longest when kept slightly above freezing, while winter squash and pumpkins can suffer chilling damage if stored that cold. A storage area that remains comfortable for people may still be warm enough to make potatoes sprout and carrots become limp.
Humidity is equally important. Carrots, beets, turnips, parsnips, and cabbage need humid conditions that prevent them from drying out. Onions, garlic, pumpkins, and winter squash need better airflow and lower humidity because damp storage encourages mold and rot.
Darkness helps prevent potatoes from turning green and discourages sprouting. Ventilation allows heat, excess moisture, and gases released by stored produce to escape. The storage space must also protect the harvest from freezing temperatures, standing water, insects, and rodents.
The biggest mistake is trying to store the entire harvest under one set of conditions. A better system separates produce into general storage groups:
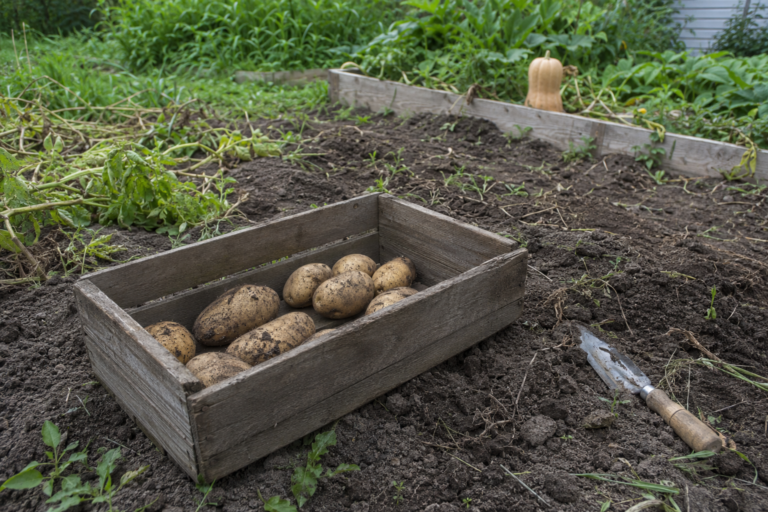
- Cold and humid: Potatoes, carrots, beets, parsnips, turnips, rutabagas, and cabbage.
- Cold or cool and relatively dry: Onions and garlic.
- Cool and dry: Pumpkins and winter squash.
You do not have to reproduce perfect commercial storage conditions. However, the farther the temperature and humidity move from a crop’s preferred range, the sooner you should expect to use, preserve, or discard that produce.
Best Root Cellar Alternatives at a Glance
The right option depends on the size of your harvest, winter temperatures, available space, drainage, and whether you are willing to use electricity. Small harvests are usually easiest to manage with a refrigerator and indoor storage area. Larger harvests may justify an insulated garage cabinet, buried container, or outdoor storage pit.
For many households, the most dependable approach is to use indoor storage for dry crops and either refrigeration or protected outdoor storage for crops that need colder, more humid conditions.
Use a Spare Refrigerator for Small Harvests
Refrigerators work particularly well for carrots, beets, turnips, rutabagas, cabbage, and similar crops that prefer cold conditions. The main limitation is humidity. Refrigerator air is relatively dry, so unprotected root vegetables can become soft, shriveled, or rubbery long before they actually spoil.
Remove leafy tops from root vegetables before storage because the leaves continue drawing moisture from the roots. Brush off loose soil and allow damaged surfaces to dry before packing the produce. Place the vegetables in perforated plastic bags or containers that retain some humidity while still allowing limited airflow.
Do not seal freshly harvested produce inside completely airtight bags. Trapped condensation can encourage mold, bacterial growth, and slimy decay. If water droplets repeatedly form inside the packaging, add ventilation holes or briefly open the container to release excess moisture.
💡 Pro Tip
Place an appliance thermometer inside the refrigerator instead of trusting the temperature-control dial. Check different shelves because the temperature can vary considerably between the door, drawers, and rear wall.
Leave enough space between containers for cold air to circulate. Keep produce away from areas where it may touch a freezing surface. Inspect the contents at least once a week and immediately remove anything that is leaking, moldy, unusually soft, or developing an unpleasant odor.
Store apples separately whenever possible. Apples release ethylene gas, which can speed aging or cause quality problems in some nearby produce. A second refrigerator is useful, but it should not become one crowded compartment for every crop.
If the refrigerator is kept in a garage or shed, confirm that the appliance is rated to operate at the temperatures that space experiences. Some refrigerators do not cool properly when the surrounding air becomes extremely hot or cold.
⚠ Warning
Do not bury an old refrigerator or freezer to create an underground root cellar. Water intrusion, soil pressure, electrical components, refrigerant lines, poor ventilation, and a latching door can create serious structural and safety hazards.
Convert a Cool Closet or Pantry
Choose the coolest location in the house, preferably away from the kitchen, furnace, water heater, clothes dryer, sunny windows, and other heat sources. A closet along a shaded exterior wall may remain cooler than the rest of the home, especially during fall and winter. Block direct light while maintaining enough airflow to prevent stale, damp conditions.
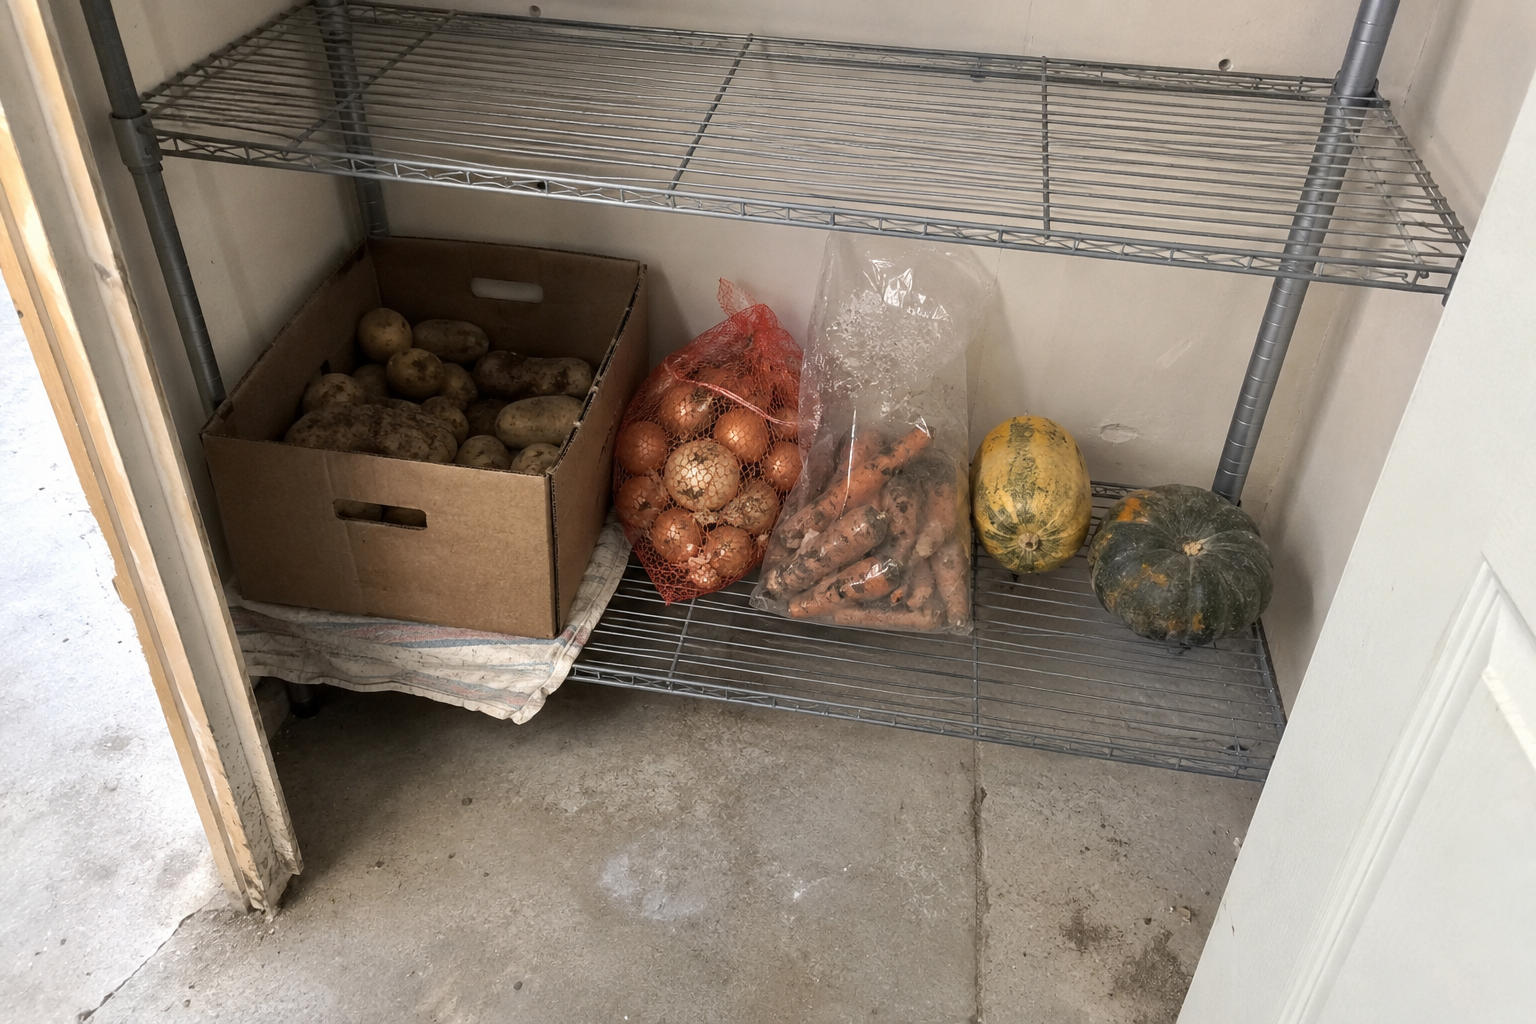
A cool pantry is best suited for thoroughly cured onions, garlic, winter squash, and pumpkins. Sweet potatoes can also be stored indoors after proper curing, although they require warmer conditions than most root crops. Potatoes may last for a limited period in a dark pantry, but a heated home is normally too warm for dependable long-term potato storage.
Use open crates, slatted shelves, mesh bags, or shallow cardboard boxes that allow air to move around the produce. Do not pack onions or garlic into sealed plastic containers. Place winter squash and pumpkins in a single layer with space between them instead of stacking them in a deep pile.
Keep produce off damp floors and away from condensation-prone walls. Separate onions, garlic, potatoes, and fruit into different containers because they have different humidity requirements and may affect one another through moisture, odors, or ripening gases.
Record the closet’s temperature during both the day and night before committing the entire harvest. If it regularly rises above the preferred storage range, use the space for short-term storage and preserve the remaining produce by freezing, dehydrating, or canning with a tested recipe.
Store Produce in an Unheated Garage or Shed
Temperature fluctuation is the main limitation. A garage may become surprisingly warm on a sunny afternoon and then drop below freezing overnight. A detached shed usually experiences even wider swings because it receives little heat from the house. Before moving the harvest, monitor the space for at least several days with a minimum-and-maximum thermometer.
Do not place produce directly on a concrete floor or against an exterior wall. Condensation, freezing surfaces, and moisture can damage the bottom layer before the problem becomes visible. Set storage containers on a pallet, wooden shelf, or other raised platform.
An insulated cabinet provides more protection than leaving boxes exposed. A simple cabinet can be built from plywood and rigid foam insulation, or you can repurpose a large insulated cooler. Include controlled ventilation so moisture does not remain trapped around the produce. Any opening should be covered with metal hardware cloth to exclude mice and insects.
Use ventilated crates, baskets, or shallow boxes rather than deep containers. Deep piles trap heat and moisture while placing damaging weight on the produce at the bottom. Separate crops according to their storage needs, and avoid placing apples in the same enclosed cabinet as potatoes or ethylene-sensitive vegetables.
Check the garage storage area after major weather changes. Add insulation before a cold spell, but do not wrap produce so tightly that airflow stops. If the temperature inside the cabinet approaches freezing, move the harvest into a protected indoor location until conditions improve.
Keep produce away from gasoline, pesticides, fertilizers, paint, solvents, and vehicle exhaust. Never store food in containers that previously held chemicals, animal feed treatments, or petroleum products. Rodent control is also essential because a garage or shed filled with vegetables can quickly attract mice.
Build a Buried Garbage-Can Cellar
This method works best with a short, clean metal or heavy-duty plastic can that can be reached from above. A container around 20 gallons is easier to load and unload than a full-size garbage can. Metal provides better rodent resistance, while plastic will not rust but may be easier for rodents to damage.
Choose a high, well-drained location that does not collect roof runoff, surface water, or melting snow. Avoid low areas, heavy wet soil, flood-prone ground, and locations with a high seasonal water table. Water intrusion can destroy the entire contents of the container before you realize there is a problem.
- Dig a hole deep enough to surround most of the container with soil while leaving the top accessible.
- Set the container level and confirm that the rim remains above the surrounding ground.
- Add clean, dry straw or another uncontaminated insulating material around the produce.
- Pack only sound, cured vegetables without cuts, bruises, insect damage, or signs of decay.
- Secure the lid, cover the top with additional insulation, and add a waterproof cover that sheds rain away from the opening.
- Mark the location clearly so it remains easy to find after leaves, snow, or winter vegetation covers the area.
⚠ Drainage Warning
A buried container should not be completely surrounded by a depression that funnels water toward its lid. Mound the soil slightly around the opening and extend the waterproof cover beyond the hole so rain drains away from the container.
Do not use a container that held trash, pesticides, fuel, paint, pool chemicals, or other hazardous materials. Use a new container or a clean container intended for food-storage use, and prevent produce from making direct contact with questionable surfaces.
Open the cellar only when necessary because every opening releases the stable air inside and introduces outside moisture. Some households divide the harvest between two or three smaller containers so they can empty one at a time instead of repeatedly exposing the entire crop.
A buried container is not suitable everywhere. Warm climates may not provide enough cold soil for long-term storage, while poorly drained or deeply frozen sites can make the container unusable. Test the temperature and moisture conditions with a small amount of produce before trusting the system with a full harvest.
Make an Insulated Storage Pit or Trench
An insulated pit or trench is a larger version of a buried-container cellar. Instead of placing produce inside a can, the harvest is packed between layers of clean insulating material and protected with soil and a waterproof cover. This method is sometimes called a storage clamp.
Select a high, well-drained part of the property. Do not place the pit beside a downspout, at the bottom of a slope, near a drainage ditch, or anywhere water stands after a heavy rain. The surrounding soil should be cool without remaining saturated.
- Excavate a shallow pit or trench approximately 6 to 12 inches deep.
- Line the bottom and sides with clean, dry straw or another uncontaminated insulating material.
- Add sound potatoes, carrots, beets, turnips, rutabagas, or cabbage without packing them tightly.
- Cover the produce completely with another thick layer of clean straw.
- Add a protective layer of soil over the insulation.
- Place a tarp or sheet of heavy plastic over the mound so rain runs away from the stored produce.
- Secure the cover against wind while leaving the edges arranged so water cannot drain into the pit.
If rodents are common, place quarter-inch metal hardware cloth beneath and around the storage area before adding the straw. Hardware cloth is more dependable than thin plastic mesh, which mice and voles can chew through.
💡 Pro Tip
Build several small pits instead of one large pit. Each pit can hold a different crop or a manageable amount of produce. Opening one smaller section prevents the entire harvest from being exposed to rain, warm air, and repeated temperature changes.
Do not store apples in the same enclosed pit as root vegetables because their ethylene gas can reduce the quality of nearby crops. Keep damaged produce out of storage because decay can spread to otherwise sound vegetables.
Wait until the soil and outdoor temperatures have cooled before filling the pit, but complete the work before the ground freezes hard. Placing produce into warm soil can trap heat and accelerate spoilage.
⚠ Safety Warning
Keep outdoor produce pits shallow. Never enter a deep, unsupported excavation because the walls can collapse without warning. A produce-storage trench should be reachable entirely from ground level.
Outdoor pits are not ideal for properties with heavy clay soil, frequent winter rain, flooding, or prolonged warm weather. Start with a small test pit and check the contents after several weeks before expanding the system.
Leave Root Crops in the Garden Under Mulch
Carrots, parsnips, turnips, and other cold-tolerant root crops are the best candidates. Rutabagas and beets may also remain in the garden for a limited period when the soil drains well and winter temperatures are moderate. This method does not work equally well for every crop, climate, or garden.
Wait until the weather cools and active growth slows. Remove diseased foliage and cover the row with a deep layer of loose, dry straw or shredded leaves. Extend the mulch beyond both sides of the row because frost can enter the soil from the edges.
A supported tarp or low cover can help keep heavy rain from saturating the mulch, but do not press plastic tightly against the plants. Trapped moisture and poor airflow can encourage rot. Mark the ends of each row before winter weather makes the garden difficult to recognize.
When vegetables are needed, pull back only enough mulch to reach a small section. Harvest the roots, inspect the remaining crop, and replace the covering immediately. Roots taken from cold outdoor storage should be used or refrigerated promptly rather than left in a warm kitchen for an extended period.
☑ Before Storing Crops in the Garden
- Confirm that the bed drains well after heavy rain.
- Remove roots with visible disease or serious insect damage.
- Apply enough mulch to protect both the crop and the surrounding soil.
- Mark the rows and record which crops are stored beneath each area.
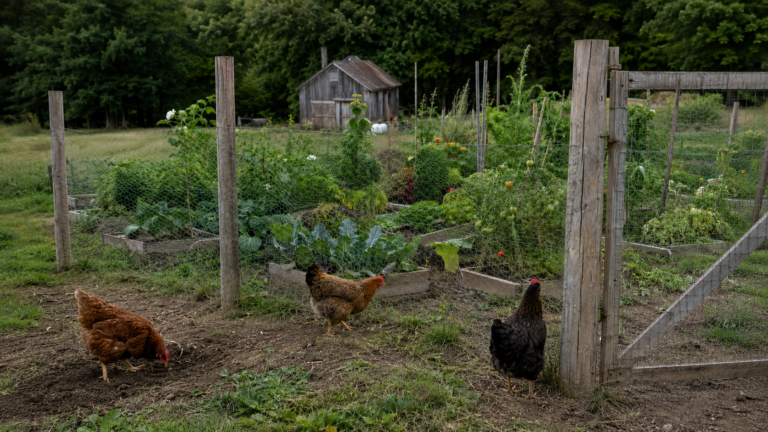
- Protect the bed from rodents, deer, rabbits, and free-ranging chickens.
- Harvest before severe cold freezes the soil below the mulch.
Mulch delays freezing but does not make the garden immune to winter weather. In very cold regions, the ground may eventually become too hard to dig. In mild, wet climates, rot and rodent damage may be greater concerns than freezing. Monitor the first stored row closely and harvest the remaining roots if conditions begin deteriorating.
Match Each Crop to the Right Storage Method
The best storage method depends more on the crop than the amount of space available. Use the following ranges as practical targets rather than expecting a closet, garage, or outdoor pit to maintain laboratory-level conditions.
Monitor Stored Produce and Correct Problems Early
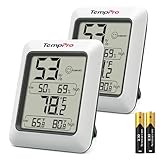
Place a thermometer and humidity meter near the produce rather than near the ceiling or doorway. Check the readings during warm afternoons, cold nights, and major weather changes. Conditions inside a garage cabinet or buried container may differ considerably from the surrounding air.
Recommended Storage Monitor
The TempPro TempAir displays the current temperature and humidity along with daily high and low readings. It provides a simple way to monitor a pantry, cool closet, garage cabinet, or other produce-storage area.
Inspect accessible produce at least once a week. Remove anything that becomes moldy, leaking, badly softened, or foul-smelling. One decaying vegetable can spread moisture and microorganisms to the rest of the container.
- Sprouting: The storage area may be too warm or exposed to light.
- Shriveling: Humidity is too low or airflow is excessive.
- Condensation: Humidity is too high or ventilation is inadequate.
- Freezing damage: Produce may appear water-soaked, soft, or discolored after thawing.
- Repeated mold: Produce may have been packed wet, damaged, or stored without enough airflow.
Do not expect every vegetable to last for its maximum published storage life. Variety, harvest maturity, curing, physical damage, temperature changes, and humidity all affect the result. Use crops with minor damage first and reserve the healthiest produce for long-term storage.
Frequently Asked Questions
Can potatoes be stored without a root cellar?
Yes. Cure them first, then store them in a cold, humid, ventilated, and completely dark garage cabinet, buried container, or outdoor pit.
Can an unheated garage serve as a root cellar?
Yes, but only when temperatures remain above freezing. Use an insulated cabinet and monitor it during warm afternoons, cold nights, and major weather changes.
Which vegetables are easiest to store inside the house?
Thoroughly cured onions, garlic, pumpkins, and winter squash are easiest because they tolerate the cooler, drier conditions available in many homes.
What should I do if I cannot keep produce cold enough?
Use it promptly or preserve it by freezing, dehydrating, pickling, or following a tested canning recipe. Plain low-acid vegetables require pressure canning.
Continue Reading
Final Thoughts
You do not need a basement to store a homegrown harvest. A spare refrigerator, cool pantry, insulated garage cabinet, buried container, outdoor pit, or protected garden bed can provide practical storage without a major construction project.
Use separate locations for crops with different storage needs, monitor conditions, and inspect the harvest regularly. Start with a small amount of produce and improve the system before depending on it for a full harvest.