
⚡ Solar + Generator Hybrid Backup (2025): Stop Wasting Fuel, Start Storing It
When the power goes out for a few hours, a portable generator feels like a lifesaver.
But when the outage stretches for days, that same generator starts burning through fuel, making constant noise, and wearing itself out.
This post contains affiliate links. I may earn a small commission at no extra cost to you. Learn more.
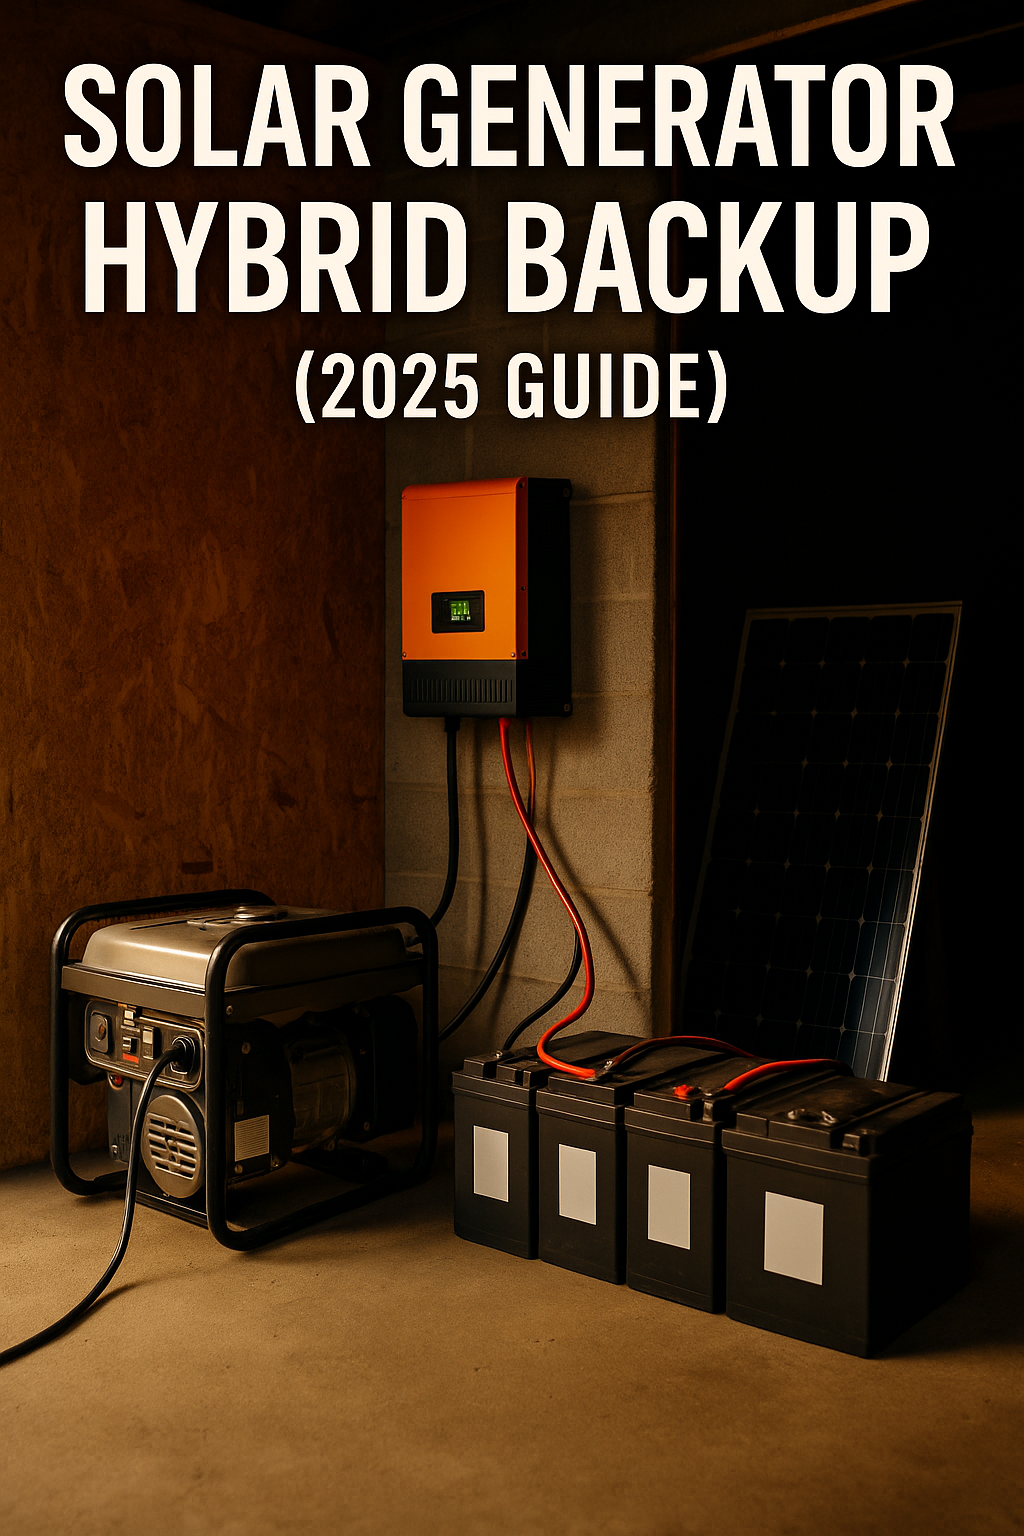
A smarter, modern solution is the solar generator hybrid system — a setup that combines your generator, inverter / charger, and a battery bank to create reliable, fuel-efficient power.
Instead of running the generator around the clock, you use it only when needed to recharge the batteries.
Those batteries then take over silently, powering your essentials for the rest of the day.
This simple shift cuts fuel use dramatically, keeps your lights and fridge running quietly, and gives you the freedom to expand into full solar power later without changing your core equipment.
🧭 This guide is part of our Grid-Down Survival Power: 2025 Off-Grid Energy Playbook →
your main hub for backup-power strategies and equipment know-how.
🔋 Why Hybrid Backup Matters
✅ Uses 40–70 % less fuel than continuous generator operation
✅ Extends engine life by reducing runtime hours
✅ Delivers quiet power for most of the day
✅ Easily upgrades to solar input later without rewiring
You don’t need solar panels on day one—just an inverter / charger, a modest battery bank, and your existing dual-fuel generator.
It’s the perfect bridge between traditional generator backup and full off-grid solar power.
🔋 Choosing an Inverter / Charger (The Brain of Your Hybrid System)
The inverter / charger is the control center of a hybrid power setup. It’s the piece of gear that connects your generator, battery bank, and eventually your solar panels into one efficient system. When it’s configured properly, you’ll burn less fuel, charge faster, and keep your power steady—even during long outages.
⚙️ What the Inverter / Charger Does
-
Inverts DC to AC: Converts your battery power into clean, usable electricity for your home.
-
Charges Batteries: When your generator is running, it reverses the process to recharge your battery bank.
-
Transfers Automatically: Detects loss of grid power and switches over to your battery supply within milliseconds.
-
Stabilizes Power: Protects sensitive electronics by keeping voltage and frequency consistent.
In short, it acts as both your power manager and safety net—keeping energy flowing exactly where it needs to go, without interruptions.
🧩 Features That Matter Most
✅ Transfer Switch Rating (Amps)
Match your inverter’s pass-through capacity to your essential loads. A 30-amp inverter is usually enough for a small backup panel, while larger homes or well pumps may need a 50-amp model.
✅ Charging Output (Amps)
A higher charge current lets you refill batteries faster, cutting down generator run time. You want your generator working hard and efficiently for short periods—not idling all day.
✅ Battery Chemistry Support
Modern units can be programmed for AGM or LiFePO₄ batteries. Make sure the voltage settings match your specific battery type so you don’t shorten its lifespan.
✅ Surge and Continuous Ratings
Your inverter’s continuous wattage covers everyday running loads. Surge capacity handles heavy start-ups like refrigerators or water pumps that can momentarily draw two to three times their rated power.
✅ Idle / Eco Mode
When only light loads are running, eco mode reduces standby draw. That means longer silent runtime overnight without draining your battery unnecessarily.
💡 Pro Tip
Choose an inverter / charger that’s slightly larger than what you think you need. That extra capacity gives you flexibility to add another fridge, freezer, or even solar charging input later without replacing equipment.
🔋 Sizing Your Battery Bank (kWh)
Getting the right battery size is the foundation of an efficient hybrid system.
Too small, and you’ll run your generator all night.
Too large, and you’ll spend money on storage capacity you’ll never use.
The goal is to balance daily energy needs, depth of discharge, and recharge speed so your setup runs efficiently day after day.
⚡ Step 1 – List Your Essentials
Start by writing down every appliance or circuit you’ll power during an outage—refrigerator, freezer, lights, internet, and maybe a fan or small heater.
Add the wattage of each item and estimate how many hours per day you’ll use it.
| Appliance | Watts | Hours per Day | Daily kWh |
|---|---|---|---|
| Refrigerator | 150 | 24 | 3.6 |
| Router + Modem | 25 | 24 | 0.6 |
| Lights (LED mix) | 100 | 5 | 0.5 |
| Misc Electronics | 75 | 5 | 0.4 |
| Total ≈ | — | — | 5.1 kWh/day |
Your daily usage number becomes the starting point for your battery sizing math.
🔋 Step 2 – Apply Efficiency & Depth-of-Discharge
Batteries and inverters aren’t 100 % efficient.
Multiply your daily total by ≈ 1.1 to 1.2 to account for conversion losses, and divide by the portion of the battery you actually use:
| Battery Type | Usable Capacity | Notes |
|---|---|---|
| AGM / Gel | ≈ 50 % usable | Cheaper, heavier, lower cycle life |
| LiFePO₄ | ≈ 90 % usable | Best choice for daily cycling |
Example: 5 kWh × 1.15 ÷ 0.9 = ≈ 6.4 kWh bank needed.
🔌 Step 3 – Match Voltage & Capacity
Most hybrid setups use 12 V, 24 V, or 48 V banks.
Higher voltage = lower current = smaller wire sizes.
When you combine batteries, you can wire them:
-
In series to increase voltage (12 V + 12 V = 24 V)
-
In parallel to increase amp-hours (100 Ah + 100 Ah = 200 Ah)
If you’re just starting, a 24 V bank (2–4 batteries) offers a good balance of simplicity and performance.
🧰 Step 4 – Real-World Examples
-
Basic Setup (Weekend Cabin)
• 2 × 100 Ah LiFePO₄ 12 V = 2.4 kWh usable
• Runs fridge + lights ≈ ½ day
• Recharges quickly with small generator -
Mid-Size Home Backup
• 4 × 200 Ah LiFePO₄ 12 V = ≈ 8 kWh usable
• Handles fridge, well pump, lights overnight -
Extended Hybrid System
• 10 kWh bank paired with 6 kW inverter
• Covers typical day load with short morning generator recharge

💡 Pro Tip
Buy batteries with a built-in BMS (battery management system).
It prevents over-charge, over-discharge, and temperature-related damage—especially when recharging from a generator that doesn’t maintain perfect voltage regulation.
⛽ Generator Charging Settings (Run Smart, Not Constant)
Once your battery bank is sized, the next step is teaching your generator to work efficiently.
Most owners run their units far too long at low load—burning fuel for very little output.
With the right charging setup, your generator runs harder for shorter periods, topping off your batteries quickly and shutting down to save fuel.
⚙️ Set Your Charge Current
Load the generator between 40 % – 80 % of its rated output.
That’s where it produces the most energy per gallon.
Example:
If you have a 5 kW generator, a charging load of 2 – 4 kW is ideal.
Running lower wastes fuel; higher risks tripping breakers.

⚡ Program Voltage Limits and Profiles
| Battery Type | Bulk / Absorb Voltage | Float Voltage | Notes |
|---|---|---|---|
| AGM | 14.4 – 14.7 V | 13.5 – 13.8 V | Avoid frequent equalize |
| LiFePO₄ | 14.2 – 14.6 V | 13.4 – 13.6 V | Follow BMS specs |
🔌 Adjust Start and Stop Triggers
If your system supports auto-start:
-
Start around 40–50 % state of charge
-
Stop around 85–90 %
This keeps your batteries in their healthy range and avoids overnight noise.
🧰 Fuel-Saving Routine
1️⃣ Morning: Run generator while making coffee and bulk-charging.
2️⃣ Daytime: Let inverter handle power silently.
3️⃣ Evening: Top off if needed before bed.
💡 Pro Tip
Keep a laminated card near your inverter with your exact charge settings and generator notes.
It’s the easiest way to stay consistent under stress.
🔀 Transfer Priority (A → B → C): Keep Power Flowing Automatically
Transfer priority decides which power source runs first.
It’s the brain logic that ensures seamless handoffs from utility to batteries to generator.
⚡ The Standard Order: A → B → C
A – Utility or Solar Input
Feeds house loads and charges batteries when available.
B – Battery / Inverter Output
Takes over instantly when power drops.
C – Generator Input
Kicks in when batteries hit recharge threshold.
⚙️ How It Works
1️⃣ Grid fails → inverter switches to battery power.
2️⃣ Batteries discharge → generator starts and recharges them.
3️⃣ Power returns → system switches back automatically.
⚡ Transfer Time
Fast transfer time (10–20 ms) keeps electronics from flickering.
If yours is slower, upgrading to an inverter with faster switching relays prevents those blips.
💡 Pro Tip
Label each position clearly—A, B, and C—so anyone can understand your system instantly during an emergency.
📊 Example Wiring Diagrams (Visualizing Your Hybrid Setup)
A wiring diagram shows how everything connects: generator, inverter / charger, batteries, and switchgear.
⚙️ Basic “Essentials Subpanel” Layout
1️⃣ Utility → interlock or manual transfer switch → inverter input
2️⃣ Generator → outdoor inlet box → same inverter input
3️⃣ Inverter output → essentials subpanel (fridge, lights, modem)
4️⃣ Batteries → inverter DC input with fuses/disconnects

🔋 Expanded “Full Hybrid” Layout
1️⃣ Utility + generator → inverter AC inputs
2️⃣ Solar → inverter or charge controller → battery bank
3️⃣ Inverter → split-phase 120/240 V output → essentials or whole-home panel
🧠 Safety Notes
-
Use properly rated cables and connectors
-
Fuse every battery positive line
-
Weatherproof outdoor conduit
-
Separate neutral and ground correctly

💰 Cost & Build Paths (2025)
🔹 Tier 1 – Starter Hybrid
-
3–6 kWh LiFePO₄ battery bank ([Affiliate Link])
-
2–3 kW inverter / charger ([Affiliate Link])
-
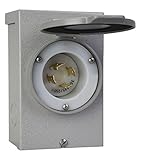
30A inlet box + cord ([Affiliate Link])
✅ Runs basic loads for 8–10 hours
✅ Quick recharge sessions
✅ Ideal for cabins and apartments
🔹 Tier 2 – Family Essentials
-
7–10 kWh battery bank ([Affiliate Link])
-
4–6 kW inverter / charger ([Affiliate Link])
-
30A / 50A inlet ([Affiliate Link])
-
Dual-fuel generator ([Affiliate Link])
✅ Handles fridge, lights, well pump
✅ Nearly silent operation for hours
🔹 Tier 3 – Robust Hybrid
-
10–15+ kWh LiFePO₄ bank ([Affiliate Link])
-
8–12 kW hybrid inverter ([Affiliate Link])
-
50A inlet + 6/3 cable ([Affiliate Link])
-
5–8 kW generator ([Affiliate Link])
✅ Whole-home coverage
✅ Runs on solar or generator interchangeably
💡 Pro Tip
Invest in a quality inverter early—you can always expand batteries later, but rewiring a poor inverter choice costs more down the line.
❄ Cold-Weather & Edge-Case Tips
Cold weather reduces battery capacity and fuel efficiency.
Prepare your system for temperature swings and longer runtime cycles.
🧊 Battery Performance
-
Use self-heating LiFePO₄ batteries ([Affiliate Link])
-
Keep batteries indoors when possible
-
Expect ~15% less capacity below freezing
⚙️ Generator & Fuel
-
Use synthetic 5W-30 oil ([Affiliate Link])
-
Shelter propane tanks from wind
-
Stabilize fuel and rotate stock ([Affiliate Link])
⚡ Long Cable Runs
-
Upgrade to 10-gauge outdoor cords over 50 ft ([Affiliate Link])
-
Apply dielectric grease to prevent corrosion ([Affiliate Link])
💡 Pro Tip
Label all components — Generator → Inverter → Battery → Solar — for easy troubleshooting in low light.
🧾 Maintenance & Monthly Test Protocol
Monthly and seasonal testing keeps your hybrid system reliable.
🔧 Monthly Mini Test
-
Disconnect utility to confirm inverter takeover
-
Check battery voltage after 15 min
-
Start generator, ensure smooth transfer

🧰 Quarterly Maintenance
-
Clean and grease plugs
-
Replace old fuel
-
Clean inverter fan vents
⚙️ Annual Load Test
Run generator at ~75% for 30 minutes; watch for smoke or surging.
Use a watt meter or clamp meter to verify draw.
💡 Pro Tip
Keep a maintenance log taped to your panel—log runtime hours, test dates, and notes.
🏁 Conclusion
A solar generator hybrid turns ordinary backup power into a smart, fuel-saving energy system.
By combining an inverter / charger, a properly sized battery bank, and a tuned generator, you can stretch every drop of fuel, stay quiet through the night, and keep your essentials running even during long-term outages.
With simple monthly testing, clean wiring, and proper charge settings, this hybrid setup will stay dependable for years.
It’s the perfect balance of technology and practicality — quiet, efficient, and always ready when the grid goes down.
💡 Simple systems work best when emergencies aren’t simple.
🔗 Further Reading
🧭 Return to the Pillar Hub
For complete strategies on off-grid power and emergency systems, return to
Grid-Down Survival Power: 2025 Off-Grid Energy Playbook →