Generator Power Connections: Safe Setup for Home Backup
Safe generator power connections are essential when using a portable generator for home backup power. Owning a generator is only half the solution when the electricity goes out. You also need a safe way to deliver that power to the appliances or household circuits you depend on.
This post contains affiliate links. I may earn a small commission at no extra cost to you. Learn more.
That connection matters more than many generator owners realize. An undersized extension cord, overloaded connection, damaged plug, or improper connection to household wiring can create excessive voltage drop, overheating, equipment problems, shock hazards, or fire risk.
And if a portable generator is connected to a home’s electrical system incorrectly, it can create an even more serious problem: backfeeding power onto utility lines.
This guide explains the major pieces of a safer portable-generator connection system and how they work together. Depending on your setup, that may include:
- Properly rated generator cords
- Outdoor power inlet equipment
- Manual transfer switches or approved interlock equipment
- Overcurrent protection
- Selected household circuits or individual appliances
We’ll follow the basic power path:
Generator → Cord → Power Inlet → Transfer Equipment → Essential Circuits
Not every generator setup uses every component in that chain. A homeowner powering a refrigerator directly with a heavy-duty extension cord has different requirements from someone connecting a generator to selected circuits in a home’s electrical panel.
If you’re choosing a generator for the first time, compare current models in our Best Survival Generators 2025 guide.
This guide is also part of our larger Grid-Down Survival Power: Complete Off-Grid Energy Guide, which covers generators, battery systems, solar power, fuel planning, and long-duration outage strategies.
The Three Main Parts of a Home Generator Connection
Generator Cord
Carries power from the generator to compatible connection equipment. The cord’s amperage, conductor size, plug configuration, length, and rating must match the intended application.
Weather-Resistant Power Inlet
Provides an exterior connection point so the generator can remain outdoors while power is delivered to properly installed equipment inside the home.
Transfer Switch or Approved Interlock System
Prevents generator power and utility power from being connected to the home’s electrical system in an unsafe configuration. The correct equipment depends on the electrical panel, generator, and installation.
A safe generator setup isn’t about buying the thickest cord or largest generator you can find. It’s about making sure every component in the power path is properly rated, compatible, and used the way its manufacturer intended.
Understanding the Generator Power Path
A safe generator setup depends on every component between the generator and the equipment you’re trying to power. The generator may have plenty of capacity, but an undersized cord, damaged connector, incompatible plug, or improperly installed transfer system can still create problems.
For a generator connected to selected household circuits, the basic power path may look like this:
Generator → Generator Cord → Power Inlet → Transfer Equipment → Breaker Panel → Selected Circuits
For a simpler setup powering individual appliances directly, the path may be:
Generator → Properly Rated Extension Cord → Appliance
Every component has electrical limits. The cord must be rated for the load, plugs and receptacles must be compatible, and any equipment connecting a generator to household wiring must be designed and installed for that purpose.
What Each Component Does
- Generator: Produces AC electricity for the loads you intend to operate. Portable generators may provide 120V only or both 120V and 240V outputs, depending on the model.
- Extension Cord or Generator Cord: Carries electricity from the generator to an appliance, distribution device, or approved power inlet. Conductor size, length, amperage rating, plug configuration, and environmental rating all matter.
- Power Inlet: Provides an exterior connection point for a properly designed home-backup installation, allowing the generator itself to remain outdoors.
- Transfer Equipment: Prevents the home’s generator supply from being improperly connected to utility power while allowing approved household circuits to receive generator power.
- Loads: Refrigerators, freezers, pumps, lights, electronics, and other equipment ultimately determine how much power the system must safely deliver.
If lights dim significantly or a motor struggles when another appliance starts, don’t automatically assume the extension cord is responsible. The cause could be excessive voltage drop, generator overload, motor startup demand, a poor connection, or another electrical problem. Reduce the load and investigate the cause rather than continuing to operate equipment under abnormal conditions.
Extension Cords and Generator Cables
Extension cords are one of the simplest ways to power individual appliances from a portable generator, but they need to be selected according to the electrical load and operating conditions.
The important factors are:
- Wire gauge
- Cord length
- Rated amperage and wattage
- Generator receptacle and plug configuration
- Indoor or outdoor rating
- Condition of the cord, plug, and receptacle
Understanding Wire Gauge
American Wire Gauge (AWG) identifies conductor size. With commonly used generator extension cords, a lower gauge number means a larger conductor. For example, 10 AWG conductors are larger than 12 AWG conductors.
Larger conductors generally have lower electrical resistance and are better suited to carrying higher current or reducing voltage drop over longer distances. But wire gauge alone does not determine whether a cord is appropriate.
You must also check the cord’s actual electrical rating, length, plug and receptacle type, temperature rating, and the requirements of the equipment being powered.
Don’t Size a Generator Cord by Gauge Alone
Use a cord that is specifically rated for the voltage and current of the intended load. Never exceed the cord manufacturer’s rating or the rating of the generator receptacle supplying it.
Why Cord Length Matters
Voltage drop increases as conductor length and electrical current increase. A longer cord therefore may require larger conductors to maintain acceptable voltage at the load.
There is no universal rule that says every additional 25 feet requires moving to the next wire gauge. The correct size depends on the actual current, total conductor length, acceptable voltage drop, and equipment requirements.
For generator use, keep cord runs only as long as necessary and avoid unnecessary connections. If a long run is unavoidable, determine the appropriate conductor size for the actual load instead of relying on a fixed distance rule.
Also avoid daisy-chaining extension cords when a single properly sized cord can do the job. Additional plugs and receptacles create more connection points that can become loose, damaged, wet, or overheated.

Use Cords Rated for Outdoor Conditions
Portable generators must operate outdoors, which means cords used around them may be exposed to rain, snow, sunlight, abrasion, and temperature extremes.
Use extension cords specifically rated for outdoor use and inspect the jacket and markings before relying on them. Common cord designations may include markings such as SJTW or STW, but the complete marking and manufacturer specifications should be checked rather than assuming that every cord with a particular label is suitable for every generator load.
Keep plugs and connections out of standing water and protect connections from weather according to the cord and equipment manufacturers’ instructions. Replace cords with damaged insulation, loose plugs, burned contacts, or other visible defects.
Choose the Cord for the Connection You’re Making
A cord powering a refrigerator from a 120V receptacle is not necessarily the same type of cord used to connect a 30A generator receptacle to a compatible power inlet.
For higher-capacity generator connections, you may encounter locking configurations such as L14-30. The plug configuration, voltage, amperage, conductor arrangement, generator receptacle, and inlet must all be compatible.
Do not use an adapter simply because the plugs physically fit. An adapter does not increase the electrical capacity of the weakest component in the system.
Label and Inspect Your Generator Cords
Before storing your backup equipment, label generator cords with their length, conductor size, amperage rating, and intended use. That makes it much easier to select the correct cord during an outage.
Periodically uncoil and inspect them as well. Look for cuts, crushed sections, damaged insulation, loose connectors, discoloration, corrosion, or evidence that a plug or receptacle has overheated.
A generator cord is part of the electrical system, not just an accessory. If it cannot safely carry the intended load, the fact that the generator itself has enough wattage doesn’t matter.
Generator Plug Types and Adapters
Before buying a generator cord, power inlet, or adapter, identify the receptacles on your generator. The connector configuration tells you important information about the voltage, amperage, and type of connection the equipment was designed to support.
A generator with several receptacles may also support different types of loads, so don’t choose a cord based only on the generator’s total wattage.
Common Generator Receptacles
- L14-30: A four-wire locking configuration commonly used for 30A, 120/240V generator connections. It is often used with compatible generator cords and power inlets for home-backup systems.
- TT-30: A 30A, 120V connection commonly associated with RV applications. Despite the similar 30A rating, it is not electrically equivalent to an L14-30 connection.
- NEMA 5-15 and 5-20: Familiar 120V receptacle configurations commonly used for individual appliances, tools, lights, and extension-cord loads.
Other generators may use different receptacles, particularly higher-output models. Always identify the exact receptacle configuration and check the generator manual before selecting cords, inlets, or adapters.
Never modify, force, or defeat a plug so it fits a different receptacle. Different connector configurations may represent different voltage, amperage, grounding, or conductor arrangements. Match the equipment by its electrical specifications and connector type.
Be Careful With Generator Adapters
Adapters can be useful in specific applications, but they do not increase the capacity of the equipment connected to them. The allowable load is still limited by the lowest-rated compatible component in the power path.
An adapter should also preserve the correct electrical configuration for the intended equipment. Voltage, grounding, neutral configuration, conductor arrangement, and overcurrent protection all matter—not simply whether one plug can be converted into another.
If you need an adapter, use one specifically designed and listed for the intended application and follow the generator and adapter manufacturers’ instructions.
For a planned home-backup system, it is generally better to choose compatible cords, inlets, and transfer equipment from the beginning rather than build the system around a collection of adapters.
Power Inlet Boxes: Bringing Generator Power to Transfer Equipment
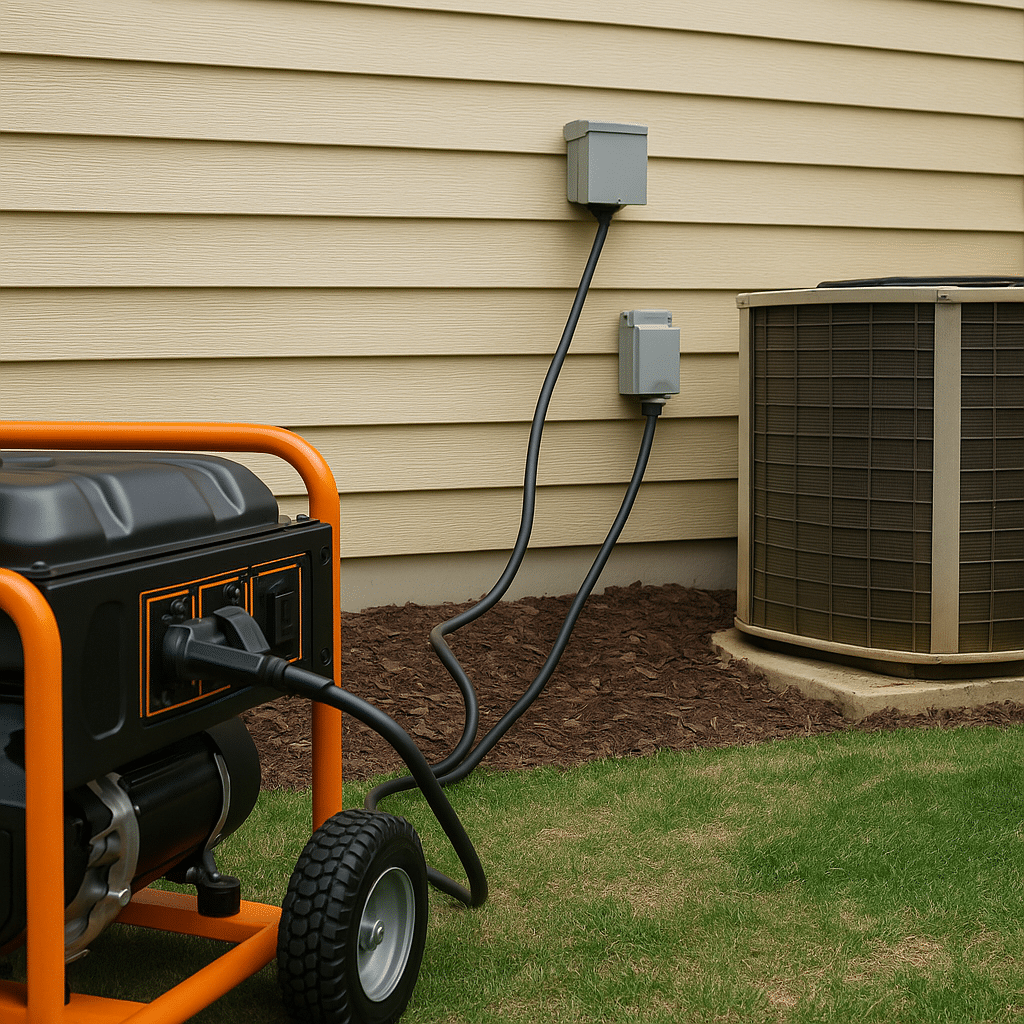
A power inlet provides an exterior connection point for a properly designed generator backup system. Instead of routing a generator cord through an open door or window, the generator remains outdoors and connects to an exterior inlet that feeds approved transfer equipment.
The inlet itself does not make a generator installation safe. It is one component of a system that must also include compatible wiring, overcurrent protection, and transfer equipment that prevents unsafe interaction between generator power and utility power.
Why a Power Inlet Is Useful
- Keeps the portable generator outdoors where it must be operated
- Provides a dedicated connection point for the generator cord
- Eliminates the need to route a generator cord through a door or window
- Can provide a cleaner connection to approved transfer equipment
- Helps protect the connection from weather when properly selected and installed
Remember that an inlet does not eliminate carbon-monoxide risk by itself. The generator must still be positioned and operated according to the generator manufacturer’s instructions and current safety guidance, away from doors, windows, vents, and other openings where exhaust could enter the building.
Choosing the Correct Power Inlet
Match the amperage. The inlet must be properly rated for the circuit and equipment it serves. Common portable-generator installations may use 30A or 50A equipment, but the correct rating depends on the generator and system design.
Match the connector configuration. An L14-30 generator connection requires compatible equipment. Other generator receptacles may require different inlet and cord configurations.
Choose equipment rated for the location. An exterior inlet should be designed for outdoor installation and installed in accordance with its listing and manufacturer instructions.
Plan the installation location. The inlet should be located where the generator can be operated safely while allowing a practical connection to the home’s transfer equipment. Generator exhaust safety is more important than simply minimizing wire length.

Existing Power Inlet Options
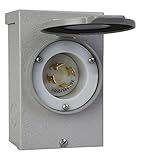
Reliance PB30 30A (L14-30) — A 30A power inlet option for compatible generator connection systems.
Generac 6343 50A — A higher-amperage inlet option for compatible systems requiring 50A equipment.
Midwest U013P 30A — Another 30A inlet option for appropriately matched generator systems.
Before buying any inlet, verify that its amperage, voltage, connector configuration, enclosure rating, and other specifications match the rest of your system.
Permanent Wiring Requires System-Specific Installation
There is no single conductor size, conduit type, grounding arrangement, or neutral configuration that applies to every generator inlet installation.
Those requirements depend on factors including circuit amperage, conductor type, installation method, distance, transfer equipment, generator configuration, electrical panel, and applicable electrical requirements.
Neutral and grounding arrangements deserve particular attention. Some portable generators have a bonded neutral while others use a floating neutral, and the correct configuration can depend on the transfer equipment and how the system is connected.
For a permanent inlet, transfer switch, interlock, or other connection to household wiring, follow the equipment manufacturers’ instructions and applicable electrical requirements. This is also an appropriate point to involve a qualified electrician.
Don’t start with a universal shopping list such as “30A generator + 10-gauge cord + six-circuit transfer switch.” Start by identifying the circuits and appliances you need during an outage. Then determine their running and startup loads and select a generator, cord, inlet, transfer equipment, and wiring that are compatible with those requirements.
For many households, the goal is not to power every circuit in the home. Prioritizing refrigeration, communications, lighting, medical equipment, heating-system controls, and other essential loads can reduce generator size and fuel consumption while making load management easier.
Transfer Switches and Interlocks: Preventing Generator Backfeed
If a portable generator will supply power to circuits in your home’s electrical system, approved transfer equipment is one of the most important parts of the installation.
The primary purpose is to prevent the generator and utility supply from being connected to the home’s electrical system at the same time. Without proper isolation, generator power can backfeed into utility lines, creating a potentially deadly hazard for utility workers and others.
Transfer equipment also gives you a controlled way to choose which household circuits receive generator power during an outage.
Why Transfer Equipment Matters
A properly designed generator connection prevents an unsafe connection between utility power and generator power. The exact equipment you need depends on your electrical panel, generator, inlet, circuits, and local electrical requirements.
For portable generators, two common approaches are a manual transfer switch and a panel-specific interlock system.
Manual Transfer Switch
A manual transfer switch allows selected household circuits to be supplied from either utility power or the generator while keeping the two sources properly isolated.
Depending on the transfer switch, those selected circuits might include:
- Refrigerator and freezer
- Sump pump
- Furnace or heating-system controls
- Lighting circuits
- Communication equipment
- Other essential household loads
Some manual transfer switches include individual circuit controls and watt meters that can make load management easier during an outage.
The advantage is simplicity: you decide in advance which circuits are important and manage those circuits from the transfer equipment rather than running extension cords throughout the house.
Interlock Kit
An interlock system works differently. Instead of creating a separate group of transferred circuits, an approved interlock mechanically prevents the generator breaker and main utility breaker from being switched on at the same time.
This can allow you to select circuits directly from the home’s main panel, but it also means you must actively manage the electrical load so the generator is not overloaded.
Interlock kits are panel-specific. Do not choose one simply because it looks similar or fits the same brand of panel. The interlock must be approved for the exact panel configuration and installed according to its instructions and applicable electrical requirements.
Manual Transfer Switch vs. Interlock
Manual transfer switch: Useful when you want a predetermined group of essential circuits and straightforward load management.
Interlock: Can provide more flexibility in choosing circuits from the main panel, but requires careful load management and must be compatible with the specific electrical panel.
Neither option should allow generator power and utility power to energize the home’s wiring at the same time.
Transfer Equipment Options
Reliance 310D 30A Kit — A manual transfer-switch option for a compatible generator backup installation.

Square D QO Interlock — An interlock option for compatible Square D QO panels. Verify the exact panel and interlock model before purchasing.
Connecticut Electric 6-Circuit — A compact transfer-switch option for a smaller group of essential circuits.
Know Your System’s Operating Procedure Before an Outage
Don’t wait until the lights go out to learn how your transfer equipment works. Label the essential circuits, know which loads your generator can support, and keep the generator and transfer-equipment instructions accessible.
Startup and shutdown procedures can differ depending on the generator and transfer equipment. Follow the manufacturers’ specified sequence for your particular system rather than relying on one universal procedure.
If you’re installing a power inlet, transfer switch, interlock, generator breaker, or other equipment connected to the home’s electrical system, the installation should comply with the equipment listing and applicable electrical requirements. When you’re unsure about panel compatibility, neutral and grounding arrangements, or permanent wiring, use a qualified electrician.
Fuel Type and Runtime Strategy
Your generator’s fuel affects available output, storage planning, maintenance, and how long you can continue operating during an extended outage.
For blackout preparedness, the important question isn’t simply which fuel is “best.” It’s which fuel you can store safely, maintain properly, and realistically obtain when local supplies are disrupted.
Gasoline
Gasoline is widely available during normal conditions and many portable generators produce their highest rated output when operating on gasoline.
Its biggest drawback for preparedness is storage. Gasoline degrades over time, and old fuel can contribute to starting problems and fuel-system deposits.
- Often provides the generator’s highest available output
- Widely available under normal conditions
- Requires safe fuel storage and rotation
- May benefit from an appropriate fuel stabilizer when stored
- Can create carburetor and fuel-system problems if neglected
Always follow the generator manufacturer’s recommendations for fuel type, storage, maintenance, and long-term shutdown procedures.
Propane
Propane is attractive for emergency preparedness because properly stored cylinders do not experience the same fuel-degradation problems as stored gasoline.
However, many dual-fuel generators produce less maximum wattage on propane than they do on gasoline. The actual difference varies by generator, so use the manufacturer’s gasoline and propane output ratings rather than assuming a fixed percentage.
- Well suited to longer-term fuel storage
- Avoids stale-gasoline and carburetor issues associated with gasoline storage
- May produce lower maximum generator output than gasoline
- Requires properly sized cylinders, regulators, hoses, and connections
- Runtime depends on electrical load, generator efficiency, tank size, and operating conditions
Propane cylinders still require proper storage, inspection, and handling. Follow applicable safety requirements and the cylinder and generator manufacturers’ instructions.
Dual-Fuel Generators
A dual-fuel generator gives you the ability to operate from either gasoline or propane. That flexibility can be particularly useful during an extended outage because you aren’t completely dependent on one stored fuel source.
For example, you might use propane when loads are modest and reserve gasoline for situations where your particular generator provides greater output on gasoline. The best strategy depends on the generator’s actual ratings and the loads you’re running.
Build a Fuel Plan Before the Outage
Don’t estimate generator runtime from tank size alone. Check the manufacturer’s published fuel-consumption information and, when practical, measure how your own generator performs while powering your planned emergency loads.
Record how much fuel you use and how long the generator operates. That gives you a much more useful basis for estimating how many hours or days your stored fuel can support.
Instead of planning to run the generator continuously, consider whether your essential loads can be managed in scheduled operating periods. Refrigeration, battery charging, water pumping, and other loads may not require the generator to run around the clock.
Reducing unnecessary runtime can stretch stored fuel considerably during a multi-day outage.
Never operate a fuel-burning generator inside a home, garage, basement, or enclosed structure. Follow current carbon monoxide safety guidance, including keeping generators at least 20 feet from the home when feasible, with exhaust directed away from openings.
Testing and Maintaining Your Generator Setup
A backup-power system should be tested before you actually need it. The goal isn’t simply to confirm that the engine starts. You also want to know that the generator, cords, connections, transfer equipment, and planned loads work together correctly.
Routine Generator Test
Follow the testing and maintenance schedule specified by your generator manufacturer. During a routine test, you can also inspect the rest of your backup-power equipment.
- Start and operate the generator according to its manual
- Test it with an appropriate electrical load
- Inspect cords, plugs, receptacles, and connections for damage
- Check for abnormal heat, discoloration, loose connections, or unusual odors
- Verify that planned essential loads operate normally
- Check fuel, oil, battery, and other maintenance items specified by the manufacturer
If a plug, cord, or connection becomes unusually hot, disconnect the load safely and determine the cause before continuing to use it.
Test the System Under Realistic Loads
Periodically simulate the loads you expect to operate during an actual outage. Rather than aiming for an arbitrary percentage of generator capacity, test the specific combination of appliances and circuits in your emergency plan while remaining within the generator’s ratings.
For a dual-fuel generator, test both fuels periodically if the manufacturer provides for operation on both. You don’t want the first propane test—or the first gasoline test—to happen during a real outage.
Record useful information such as:
- Generator runtime
- Approximate electrical load
- Fuel consumed
- Appliances or circuits operated
- Maintenance performed
- Any startup, transfer, or connection problems
That log becomes increasingly valuable over time because it shows how your actual backup system performs rather than relying entirely on estimates.
Inspect Connections Instead of Treating Them Automatically
Keep plugs and receptacles clean, dry, and in good condition. Do not automatically apply contact cleaner, dielectric grease, or other products to electrical contacts unless the equipment manufacturer recommends their use for that specific connection.
Real-World Generator Setup Examples
Generator setups should be built around the loads you actually need to operate. The following examples show how backup-power priorities can change between an urban home, a suburban property, and a rural location.
These are planning examples rather than universal equipment specifications. Generator size, cord requirements, transfer equipment, fuel consumption, and electrical installation should always be matched to the actual equipment and loads.
1. Urban Blackout: Essential Loads Only
For a short outage in a smaller home, the goal may simply be to protect food, maintain communication, and provide basic lighting.
Example generator: Small dual-fuel inverter generator
Primary loads: Refrigerator, LED lighting, router, phones, and small electronics
Connection: Properly rated outdoor extension cords to individual appliances
This type of setup doesn’t necessarily require connecting the generator to the home’s electrical panel. Keeping the load small also reduces fuel consumption and makes load management easier.
Operate the generator outdoors according to the manufacturer’s required clearances and current carbon-monoxide safety guidance. Keep exhaust away from doors, windows, vents, crawlspaces, and other openings where fumes could enter the building.
Instead of assuming a fixed fuel-consumption rate, determine runtime from the generator manufacturer’s specifications and your actual electrical load.
2. Suburban Blackout: Multiple Essential Circuits
A suburban home may need to support more equipment during a multi-day outage, particularly if the home depends on a sump pump, furnace controls, freezer, or well system.
Example generator: Mid-size portable generator
Connection: Compatible power inlet with approved transfer equipment
Primary loads: Refrigerator, freezer, selected lighting, communications, heating-system controls, and other essential circuits
Homes with well pumps, sump pumps, furnaces, or other motor-driven equipment require additional planning because startup demand can be considerably higher than normal running wattage.
Manage circuits according to priority and generator capacity rather than trying to operate every household load simultaneously.
Propane runtime cannot be predicted accurately from cylinder size alone. Generator load, engine efficiency, ambient conditions, generator model, and available tank capacity all affect actual runtime. Use the manufacturer’s consumption information as a starting point and test your own setup before relying on it.
3. Rural Property: Layered Backup Power
Rural homes and homesteads may have substantially different requirements because electricity can also be responsible for water pumping, multiple freezers, heating equipment, livestock systems, communications, and other essential infrastructure.
Example primary source: Larger portable or permanently installed generator
Connection: Properly designed transfer equipment matched to the electrical system
Secondary backup: Battery storage and solar charging where practical
A layered system can reduce generator runtime by allowing batteries to handle smaller loads while the generator is reserved for higher-demand equipment and battery charging.
Fuel reserves should be based on your measured or manufacturer-published fuel consumption, expected generator schedule, outage duration, and safe storage capacity rather than an arbitrary number of days.
Grounding and bonding can become more complicated when generators, transfer equipment, multiple buildings, and separately derived systems are involved. Do not assume that every building or generator automatically requires a separate grounding electrode. Follow the equipment instructions and applicable electrical requirements for the specific installation.
Common Generator Connection Mistakes
| Mistake | Why It Matters | Better Approach |
|---|---|---|
| Using an undersized or improperly rated cord | Can increase voltage drop, overheating risk, and poor equipment performance | Size the cord for the actual load, length, connection, and manufacturer requirements |
| Running generator cords through doors or windows | Can damage cords and may create an opening where generator exhaust can enter | For permanent home connections, use properly installed outdoor inlet and transfer equipment |
| Backfeeding through a household receptacle | Can energize wiring unexpectedly and create a potentially deadly hazard | Use approved transfer equipment designed for generator connection |
| Guessing about grounding or neutral configuration | An incorrect configuration can create electrical hazards or cause protective equipment to operate incorrectly | Follow the generator and transfer-equipment instructions and applicable electrical requirements |
| Operating too many loads at once | Can overload the generator or create excessive voltage drop during startup surges | Prioritize essential loads and manage high-demand appliances according to generator capacity |
| Never testing the complete system | Problems may not appear until an actual outage | Periodically test the generator, connections, transfer equipment, and planned emergency loads |
After an outage or test run, inspect your cords and connections, record generator runtime, and complete any maintenance required by the generator manufacturer. A few minutes of documentation can make the next outage much easier to manage.
Generator Backup Setups by Household Need
There is no single generator setup that works for every household. The right system depends on the appliances you need to operate, their startup and running loads, your generator’s output, your property, and whether you are powering individual appliances or connecting to household circuits.
Basic Essential-Load Setup
For a short outage, some households only need enough power for refrigeration, communication, lighting, and device charging.
- Small portable inverter generator
- Properly rated outdoor extension cords matched to the loads
- LED lighting and device chargers
- Refrigerator or freezer as capacity allows
This approach can be relatively simple because individual appliances can be connected directly with properly rated cords instead of connecting the generator to the home’s electrical panel.
Portable fuel-burning generators still require safe outdoor operation. They should not be operated in apartments, garages, enclosed porches, or other enclosed or partially enclosed spaces.
Family Essential-Circuit Backup
For a home that needs several essential circuits during a multi-day outage, a properly designed inlet and transfer system can provide a cleaner solution than running multiple extension cords throughout the house.
A typical system might include:
- Mid-size portable or dual-fuel generator sized for the planned loads
- Compatible generator cord and outdoor power inlet
- Manual transfer switch or approved panel-specific interlock
- Load plan for refrigeration, lighting, communications, heating-system controls, pumps, or other essential circuits
The generator should be sized for both normal running loads and the startup demand of motor-driven equipment. You may also need to stagger larger loads instead of operating everything simultaneously.
Extended-Outage or Rural Backup System
Rural properties and households preparing for longer outages may benefit from a larger, layered system.
Depending on the property, that could include:
- Higher-output generator sized for essential loads
- Compatible transfer equipment
- Battery storage for quiet, low-load operation
- Solar charging for additional energy redundancy
- Planned gasoline, propane, or dual-fuel reserves
- Surge protection where appropriate for the electrical system
A hybrid approach can reduce generator runtime by allowing batteries to handle smaller loads while the generator operates periodically for larger loads and battery charging.
Grounding and bonding requirements should be determined from the actual generator, transfer equipment, electrical system, and applicable requirements. Do not add a grounding electrode simply because the system uses a large generator.
Keep a Generator Load Plan
Keep a simple reference sheet with your backup-power equipment that lists the essential appliances and circuits you intend to operate, their approximate running wattage, and any known startup requirements.
Also record which loads should not be operated simultaneously. During an outage, that is far easier than trying to rebuild your power plan from memory.
Final Takeaway: Build the Connection System as Carefully as the Generator
A portable generator is only one part of a safe backup-power system. The electricity still has to travel through cords, plugs, inlets, transfer equipment, and household wiring before it reaches the appliances and circuits you depend on.
That means every part of the power path needs to be compatible with the next.
For individual appliances, that may be as simple as using properly rated outdoor extension cords and managing the generator’s load carefully.
For household circuits, the system becomes more involved. A compatible power inlet, approved transfer equipment, correct wiring, and proper neutral and grounding configuration all become important.
Generator Connection Checklist
Before relying on your generator during an outage, make sure the complete power path is ready:
- Size extension cords and generator cables for the actual load and distance
- Match plugs, receptacles, voltage, and amperage correctly
- Use cords and connection equipment rated for the environment where they will operate
- Never backfeed a home through a household receptacle
- Use approved transfer equipment when supplying household circuits
- Operate portable generators outdoors according to manufacturer and carbon-monoxide safety guidance
- Keep generator exhaust away from doors, windows, vents, and other building openings
- Manage startup and running loads within the generator’s capacity
- Follow the correct grounding and neutral configuration for your specific system
- Test the complete backup-power setup before an emergency
- Inspect cords, plugs, inlets, and connections for damage or overheating
- Maintain the generator and fuel system according to the manufacturer’s schedule
You can handle many parts of generator preparedness yourself, including calculating loads, organizing cords, testing equipment, planning fuel use, and deciding which appliances matter most.
Permanent electrical work is different. If the project involves a power inlet, transfer switch, interlock, generator breaker, panel wiring, or questions about neutral and grounding configuration, use the equipment manufacturer’s instructions and applicable electrical requirements. When necessary, have the installation performed or verified by a qualified electrician.
The goal isn’t to power everything in your house exactly as if the grid were still operating. The goal is to maintain the critical systems your household actually needs without creating a new emergency in the process.