Primitive Fire Starting: 8 Essential Techniques and Survival Tips
Primitive fire starting is one of the most valuable traditional outdoor skills you can learn. Long before matches, lighters, and ferrocerium rods, people developed ways to produce fire using friction, natural materials, and carefully prepared tinder.
This post contains affiliate links. I may earn a small commission at no extra cost to you. Learn more.
Learning these methods can improve your understanding of wood selection, fire preparation, and ember management. However, starting a fire without modern equipment requires patience, practice, and the right environmental conditions.
In this guide, you’ll learn six primitive fire starting methods, including the hand drill, bow drill, fire plough, fire saw, traditional flint and steel, and solar ignition. You’ll also learn how to select suitable wood, prepare tinder, transfer an ember into flame, and troubleshoot common problems.
For a broader overview of emergency fire-making equipment, visit our Ultimate Survival Fire Starters Guide. You can also explore additional outdoor fundamentals in our Core Survival Skills Guide.
Quick Answer: What Is the Easiest Primitive Fire Starting Method?
For many beginners, the bow drill is a practical friction-fire method to learn because the bow helps rotate the spindle without requiring continuous palm-rolling. Traditional flint and steel can also be effective once you have a suitable striker, sharp stone, and ember-catching material such as char cloth.
Important: Primitive fire starting is a practiced skill, not a dependable replacement for emergency ignition equipment. Carry a lighter, waterproof matches, or a ferro rod as a backup, and only practice fires where they are permitted.
What Is Primitive Fire Starting?
Primitive fire starting refers to methods of producing an ember or flame using traditional techniques and materials rather than relying on modern disposable ignition devices.
Most traditional methods fall into three categories:
- Friction methods: Generate heat by rubbing or rotating suitable pieces of wood against each other.
- Percussion methods: Produce sparks by striking suitable materials together, such as high-carbon steel against flint.
- Solar methods: Concentrate sunlight onto tinder until it begins to char or smolder.
These methods work differently, but they share one essential requirement: properly prepared tinder.
Producing smoke or a glowing coal is only the beginning. You must then transfer that heat into a larger tinder bundle and carefully develop a sustainable flame.
Before You Start: Fire Safety and Preparation
Fire-making skills should be practiced in a controlled, legal location with appropriate safety precautions.
Before attempting any method:
- Check local fire restrictions, burn bans, and campground regulations.
- Use an established fire ring or other approved fire area.
- Avoid practicing during high winds or dangerous wildfire conditions.
- Keep sufficient water and suitable extinguishing equipment nearby.
- Clear combustible material as required by the site or land manager.
- Never leave a fire, glowing ember, or hot equipment unattended.
- Make sure the fire and ashes are completely cold before leaving.
If open fires are prohibited, practice assembling your fire-making equipment and preparing tinder without attempting ignition.
1. Prepare Your Tinder and Kindling First
Good tinder preparation is one of the most important parts of primitive fire starting.
Friction-fire techniques usually produce a small, fragile ember rather than an immediate flame. That ember needs dry, finely textured material to develop into a larger fire.
Three Stages of Fire Material
- Fine tinder: Very dry, easily ignited material such as shredded inner bark, dry grass, or carefully prepared natural fibers.
- Small kindling: Thin, dry twigs and wood shavings that ignite once the tinder begins burning.
- Larger fuel: Progressively thicker sticks and split wood that maintain the fire after it is established.
Prepare all three stages before trying to generate an ember. Searching for additional fuel after your tinder catches fire can cause the flame to go out.
How to Make a Tinder Bundle
- Collect dry, fine natural fibers where gathering is permitted.
- Separate and loosen the fibers to create a fluffy texture.
- Form a loose nest with a small depression in the center.
- Place slightly coarser dry material around the outside.
- Keep the bundle protected from moisture until you’re ready to use it.
The goal is to provide enough surface area for a small ember to spread without packing the material so tightly that airflow is restricted.
What If the Wood Is Damp?
Wet conditions make primitive ignition considerably harder.
Where collecting wood is allowed, inspect dead branches that remain off the ground and split suitable pieces to expose potentially drier interior wood.
However, the interior of a branch is not guaranteed to be dry. Test your materials rather than assuming that every elevated branch or split log will work.
For additional advice, read our guide to starting a fire in wet weather.
2. Choose the Right Wood for Friction Fire
Wood selection affects how efficiently a friction-fire setup produces heat and fine combustible dust.
For beginners, dry, straight-grained, relatively soft wood is often easier to work with than very dense or resinous material.
Commonly used friction-fire materials include:
| Wood or Plant Material | Potential Use | Notes |
|---|---|---|
| Cedar | Fireboard, tinder fibers | Some dry cedar species work well; properties vary. |
| Basswood | Fireboard, spindle | Often favored for its workable texture. |
| Cottonwood | Fireboard, spindle | Can be useful when thoroughly dry. |
| Willow | Spindle, fireboard | Commonly used in traditional friction-fire practice. |
| Yucca | Hand-drill spindle, fireboard | Dry stalk material can be suitable for certain friction methods. |
| Mullein | Hand-drill spindle | Straight, thoroughly dry stalks are commonly used. |
No single species guarantees success. Moisture content, wood condition, spindle dimensions, pressure, and technique all influence the outcome.
For your first practice session, consider using a matched spindle and fireboard made from a known, suitable material rather than experimenting with random pieces of wood.
3. Hand Drill Method: Fire Starting Without a Bow
The hand drill is a traditional friction-fire technique that uses the palms to rotate a wooden spindle against a fireboard.
It requires minimal equipment but can be physically demanding, particularly for beginners.
What You Need
- A straight, dry spindle made from suitable plant material
- A dry fireboard
- A small ember-catching surface
- A prepared tinder bundle
- A safe, approved location for practicing
How to Start a Fire With a Hand Drill
- Prepare the fireboard. Make a small depression near one edge of the board to help position the spindle.
- Position the spindle. Place its working end in the depression and hold it upright.
- Rotate the spindle. Roll it between your palms while applying controlled downward pressure.
- Develop the socket. Continue until the spindle and board develop a stable contact area.
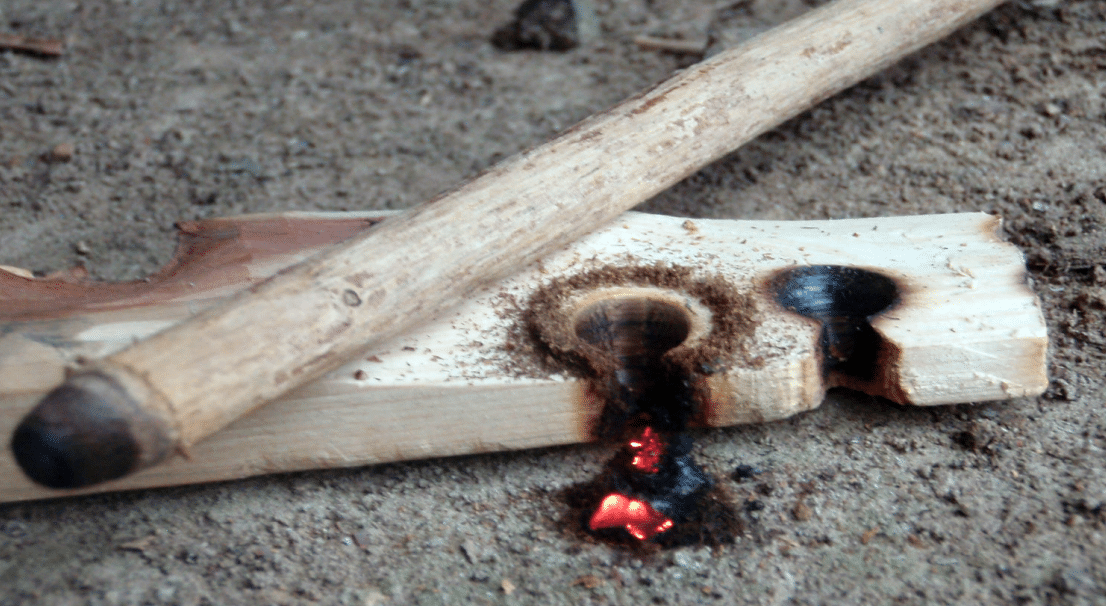
- Create a notch. Cut a notch from the board’s edge toward the socket so hot wood dust can collect.
- Resume drilling. Maintain steady rotation and pressure while watching for darkening dust and smoke.
- Check for an ember. When a cohesive pile of hot dust continues smoldering after drilling stops, allow the ember to strengthen before moving it.
- Transfer the ember. Carefully place it into your tinder bundle and gently encourage the tinder to ignite.
Why Hand Drills Are Difficult
Hand drilling requires coordination, endurance, and consistent pressure. The spindle may also slide down your palms, forcing you to reposition your hands repeatedly.
Common problems include:
- Wood that is too damp
- Inconsistent spindle rotation
- Insufficient pressure
- Excessive friction at the wrong contact point
- A notch that does not collect dust effectively
- Tinder that cannot sustain the ember
Beginner tip: Practice the drilling motion and ember transfer separately before expecting to complete the entire process in one attempt.
4. Bow Drill Method: A Practical Friction-Fire Technique
The bow drill is one of the most widely taught traditional friction-fire methods.
Instead of rotating the spindle with your palms, you use a bow and cord to turn it against a fireboard.
This can make sustained rotation easier, although correct alignment, pressure, and wood preparation still require practice.
Bow Drill Components
- Bow: A sturdy, slightly curved or straight piece of wood with a suitable cord attached.
- Bowstring: Cordage that grips and rotates the spindle.
- Spindle: A dry wooden shaft that rotates against the fireboard.
- Fireboard: A flat piece of suitable wood with a prepared socket and notch.
- Bearing block: A handhold that stabilizes the spindle’s upper end while minimizing unwanted friction.
- Ember catcher: A thin, suitable surface placed beneath the notch.
Step-by-Step Bow Drill Instructions
- Prepare the fireboard. Create a shallow socket near the edge of the board.
- Prepare the spindle. Shape its working end to maintain consistent contact with the socket.
- Attach the bowstring. Wrap the cord around the spindle so moving the bow rotates it.
- Stabilize the setup. Secure the fireboard and hold the spindle upright using the bearing block.
- Burn in the socket. Move the bow steadily until the contact surfaces are seated.
- Cut a notch. Make a dust-collecting notch from the board’s edge toward the socket.
- Resume bowing. Use controlled strokes and appropriate downward pressure to develop hot, dark wood dust.
- Form the ember. Continue until the dust forms a cohesive, self-sustaining smoldering coal.
- Transfer carefully. Move the ember to your prepared tinder bundle and gradually encourage a flame.
Bow Drill Troubleshooting
If the spindle slips, inspect the bowstring tension and spindle alignment.
If you produce smoke but no ember, check the wood’s moisture content, contact surfaces, and notch.
If the spindle binds or breaks, reduce excessive pressure and check that the components are aligned properly.
Remember that smoke alone does not mean you have produced a usable coal.
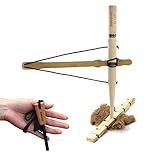
For beginners who want to practice with prepared components, a dedicated training kit can reduce some of the initial woodworking.
5. Fire Plough Method: Creating an Ember With a Wooden Groove
The fire plough, also called the fire plow, produces friction by repeatedly moving a wooden shaft along a groove in a wooden base.
Instead of spinning a spindle, you push and pull the shaft to generate heat and collect fine wood dust.
What You Need
- A dry, suitable wooden base
- A wooden shaft or rubbing stick
- A prepared groove
- A surface to catch hot wood dust
- Dry tinder ready for ember transfer
Basic Fire Plough Technique
- Prepare a stable wooden base with a shallow groove.
- Position the rubbing stick at an angle that allows firm contact with the groove.
- Move the stick repeatedly along the groove while applying controlled pressure.
- Allow fine wood dust to accumulate near the end of the channel.
- Continue until the collected dust develops a self-sustaining ember.
- Transfer the ember into a tinder bundle and carefully develop a flame.
Fire ploughing can require substantial effort. Wood selection and the shape of the contact surfaces make a significant difference.
There is no universally reliable combination of hardwood and softwood that works best in every location.
Practical advice: Test dry materials and refine your technique rather than relying on a specific rubbing angle or fixed number of strokes.
6. Fire Saw Method: Producing Heat With a Sawing Motion
The fire saw is another traditional friction-fire method, historically practiced in different forms using suitable natural materials, including certain types of bamboo.
In a typical arrangement, one prepared piece moves rapidly across another to generate hot dust and eventually a smoldering ember.
How the Fire Saw Works
- Select dry, appropriate materials that can withstand repeated friction.
- Prepare a contact surface that allows hot dust to accumulate.
- Stabilize the base material.
- Move the rubbing piece in a controlled sawing motion.
- Continue until a cohesive ember develops.
- Transfer the ember into prepared tinder.
The precise setup depends on the materials and regional technique.
Fire saws are useful to understand as part of traditional firecraft, but they are not always the most practical first method for beginners.
7. Traditional Flint and Steel: Starting Fire With Sparks
Traditional flint-and-steel fire starting differs from friction-fire methods.
It uses a sharp piece of suitable stone to shave tiny, hot particles from a high-carbon steel striker.
Those sparks can be caught by an appropriate ember-catching material and transferred into a tinder bundle.
What You Need
- A suitable high-carbon steel striker
- Flint, chert, or another suitable hard stone with an appropriate edge
- Prepared char cloth or another compatible ember-catching material
- A dry tinder bundle
How to Use Flint and Steel
- Place a small piece of char cloth where it can catch sparks safely.
- Hold the stone and striker securely, keeping fingers away from the striking edge.
- Strike the steel against the stone using controlled movements.
- Watch for a spark to land on the char cloth and produce a glowing spot.
- Carefully transfer the smoldering material into your tinder bundle.
- Gently encourage the ember until the tinder ignites.
Traditional flint and steel generally produce smaller, less intense sparks than a modern ferrocerium rod.
That is why properly prepared char cloth or another suitable ember-catching material is so valuable.
What Is Char Cloth?
Char cloth is cotton fabric that has been heated in a low-oxygen environment until it becomes carbonized.
It can catch relatively small sparks and hold a glowing ember long enough to transfer into tinder.
Char-cloth preparation involves high heat and potentially hazardous gases. Use established outdoor safety procedures and suitable equipment rather than improvising sealed containers or heating them indoors.
8. Solar Fire Starting: Using Concentrated Sunlight
Solar ignition uses concentrated sunlight to heat a small area of tinder until it begins to smolder.
Unlike friction methods, solar ignition requires suitable sunlight and an appropriate focusing device.
Materials for Solar Ignition
- A magnifying lens or suitable Fresnel lens
- Dry, dark-colored tinder
- A prepared tinder bundle
- A safe, controlled location
How Solar Ignition Works
- Place a small amount of suitable tinder on a safe, nonflammable surface.
- Position the lens between the sun and tinder.
- Adjust the distance until the concentrated light forms a small, bright point.
- Maintain the focused point on the tinder while watching for smoke or charring.
- If a sustained ember develops, transfer it carefully into your tinder bundle.
Solar ignition is most practical in strong, direct sunlight. Cloud cover, low sun angles, unsuitable lenses, and damp tinder can prevent ignition.
Never direct concentrated sunlight toward people, animals, or combustible material outside your controlled practice area.
How to Turn a Small Ember Into a Flame
Producing an ember is a major achievement, but you still need to convert it into a stable fire.
This step is particularly important when using hand drills, bow drills, fire ploughs, fire saws, or traditional flint and steel.
Ember-to-Flame Process
- Allow the ember to stabilize. Make sure the hot dust or char cloth continues glowing or smoldering.
- Move it carefully. Transfer the ember to the center of your prepared tinder bundle.
- Surround it with fine tinder. Gently bring the loose fibers around the ember without crushing it.
- Provide controlled airflow. Encourage the ember with gentle, steady breaths while keeping the bundle away from your face.
- Wait for ignition. As the tinder heats, it may begin to flame.
- Add small kindling. Place the burning tinder into an approved fire area and feed the flame gradually.
Wear appropriate protection and be aware that a tinder bundle may flare suddenly.
Never hold burning material close to your face or inhale smoke.
Best Fire Lays for Building a Sustainable Fire
Once your tinder catches flame, the next challenge is keeping the fire burning.
Different fire arrangements can help manage airflow and fuel placement.
Teepee Fire Lay
A teepee fire lay positions small sticks around a central tinder bundle.
It allows air to circulate through the structure and can develop a strong initial flame.
Lean-To Fire Lay
A lean-to arrangement uses a larger support piece with smaller kindling placed against it.
It can help organize fuel and provide some shielding, although it is not a substitute for avoiding dangerous wind conditions.
Log Cabin Fire Lay
A log cabin arrangement stacks fuel in alternating layers around the ignition area.
It can provide an organized structure as the fire develops, but it still requires monitoring and appropriate fuel management.
Whichever arrangement you choose, begin with small, dry fuel and gradually add larger pieces as the flame becomes established.
Primitive Fire Starting in Wet Weather
Rain and high humidity make traditional fire starting significantly more difficult.
Moisture can prevent friction-fire dust from reaching the conditions needed to form a stable ember.
It can also make tinder difficult to ignite and sustain.
Wet-Weather Preparation Tips
- Look for naturally sheltered, dry material where collection is permitted.
- Split suitable deadwood to check for drier interior sections.
- Keep prepared tinder protected in a waterproof container.
- Use a tarp or other suitable shelter to protect the work area from precipitation, while keeping it safely clear of flames and sparks.
- Practice using dry materials before attempting difficult wet-weather conditions.
- Carry modern ignition backups rather than relying entirely on friction fire.
For a more detailed approach, read How to Start a Fire in Wet Weather.
Modern Fire Starters Every Survival Kit Should Include
Primitive fire starting is a valuable skill, but modern ignition tools are generally faster and more dependable during an emergency.
A practical survival fire kit should include more than one ignition method.
Emergency Fire-Starting Kit Checklist
Consider packing the following items in a waterproof or water-resistant container:
- Reliable lighter
- Waterproof or stormproof matches
- Full-sized ferrocerium rod
- Compatible striker
- Commercial fire-starting tinder
- Dry natural tinder or prepared wood shavings
- Suitable waterproof storage
- Backup ignition method stored separately
Ferrocerium Rod
A ferro rod produces hot sparks when scraped with a compatible striker.
It can be useful when a lighter is unavailable or conditions make conventional ignition difficult.
Although a ferro rod can produce sparks after getting wet, the tinder still needs to be suitable for ignition.

Magnesium Fire Starter
Some emergency fire-starting tools combine a magnesium block with a ferrocerium striker.
Magnesium shavings can burn intensely once ignited, but they also create additional fire and burn hazards. Use only according to the manufacturer’s instructions and in a safe, permitted setting.

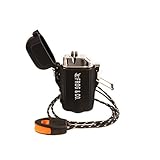
Stormproof Lighter
A dependable lighter can start a fire much more quickly than a friction-fire setup.
Wind-resistant designs can be useful in difficult conditions, although no lighter should be treated as completely weatherproof or failure-proof.
For more comparisons and buying advice, visit our complete survival fire starters guide.
Common Primitive Fire Starting Mistakes
Even experienced outdoor enthusiasts can struggle with primitive ignition when materials or conditions are unsuitable.
These are some of the most common problems:
- Using damp materials: Moisture reduces friction-fire performance and makes tinder harder to ignite.
- Choosing unsuitable wood: Some materials produce poor dust, excessive polishing, or unstable contact surfaces.
- Skipping tinder preparation: A small ember may die before you have a suitable bundle ready.
- Confusing smoke with an ember: Smoke alone does not prove that a self-sustaining coal has formed.
- Applying inconsistent pressure: Unstable movement can interrupt heat generation.
- Using poorly shaped components: Misaligned spindles and unsuitable sockets can waste effort.
- Moving an ember too quickly: A fragile coal may break apart before it can ignite the tinder.
- Practicing only in ideal conditions: Skills learned with dry materials should be developed gradually, without taking unnecessary risks.
- Depending entirely on primitive methods: A lighter or other modern backup is important for emergency preparedness.
Fire Safety and Leave No Trace Practices
Fire-making skills come with a responsibility to protect people, property, wildlife, and natural areas.
Before building any fire, verify that it is legal and appropriate for the location and current conditions.
Follow These Basic Rules
- Observe all fire bans and local restrictions.
- Use established fire rings where available and permitted.
- Keep fires small and manageable.
- Never leave a fire or glowing coals unattended.
- Keep flammable shelters, equipment, and vegetation at a safe distance.
- Do not burn trash, batteries, or chemical containers.
- Use water to thoroughly extinguish the fire, stirring and checking until the ashes and coals are cold.
- Pack out non-natural materials and follow local site-restoration rules.
Do not bury hot coals to preserve them overnight. Buried embers can remain hot and create a fire hazard.
If conditions are unsafe or fire restrictions are in effect, use an approved alternative for cooking or warmth.
Frequently Asked Questions About Primitive Fire Starting
What is the easiest primitive fire starting method for beginners?
The bow drill is often a practical starting point for learning friction fire because the bow helps maintain spindle rotation. Traditional flint and steel can also be approachable when using prepared char cloth and suitable equipment.
Can you start a fire by rubbing two sticks together?
Yes, but successful friction fire requires more than rubbing random sticks together. Suitable materials, consistent movement, proper pressure, and prepared tinder are essential.
What wood is best for a bow drill?
Dry, workable woods such as basswood, cottonwood, willow, and certain cedar species are commonly used. The best choice depends on the specific wood, its moisture content, and the design of the spindle and fireboard.
How long does it take to start a fire with a bow drill?
There is no guaranteed time. Experienced practitioners using well-prepared materials may produce an ember quickly, while beginners may need multiple practice sessions before achieving consistent results.
Can primitive fire starting work in the rain?
It can be possible with suitable sheltered materials and careful preparation, but wet conditions make friction-fire methods much less reliable. Modern ignition tools and dry emergency tinder are strongly recommended as backups.
Is a ferro rod considered primitive fire starting?
Not in the traditional sense. Ferrocerium rods are modern manufactured ignition tools, although they are commonly used in bushcraft and survival training.
What is the difference between flint and steel and a ferro rod?
Traditional flint and steel produce sparks by striking suitable high-carbon steel against a hard stone. A ferro rod produces sparks when material is scraped from a manufactured ferrocerium alloy.
What should you do if your friction-fire setup only produces smoke?
Check whether the wood dust is collecting properly and whether it forms a cohesive ember that continues smoldering after you stop. Review moisture content, spindle alignment, pressure, and the condition of your fireboard.
Final Thoughts: Practice Primitive Fire Starting Before You Need It
Primitive fire starting is a rewarding survival skill because it teaches patience, preparation, material selection, and the basic principles of combustion.
The hand drill, bow drill, fire plough, fire saw, traditional flint and steel, and solar ignition each offer a different way to understand how fire can be produced without a conventional lighter.
For beginners, start by mastering tinder preparation and one reliable method before moving on to more demanding techniques.
Practice only in safe, permitted conditions, and always carry modern ignition equipment when traveling outdoors.
Traditional skills build knowledge. Reliable backups build preparedness.
Further Reading
- Ultimate Survival Fire Starters Guide
- Core Survival Skills Guide
- Starting a Fire in Wet Weather
- Best Fire Starters for Extreme Heat
- Does All Wax Burn? Survival Fire Starters
- How to Use a Survival Knife
- How to Build a Bushcraft Cooking Tripod
- Survival Water Purification Guide
Stay prepared. Stay sharp. Stay savvy.