Shelter Building Tools for Survival: 6 Essential Items
Having the right shelter building tools for survival can make the difference between spending hours struggling with natural materials and getting dependable protection from the weather before conditions deteriorate.
This post contains affiliate links. I may earn a small commission at no extra cost to you. Learn more.
In a wilderness emergency, shelter helps protect you from wind, rain, snow, direct sunlight, and dangerous heat loss. But building an effective shelter requires more than throwing a few branches together. You need to choose a safe location, manage moisture, create adequate insulation, and secure your shelter against changing weather.
Fortunately, you don’t need to carry a large collection of expensive equipment. A few lightweight, multipurpose tools can help you construct a tarp lean-to, A-frame shelter, emergency sleeping area, or more substantial wilderness shelter.
This guide covers six useful shelter-building items, explains how to use them effectively, and shows you how to assemble a practical survival shelter kit without overpacking.
Quick Answer: What Are the Best Shelter Building Tools for Survival?
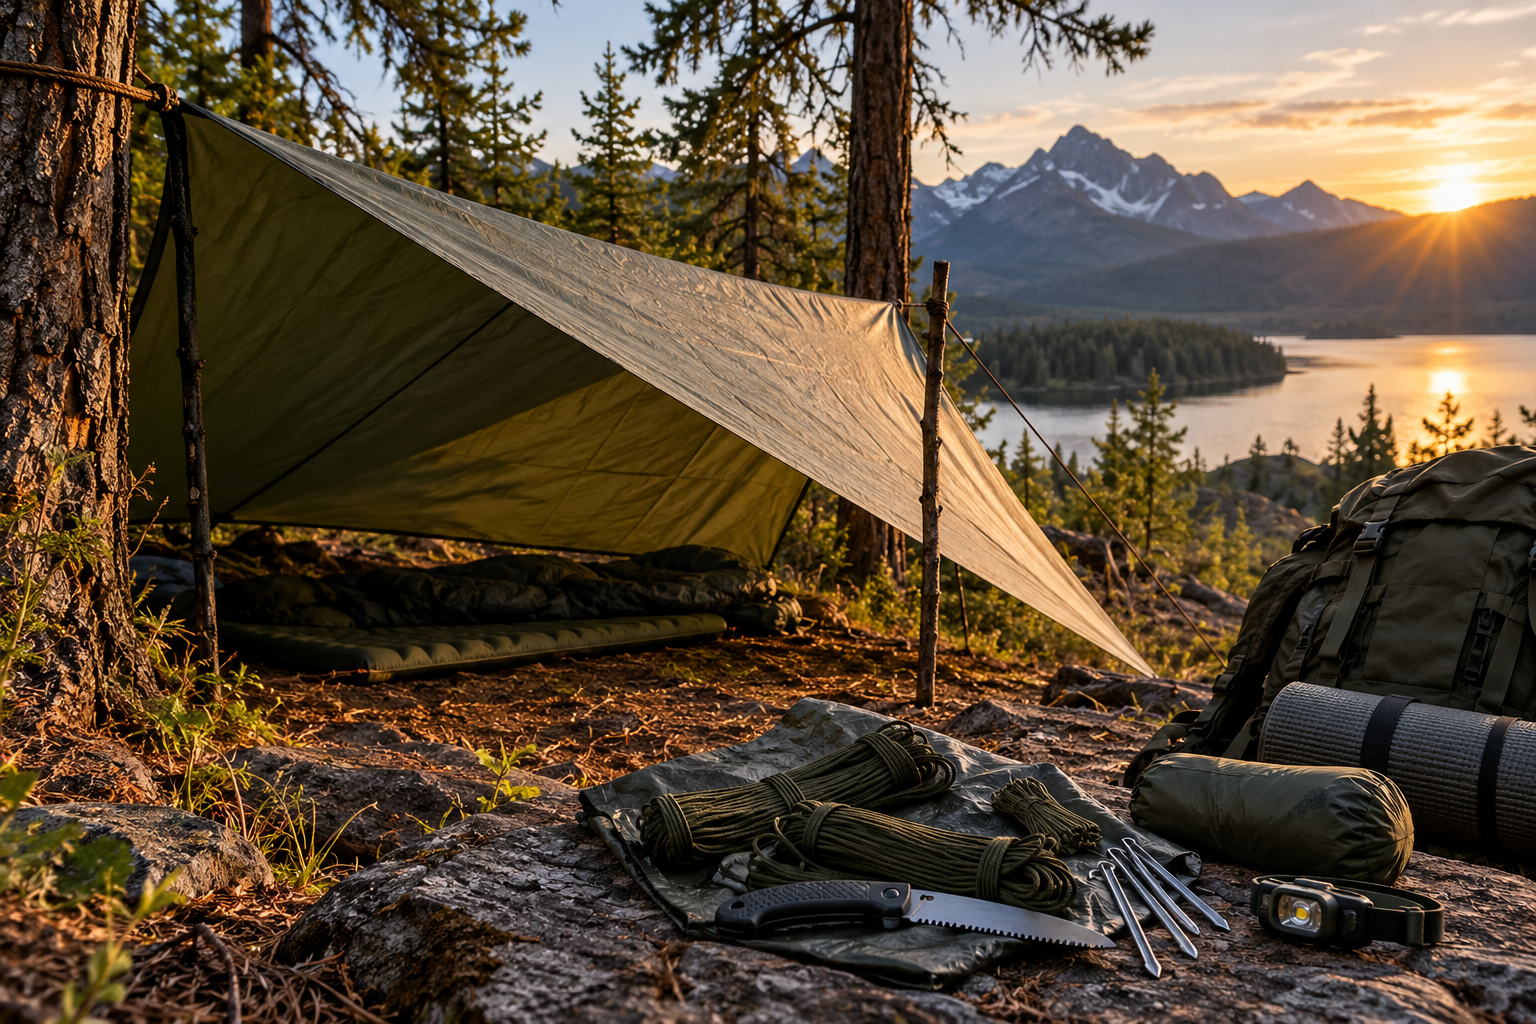
The most useful shelter building tools for survival include a waterproof tarp, 550 paracord, a folding saw, an emergency bivy sack, adjustable trekking poles, and an additional groundsheet or tarp. Together, these items help you create overhead protection, secure shelter structures, process suitable materials, and reduce exposure to wind, rain, and cold.
If you can carry only a few items, prioritize weather protection, reliable cordage, and insulation appropriate for the conditions.
Key Takeaways
- A waterproof tarp provides fast overhead protection without requiring extensive construction.
- Paracord and suitable anchors help secure ridgelines, shelter frames, and equipment.
- A folding saw makes processing suitable wood more efficient but requires careful handling.
- Emergency bivy sacks provide temporary weather protection but do not replace adequate sleeping insulation.
- Trekking poles can support tarp shelters where suitable trees are unavailable.
- Ground insulation is essential for reducing heat loss in cold conditions.
- Always evaluate falling branches, drainage, wind exposure, and local restrictions before selecting a shelter location.
Why Shelter Building Tools Matter in a Survival Situation
Exposure to severe weather can become dangerous long before a person runs out of food. Rain-soaked clothing, strong winds, freezing temperatures, or extreme heat can quickly create a serious survival problem.
An effective shelter helps reduce these risks by creating a more controlled environment.
However, shelter construction takes time and energy. Gathering materials, cutting branches, securing supports, and building a weather-resistant covering can become especially difficult when you are tired, injured, or working in poor weather.
Carrying suitable tools reduces the amount of improvisation required.
What a Survival Shelter Must Accomplish
A dependable emergency shelter should address several important needs:
- Overhead protection: Keep rain, snow, and falling moisture away from occupants and essential equipment.
- Wind protection: Reduce exposure to cold winds without creating unsafe structural loads.
- Ground protection: Separate occupants from wet soil and provide adequate insulation against conductive heat loss.
- Ventilation: Allow appropriate airflow and help manage condensation.
- Structural stability: Remain securely anchored under expected conditions.
- Safe placement: Avoid falling trees, unstable terrain, flood-prone areas, and other environmental hazards.
No single accessory handles all these requirements. The best survival shelter kit combines several items that work together.
Best Shelter Building Tools for Survival: Quick Comparison
Each of the following items serves a different purpose. This comparison can help you decide what belongs in your emergency kit.
| Shelter Tool | Primary Purpose | Best Use |
|---|---|---|
| 550 Paracord | Securing and lashing | Ridgelines, tie-outs, and repairs |
| Waterproof Tarp | Overhead weather protection | Lean-to and A-frame shelters |
| Emergency Bivy Sack | Temporary personal protection | Unexpected overnight emergencies |
| Folding Saw | Processing suitable wood | Shelter supports and debris preparation |
| Trekking Poles | Adjustable structural support | Tarp shelters without trees |
| Additional Tarp | Ground and equipment protection | Groundsheets and secondary cover |
1. 550 Paracord: Essential Cordage for Shelter Construction
Paracord is one of the most versatile items in a wilderness survival kit. It is lightweight, compact, and useful for securing shelters, making field repairs, and organizing equipment.
When building a tarp shelter, cordage allows you to create a ridgeline between suitable anchor points and attach the tarp without relying on improvised knots made from natural fibers.
How Paracord Helps Build Survival Shelters
- Ridgelines: Suspend a tarp between suitable trees or other secure supports.
- Shelter tie-outs: Attach tarp corners and reinforced attachment points to stakes or anchors.
- Frame construction: Lash suitable poles together when constructing temporary supports.
- Field repairs: Replace damaged guylines or secure loose equipment.
- Gear organization: Keep appropriate supplies off wet ground and reduce clutter.
How Much Paracord Should You Carry?
A 50-foot length is a reasonable starting point for a compact emergency kit, although larger tarp shelters or multiple anchor points may require additional cordage.
For frequent shelter construction, consider carrying several shorter lengths alongside a longer ridgeline. This makes setup easier and reduces the need to repeatedly cut your main cord.
Remember that 550 paracord is not automatically suitable for climbing, rappelling, rescue lifting, or supporting a person’s weight. Use properly rated equipment for those activities.
Recommended Paracord
Choose genuine, appropriately rated cordage with sufficient length for your shelter system. The following Amazon listing is one option to consider.
Survival tip: Practice a bowline, taut-line hitch, and trucker’s hitch before an emergency. Knowing a few dependable knots can be more valuable than carrying extra cordage you don’t know how to use.
2. Waterproof Camping Tarp: Fast Overhead Protection
A waterproof tarp is among the most valuable shelter materials you can carry because it provides immediate protection without requiring you to cut large quantities of wood or construct a complete frame.
With suitable anchors and cordage, a tarp can be configured into several practical shelters.
Common Survival Tarp Configurations
Lean-to shelter: A sloping tarp secured along a ridgeline or support structure. It provides a covered area and can offer useful wind protection when oriented appropriately.
A-frame shelter: A tarp draped over a ridgeline with both sides anchored near the ground. This configuration can provide improved protection from wind-driven rain compared with a more open shelter.
Low-pitched storm shelter: A tarp pitched closer to the ground to reduce wind exposure, while maintaining appropriate ventilation and sufficient interior space.
Sunshade: An elevated tarp that provides shade and airflow during warm-weather camping.
What to Look for in a Survival Tarp
- Waterproof or appropriately weather-resistant construction.
- Reinforced tie-out points.
- Durable stitching and suitable fabric strength.
- A size appropriate for the number of occupants.
- Manageable packed weight and dimensions.
- Enough attachment points for different configurations.
Keep in mind that waterproof fabric alone does not guarantee a waterproof shelter. Wind-driven rain, poor pitching angles, inadequate drainage, and damaged seams can allow water to enter.
Recommended Survival Tarp
A camping tarp such as the Wise Owl option can serve as the main weather barrier in a lightweight emergency shelter system.

Survival tip: Pitch your tarp so water drains away from the sleeping area. Avoid depressions and channels where runoff can collect beneath your shelter.
3. Emergency Bivy Sack: Compact Backup Protection
An emergency bivy sack is designed to provide temporary personal protection when you cannot establish a conventional shelter or need additional protection inside an existing one.
Many emergency bivy sacks use reflective materials that help reduce radiant heat loss while providing a barrier against some wind and precipitation.
They can be particularly useful in vehicle emergency kits, daypacks, and bug-out bags because they occupy relatively little space.
Benefits of an Emergency Bivy Sack
- Provides a compact emergency covering.
- Helps reduce some forms of heat loss.
- Offers temporary protection from wind and precipitation when used correctly.
- Can improve visibility to rescuers when made with bright materials.
- May supplement an existing shelter and insulation system.
Important Limitations
An emergency bivy is not a substitute for a properly rated sleeping bag, insulated sleeping pad, or adequate clothing in freezing conditions.
Reflective material cannot generate heat. If you are already severely chilled, wet, or lying directly on cold ground, a thin emergency bivy may provide insufficient insulation.
Condensation can also accumulate inside some emergency bivy designs. Follow the manufacturer’s instructions for ventilation and positioning, and never seal the covering around your face.
Recommended Emergency Bivy
The Life Bivy emergency sleeping bag is an example of a compact emergency covering suitable for consideration as part of a broader survival kit.

Cold-Weather Survival Warning
Hypothermia can occur when the body loses heat faster than it can produce it, including in cool, wet, and windy conditions above freezing.
If someone develops confusion, loss of coordination, unusual drowsiness, or other signs of hypothermia, seek emergency medical assistance. Move them out of exposure, remove wet clothing when possible, and provide appropriate gradual warming while following emergency medical guidance.
Survival tip: Pair an emergency bivy with suitable ground insulation. A sleeping pad or another appropriate insulating layer helps reduce heat loss into cold soil.
4. Folding Saw: Process Shelter Materials More Efficiently
A folding saw can be valuable when constructing shelters from suitable natural materials. It allows you to cut manageable branches and poles more efficiently than breaking them by hand.
For bushcraft-style shelter building, a saw can help prepare frame components, shorten fallen branches, and process appropriate materials for temporary structures.
However, cutting wood is not always necessary. When conditions are deteriorating, deploying a tarp may be faster and safer than constructing an elaborate debris shelter.
Why Carry a Folding Saw?
- Efficient cutting: Processes appropriately sized branches with less effort than repeated chopping.
- Compact storage: Folding designs protect the blade during transport.
- Better control: A suitable saw can provide precise cuts for shelter supports.
- Versatility: Useful for ordinary camp tasks and permitted bushcraft activities.
Choosing a Folding Survival Saw
Look for a dependable locking mechanism, comfortable handle, suitable blade length, and a tooth pattern appropriate for the wood you expect to encounter.
Some folding saws cut primarily on the pull stroke. Using excessive pressure during the opposite stroke can bend or damage the blade.
Recommended Folding Saw
A Silky-style folding saw is an example of a compact wood-processing tool worth considering for a wilderness survival kit.

Folding Saw Safety
- Keep your supporting hand away from the cutting path.
- Secure branches before cutting.
- Never cut directly toward your body.
- Use the saw only within its intended capacity.
- Avoid cutting overhead branches or working beneath unstable limbs.
- Follow local restrictions on cutting vegetation or collecting wood.
Survival tip: Use fallen, suitable materials where permitted instead of cutting live trees unnecessarily. Avoid dead standing trees and hanging branches, which can fall without warning.
5. Trekking Poles: Adjustable Supports for Tarp Shelters
Trekking poles are often overlooked as shelter-building equipment, but adjustable models can be useful when suitable trees or natural supports are unavailable.
Some tarp shelters are specifically designed to use trekking poles as their primary supports.
This makes trekking poles especially valuable for hikers who want multipurpose equipment rather than carrying separate tent poles.
How Trekking Poles Help With Shelter Construction
- Support tarp peaks or elevated corners.
- Allow adjustments to shelter height and pitch.
- Help create shade structures in suitable conditions.
- Reduce the need to locate and cut support poles.
- Serve as walking aids during travel.
What to Look for in Trekking Poles
Choose poles with dependable locking mechanisms, appropriate adjustment ranges, and construction suitable for the intended load.
Not every trekking pole is designed to support a shelter. Check compatibility with your tarp, attachment hardware, and manufacturer instructions.
Recommended Trekking Poles
Adjustable trekking poles can provide useful flexibility for campers who want to combine hiking equipment with a lightweight tarp shelter system.

Survival tip: Test your tarp-and-pole configuration at home before relying on it outdoors. Proper guyline tension and secure anchors are essential for stability.
6. Additional Camping Tarp: Groundsheet and Secondary Protection
A second tarp provides flexibility when building a more complete campsite shelter.
While the main tarp creates overhead coverage, an additional tarp can protect equipment, provide a ground barrier, or serve as backup material if the primary shelter is damaged.
However, a groundsheet does not replace an insulated sleeping pad. Waterproof material may block moisture, but it generally provides little thermal insulation on its own.
Practical Uses for a Second Tarp
- Groundsheet: Create a barrier between equipment and damp ground.
- Equipment cover: Protect backpacks and suitable supplies from precipitation.
- Secondary windbreak: Reduce exposure in an appropriately anchored shelter setup.
- Additional shade: Expand covered space in warm conditions.
- Emergency backup: Provide replacement covering if another shelter component fails.
Using a Groundsheet Correctly
If a groundsheet extends beyond the edges of the overhead shelter, it may collect rainwater and direct moisture into the sleeping area.
Position and fold the groundsheet so runoff drains away rather than pooling beneath your bedding.
On cold ground, use a suitable insulated sleeping pad above the moisture barrier.
Recommended Additional Tarp
A separate camping tarp can be useful for vehicle-based emergency kits, group camping, and situations where additional coverage is worth the extra weight.

Survival tip: Before carrying two full-size tarps, compare the combined weight and packed volume with a dedicated lightweight groundsheet or footprint.
How to Build a Basic Survival Tarp Shelter
One of the simplest ways to use these tools together is to build an A-frame tarp shelter between two suitable anchor points.
This setup can provide useful overhead protection without requiring extensive cutting or permanent construction.
Step 1: Choose a Safe Location
Look for relatively level ground with suitable drainage and protection from the prevailing weather.
Avoid dry creek beds, low-lying drainage channels, unstable slopes, and locations beneath dead branches or damaged trees.
Check for loose rocks, animal activity, and other hazards before establishing your sleeping area.
Step 2: Establish a Ridgeline
Secure suitable cordage between two healthy, stable anchor points at an appropriate height.
Use reliable knots and avoid excessive tension that could damage equipment or supports.
Where trees are unavailable, use compatible trekking poles and appropriately secured guylines and stakes.
Step 3: Position the Tarp
Drape the tarp over the ridgeline or attach it according to its design.
Adjust the sides to provide adequate interior space while maintaining protection from expected wind and precipitation.
Step 4: Anchor the Corners
Secure the tarp using appropriate stakes, guylines, or other suitable anchors.
Keep the fabric properly tensioned so it sheds water rather than forming pockets where rain can collect.
Recheck anchor security as weather conditions change.
Step 5: Prepare the Sleeping Area
Remove sharp objects and position a suitable moisture barrier and insulated sleeping pad where needed.
Keep bedding and essential equipment away from the exposed edges of the shelter.
Step 6: Check Drainage and Ventilation
Make sure rainwater can flow away from the shelter rather than collecting beneath it.
Maintain appropriate ventilation to reduce condensation and avoid enclosing yourself in a poorly ventilated space.
Do not dig drainage trenches or disturb vegetation where prohibited. Choosing a naturally well-drained location is preferable.
Practice Before an Emergency
Set up your tarp shelter in controlled conditions before relying on it in the wilderness. Practice pitching it in different configurations, securing the guylines, and packing everything away efficiently.
Knowing how to deploy your shelter quickly is just as important as owning the equipment.
How to Choose a Safe Survival Shelter Location
Even well-built shelters can become dangerous when placed in the wrong location.
Before unpacking equipment, evaluate the surrounding terrain and weather conditions.
Avoid Falling Branches and Unstable Trees
Look above your intended campsite for dead limbs, broken branches, leaning trees, and other overhead hazards.
Do not camp beneath unstable trees, especially during strong winds or storms.
Stay Away From Flood-Prone Areas
Dry creek beds and shallow depressions may look convenient but can become dangerous during heavy rainfall.
Choose elevated, well-drained ground without positioning yourself in another hazardous location such as an exposed ridge during lightning.
Consider Wind Direction
Orient your shelter to reduce direct exposure to prevailing winds while allowing appropriate airflow.
A low-pitched tarp may perform better in windy conditions, but severe weather can exceed the capability of lightweight shelters.
Protect Yourself From Ground Moisture
Wet ground can increase discomfort and contribute to heat loss.
Use a moisture barrier where appropriate, along with sufficient sleeping insulation for the expected conditions.
Follow Land-Use Rules
Public lands, national parks, wilderness areas, and private properties may have different rules concerning camping, tree attachments, vegetation cutting, and shelter construction.
Follow the applicable regulations and minimize unnecessary environmental damage.
Common Survival Shelter Building Mistakes
Building Too Large a Shelter
An unnecessarily large shelter can require more materials, take longer to construct, and be harder to protect from the weather.
Build only as much space as you reasonably need for the occupants and essential equipment.
Ignoring Ground Insulation
Overhead protection is important, but cold ground can draw heat away from your body.
A waterproof tarp alone is not enough for safe sleeping in cold conditions. Use suitable insulated bedding.
Using Weak Anchor Points
Loose stakes, unstable branches, and poorly secured guylines can cause a shelter to collapse or fail in strong winds.
Inspect supports and anchors before relying on them.
Waiting Until Dark to Build
Shelter construction becomes more difficult when visibility decreases.
Whenever possible, identify a suitable location and establish weather protection before daylight fades.
Relying on Emergency Gear Beyond Its Limits
Reflective bivy sacks, lightweight tarps, and improvised shelters have limitations.
They should not be treated as guaranteed protection against severe storms, extreme cold, or other dangerous conditions.
Using Fire or Fuel-Burning Equipment Inside a Shelter
Camp stoves, charcoal burners, and ordinary fuel-burning heaters can create dangerous fire and carbon monoxide hazards inside enclosed shelters.
Keep cooking equipment outdoors and follow manufacturer instructions and applicable fire restrictions.
Survival Shelter Building Kit Checklist
Use this checklist to make sure your emergency shelter kit includes the essentials for weather protection, shelter construction, and staying warm.
For a small daypack, prioritize compact emergency protection and essential safety supplies. For vehicle-based preparedness or extended wilderness travel, a more complete shelter system may be appropriate.
Shelter construction is also a useful fieldcraft skill. Explore our guide to 100 Forgotten Survival Skills That Could Save Your Life for additional practical preparedness knowledge.
Frequently Asked Questions About Shelter Building Tools
What are the best tools for building a survival shelter?
Useful shelter-building tools include a waterproof tarp, suitable cordage, a folding saw, trekking poles, an emergency bivy sack, and a groundsheet. The best combination depends on the environment, weather, and type of shelter you intend to build.
What is the most important shelter-building item?
A waterproof tarp is often one of the most useful items because it can provide overhead protection quickly. However, appropriate insulation, secure anchors, and a safe location are equally important in challenging conditions.
How much paracord should I carry for survival?
Approximately 50 feet is a practical starting point for a compact kit. Larger shelters, multiple tie-outs, or more complicated configurations may require additional cordage.
Can you build a survival shelter without tools?
Yes. Some emergency shelters can be constructed using suitable natural materials. However, a tarp and cordage can greatly reduce construction time, while a folding saw can help process appropriate materials when necessary.
What is the fastest survival shelter to build?
A simple tarp lean-to or A-frame can be relatively quick to establish when you have suitable anchor points and have practiced the setup. Construction time varies with terrain, weather, equipment, and experience.
Are emergency bivy sacks warm enough for winter survival?
Not necessarily. Emergency bivy sacks can reduce some heat loss, but they do not replace adequate sleeping insulation, dry clothing, and protection from cold ground. Their effectiveness depends on conditions and how they are used.
Can trekking poles support a survival tarp?
Some trekking poles can support compatible tarp shelters when properly secured. Check the pole and shelter manufacturers’ instructions and use appropriate stakes and guylines.
Should a survival shelter be completely sealed?
No. Appropriate ventilation is important for managing condensation and maintaining a safer shelter environment. Never operate fuel-burning equipment inside an enclosed sleeping shelter.
What should I prioritize when building a survival shelter?
Start by choosing a safe location and protecting yourself from the most immediate environmental threat. Establish appropriate overhead protection, wind protection, and ground insulation based on the conditions.
Final Thoughts: Build a Better Shelter With Less Equipment
The best shelter building tools for survival are not necessarily the largest or most expensive. They are the items that help you establish dependable protection while conserving time, energy, and pack space.
A tarp provides fast overhead coverage. Paracord secures the structure. A folding saw helps process suitable materials. Trekking poles offer adjustable support, while an emergency bivy and additional tarp provide useful backup options.
But equipment alone is not enough. Learning how to select a safe campsite, pitch a tarp correctly, manage drainage, and insulate yourself from the ground is essential.
Practice these skills before you need them. A simple shelter system that you know how to use is often more valuable than a complicated collection of gear you have never tested.
Further Reading
- Essential Bushcraft Skills for Preppers
- 100 Forgotten Survival Skills That Could Save Your Life
- How to Survive in the Woods Without Gear
- How to Use a Survival Knife
- How to Survive in the Woods With Just a Knife
As an Amazon Associate, The Savvy Survivalist earns from qualifying purchases.