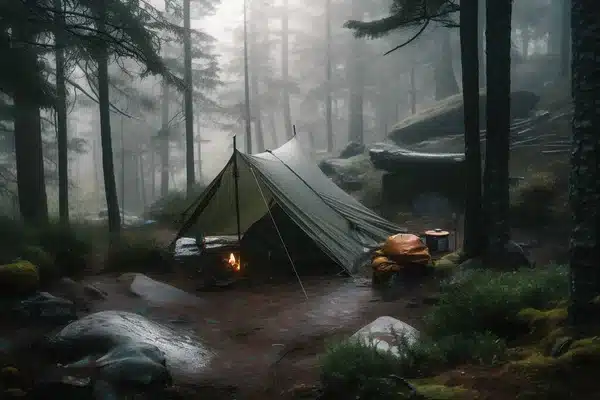
7 Beginner Survival Skills Most People Ignore
Forgotten survival skills are practical abilities that can help you handle emergencies when modern equipment is unavailable. Knowing how to build a fire, navigate without electronics, find safe water, and create emergency shelter can make a meaningful difference when conditions deteriorate.
This post contains affiliate links. I may earn a small commission at no extra cost to you. Learn more.
Modern survival gear is useful, but equipment can break, batteries run out, and supplies get lost. Learning traditional techniques gives you additional options rather than forcing you to depend on a single tool.
These seven beginner survival skills cover fire, navigation, food gathering, cordage, water, shelter, and wild plant identification. Each section explains why the skill matters, how to begin practicing, and the mistakes to avoid.
For a broader approach to emergency readiness, start with our emergency preparedness master plan. You can also explore our guide to 100 forgotten survival skills.
Quick Guide: Seven Survival Skills Worth Learning
- Starting a fire without matches or a lighter
- Navigating with the sun, stars, and terrain
- Understanding traditional small-game trapping
- Making cordage from natural fibers
- Finding and treating drinking water
- Building emergency shelter from natural materials
- Identifying wild edible plants safely
Beginner priority: Practice shelter, navigation, and safe water treatment before relying on advanced food-gathering techniques. In many short-term wilderness emergencies, preventing exposure and getting rescued matter more than finding food.
1. Starting Fire Without Matches or Lighters
Fire can provide warmth, help boil water, support outdoor cooking, and create a visible signal when conditions permit. However, making fire without modern ignition equipment takes practice.
One traditional technique is the bow drill, which uses friction between wooden components to produce a glowing ember.
How the Bow Drill Works
A basic bow-drill set consists of a spindle, hearth board, bow, cord, and handhold.
The bow rotates the spindle against the hearth board. Friction produces fine wood dust, which can eventually become hot enough to form an ember.
That ember is transferred into a prepared tinder bundle and carefully encouraged into flame.
How to Practice
- Choose suitable, dry wood for the spindle and hearth board.
- Prepare a stable hearth board with a spindle socket and ember-catching notch.
- Make a bow using a flexible branch and strong cord.
- Position the spindle between the hearth board and handhold.
- Use steady bow strokes to rotate the spindle while maintaining controlled downward pressure.
- Watch for a sustained ember in the accumulated wood dust.
- Carefully transfer the ember to dry tinder and gently increase airflow.
The exact wood combination, spindle shape, and pressure matter. Beginners often produce smoke long before they produce a usable ember.
Common Fire-Starting Mistakes
- Using damp wood or poorly prepared tinder
- Applying excessive pressure before developing a steady rhythm
- Allowing the spindle to slip out of position
- Trying to ignite large sticks directly instead of preparing fine tinder
- Practicing where fires are prohibited or unsafe
Practice in a controlled outdoor setting with water available for extinguishing the fire. Observe local fire restrictions and fully extinguish all embers before leaving.
For difficult conditions, read our guide to starting a fire in wet weather.
Recommended Fire-Starting Equipment
A reliable fire starter remains an important backup even when you know primitive techniques.

2. Navigating Without GPS or a Compass
Smartphones and GPS devices are useful, but they depend on working batteries, readable screens, and functioning equipment.
Traditional navigation techniques help you maintain awareness of direction and terrain when electronic navigation becomes unavailable.
Using the Sun and Shadows
The shadow-stick method can help estimate an east-west direction.
- Place a straight stick vertically in reasonably level ground.
- Mark the end of its shadow.
- Wait approximately 15 to 30 minutes.
- Mark the new shadow tip.
- Draw a line from the first mark toward the second.
In ordinary conditions, the first mark is approximately west and the second approximately east. This is an estimation method, not a replacement for a properly used compass or detailed map.
Terrain, season, and measurement errors can affect accuracy. Practice where you can compare your result against a known direction.
Finding North with Polaris
In the Northern Hemisphere, Polaris appears close to the north celestial pole.
One common way to locate it is by using the two outer stars of the Big Dipper’s bowl as pointers toward Polaris.
Polaris provides an approximate indication of true north, but it is not visible everywhere on Earth, and cloud cover can make celestial navigation impossible.
Terrain Association
Terrain association means identifying recognizable features such as ridgelines, streams, valleys, roads, and distinctive hills.
Learn to compare those features with a topographic map. A map remains useful even when a GPS device fails.
Before hiking, identify your starting point, intended route, major landmarks, and safe exit points.
Important: If you become lost, do not start walking in an arbitrary direction based only on a rough sun or star reading. Stop, assess your situation, conserve energy, and consider staying in a safe location where rescuers can find you.
Our lost in the woods survival checklist explains the immediate priorities.
Recommended Navigation Equipment
Carry a dependable navigation backup and learn how to use it before your trip.

3. Understanding Traditional Small-Game Trapping
Trapping is a traditional food-gathering skill, but it is considerably more complicated than simply placing a snare along an animal trail.
Successful and responsible trapping requires wildlife knowledge, legal compliance, proper equipment, humane handling, and food safety skills.
For beginners, understanding animal behavior and learning to recognize signs of wildlife are better starting points than deploying improvised traps.
Recognizing Animal Signs
Animals leave evidence of their movement and feeding habits. Common signs include tracks, droppings, disturbed vegetation, feeding marks, and established travel routes.
Practice identifying these signs using regional wildlife references.
Observe how different animals move through a landscape and how their behavior changes with the seasons.
Traditional Trap Designs
Historical survival literature often describes deadfall traps and snares. These devices can injure or kill wildlife and may also endanger pets or non-target animals.
They are not appropriate for casual experimentation. Their legality varies by species, season, land ownership, and jurisdiction.
For practical training, learn from a qualified trapping instructor or wildlife agency and use only methods that are lawful and humane in your area.
What Beginners Should Practice First
- Identifying animal tracks and habitat
- Understanding local hunting and trapping regulations
- Recognizing protected and non-target species
- Learning wildlife-related hygiene and food safety
- Understanding why trapping is rarely the first priority in a short-term emergency
In a typical lost-person situation, spending time setting traps may waste energy and delay rescue. Shelter, hydration, communication, and signaling usually deserve attention first.
Recommended Equipment
Learning to recognize animal signs and understand local wildlife regulations is a valuable first step. Appropriate field equipment can support wildlife observation and responsible outdoor training.

4. Making Cordage from Natural Materials
Cordage is useful for shelter construction, securing equipment, tying bundles, and making temporary repairs.
Commercial rope and paracord are generally more predictable than improvised plant cordage. However, learning to make natural cordage helps you understand how fibers behave and how traditional materials can be used.
Plants Traditionally Used for Cordage
Depending on the region and season, suitable fibers may come from plants such as yucca, nettle, milkweed, and certain tree barks.
Different plants require different preparation methods. Some fibers are stripped directly, while others require drying, soaking, or separating from surrounding plant tissue.
Identify plants correctly and avoid harvesting protected species or damaging living trees unnecessarily.
The Two-Ply Reverse-Wrap Method
- Prepare two bundles of reasonably even fibers.
- Hold the bundles together near one end.
- Twist one bundle in one direction.
- Cross it over the second bundle in the opposite direction.
- Repeat the twist-and-cross motion while maintaining tension.
- Overlap additional fibers as needed to extend the cord.
The opposing twists help the fibers hold together.
Begin with short pieces and inspect the finished cord for weak spots.
Testing Natural Cordage
Use early practice pieces for light-duty tasks such as tying bundles or securing small items.
Do not trust homemade cordage for climbing, rappelling, lifting people, rescue operations, or other life-support applications.
Natural fibers can weaken when wet, damaged, or exposed to prolonged stress.
Recommended Cordage Equipment
Keep manufactured cordage in your emergency kit as a dependable primary option.

5. Finding and Purifying Water Without a Filter
Safe drinking water is one of the most important wilderness survival priorities.
Dehydration can become dangerous quickly, particularly during hot weather or strenuous activity. However, untreated natural water may contain microorganisms, chemicals, or other contaminants.
Finding a Water Source
Potential water sources include streams, springs, lakes, collected rainwater, and other accessible supplies.
Look for water that can be reached safely without risking a fall, injury, or exposure.
Flowing water is not automatically safe. Clear water can still contain harmful microorganisms.
Boiling Water
When microbial contamination is the concern and boiling is feasible, bring clear water to a rolling boil for one minute, or three minutes at elevations above 6,500 feet.
Allow it to cool naturally and store it in a clean container.
Boiling can inactivate common disease-causing microorganisms, but it does not reliably remove chemical pollutants, heavy metals, or salts.
Filtering Sediment
A clean cloth or other suitable prefilter can help remove visible sediment before further treatment.
Homemade filters containing sand, gravel, or charcoal may improve water clarity, but they do not reliably remove pathogens or chemical contamination.
Never assume water is safe to drink merely because it looks clear after passing through a homemade filter.
Why Solar Stills Are Limited
A solar still uses evaporation and condensation to collect a small amount of water.
Although the principle is useful to understand, improvised solar stills often produce very little water relative to the effort required to build them.
They should not be your primary emergency hydration plan.
Distillation also does not guarantee removal of every chemical contaminant, particularly certain volatile substances.
When Water May Be Chemically Contaminated
If water is suspected of containing fuel, pesticides, industrial chemicals, or other hazardous substances, ordinary boiling and basic camping filters may not make it safe.
Seek another source or follow instructions from the appropriate public health authority.
For more detailed treatment methods, read our ultimate water purification guide.
For household preparedness, also see how to store water for emergencies.
Recommended Water Equipment
A purpose-built water treatment system is generally more dependable than improvised methods when used according to its specifications.

6. Building Emergency Shelter Without Modern Tools
Exposure to cold, wind, rain, and wet ground can become dangerous well before food shortages become a serious concern.
A temporary shelter can reduce heat loss, provide protection from precipitation, and make it easier to rest while waiting for assistance.
Choosing a Safe Shelter Location
Before collecting materials, inspect the area for hazards.
- Avoid dry creek beds and locations vulnerable to flash flooding.
- Stay clear of dead trees, unstable limbs, and loose rocks.
- Choose ground that drains reasonably well.
- Consider prevailing wind and exposure to rain.
- Do not build beneath unstable slopes or other obvious hazards.
Building a Basic Debris Shelter
A debris shelter uses branches and insulating natural material to reduce exposure.
- Select a safe location with available materials.
- Position a sturdy ridgepole using stable supports.
- Arrange smaller branches along the sides to form a framework.
- Cover the frame with substantial layers of dry leaves, brush, or other suitable debris.
- Add dry insulation beneath your body to reduce heat loss to the ground.
- Keep the shelter entrance as small as practical while maintaining safe ventilation and access.
The structure must remain stable. Do not use heavy, precariously balanced branches that could collapse onto an occupant.
Lean-To Shelters
A lean-to provides a sloping barrier against wind and precipitation.
It can be built with natural materials or a tarp when one is available.
Lean-tos are often quicker to construct than heavily insulated debris shelters, but their open design may provide limited protection in very cold conditions.
Why Ground Insulation Matters
Cold ground can draw heat away from your body through conduction.
A thick layer of dry, suitable insulating material beneath you may be as important as the shelter roof.
Keep clothing and bedding dry whenever possible.
Practice Shelter Building Safely
Build a practice shelter during daylight, check its stability, and evaluate how effectively it blocks wind and rain.
Do not make an unsupervised overnight test in dangerous weather. Use appropriate camping equipment and maintain a reliable exit plan.
See our shelter building tools guide for more ideas.
Recommended Shelter Equipment
Emergency shelter supplies can reduce the time and effort required to protect yourself from the elements.

7. Identifying Wild Edible Plants
Foraging is a traditional skill that can deepen your understanding of local ecosystems and seasonal food sources.
However, wild plant identification requires caution. Some poisonous plants resemble edible species, and incorrect identification can cause serious illness.
For most short-term wilderness emergencies, finding wild food is less urgent than securing shelter, safe water, and rescue.
Start with Regional Plant Identification
Use a reputable field guide specific to your region.
Learn each plant’s identifying features across different growth stages, including leaves, flowers, stems, roots, and habitat.
Do not rely on a single photograph or a phone identification app as proof that a plant is edible.
Examples of Commonly Studied Wild Edibles
Dandelion: A familiar plant with a basal rosette of toothed leaves and yellow flower heads. Correct identification remains necessary.
Chickweed: A low-growing plant group that includes edible species, but identification should account for similar-looking plants.
Lamb’s quarters: A traditional edible green that requires correct identification and appropriate food preparation.
Wild onions: Some edible Allium species have a recognizable onion or garlic odor. Dangerous lookalikes exist, so smell alone is not sufficient identification.
Foraging Safety Rules
- Never eat a plant you cannot confidently identify using multiple distinguishing features.
- Learn from a qualified local instructor whenever possible.
- Avoid plants growing in contaminated soil or areas treated with pesticides.
- Check whether the plant requires cooking or other preparation.
- Do not assume that a plant is safe because wildlife eats it.
- Respect land ownership, harvesting restrictions, and conservation rules.
The so-called universal edibility test is not a reliable way to establish that an unknown plant is safe.
Explore our guide to wild edible plants for further reading.
Recommended Foraging Reference
A reliable plant identification field guide is an essential learning resource for anyone interested in wild edible plants. Choose references that cover your region and provide detailed photographs, identification features, and warnings about poisonous lookalikes.


How to Practice These Survival Skills as a Beginner
You do not need to master all seven skills immediately. A structured practice routine is more useful than reading dozens of techniques without testing them.
Week 1: Fire and Navigation
Practice identifying tinder materials, learn how a bow drill works, and rehearse the shadow-stick method in a familiar outdoor area.
Compare your direction estimates with a map and compass.
Week 2: Cordage and Shelter
Make a short length of natural cordage and build a small practice shelter in a permitted area.
Focus on material selection, stability, and protection from wind and moisture.
Week 3: Water Safety
Learn how to identify safer potential water sources and practice correct water treatment with appropriate equipment.
Understand the difference between removing sediment, inactivating microorganisms, and addressing chemical contamination.
Week 4: Wildlife and Plant Identification
Practice recognizing animal tracks and identifying common local plants without collecting or eating them.
Use regional references and seek experienced instruction.
Record what you learn in a notebook. Over time, repeat these exercises in different seasons and weather conditions while maintaining appropriate safety precautions.
Frequently Asked Questions
What survival skill should beginners learn first?
Start with staying safe, recognizing hazards, maintaining body temperature, navigating responsibly, and obtaining safe drinking water. The exact priority depends on your environment and situation.
Can you survive without modern survival gear?
Traditional skills can help, but they do not guarantee survival. Reliable equipment, sound judgment, preparation, and the ability to call for rescue substantially improve your options.
How long does it take to learn primitive fire-starting?
Learning time varies widely. Some people produce an ember during their first supervised practice session, while others need many attempts to develop consistent technique.
Is natural water safe if it looks clean?
No. Clear water can contain harmful microorganisms or chemical contaminants. Use an appropriate treatment method and avoid suspected chemically contaminated sources.
Is foraging a good emergency food strategy?
Foraging can be useful when supported by extensive local knowledge, but it is not a dependable substitute for stored food or a planned emergency supply.
Are primitive survival skills still useful today?
Yes. They build practical knowledge and adaptability, especially when combined with modern safety practices and dependable emergency equipment.
Conclusion: Build Skills Before You Need Them
These seven forgotten survival skills demonstrate how much useful knowledge can be gained from traditional outdoor techniques.
Learning to start a fire, navigate without electronics, make cordage, identify wildlife signs, treat water, build shelter, and recognize edible plants can improve your confidence and decision-making.
The goal is not to abandon modern equipment. It is to understand what to do when equipment is unavailable, damaged, or insufficient.
Begin with manageable practice sessions, learn from qualified instructors, and make safety part of every exercise.
Survival knowledge becomes valuable when you can apply it calmly, correctly, and safely.
Further Reading
- 100 Forgotten Survival Skills That Could Save Your Life
- Lost in the Woods Survival Checklist
- Ultimate Water Purification Guide
- Ultimate 72-Hour Bug-Out Bag Guide
- Emergency Preparedness Master Plan
Affiliate disclosure: This article contains Amazon affiliate links. As an Amazon Associate, The Savvy Survivalist earns from qualifying purchases at no additional cost to you.