How to Build an Underground Root Cellar for Long-Term Food Storage
Learning how to build an underground root cellar is one of the most practical ways to preserve homegrown food without relying on electricity. Long before modern refrigerators and freezers became common, families used underground storage spaces to keep potatoes, carrots, beets, turnips, and other vegetables fresh through the winter. Today, a properly designed root cellar can provide dependable seasonal food storage, reduce food waste, and strengthen long-term self-sufficiency during extended power outages.
This post contains affiliate links. I may earn a small commission at no extra cost to you. Learn more.
However, building an underground root cellar involves considerably more than digging a hole and installing a wooden door. The structure must withstand soil pressure, manage groundwater, provide adequate ventilation, and maintain the temperature and humidity conditions that stored vegetables require.
This guide explains how underground root cellars work, which designs are practical for different properties, how to plan and construct a permanent cellar, what materials are commonly used, and how to manage the storage environment after construction. It also covers common mistakes that can turn an otherwise promising cellar into a damp, moldy, or structurally unsafe space.
What Is an Underground Root Cellar?
An underground root cellar is a naturally cooled storage space built partially or completely below ground level. Instead of relying primarily on mechanical refrigeration, it takes advantage of the surrounding soil’s ability to moderate temperature changes throughout the year.
Soil temperatures generally change more slowly than outdoor air temperatures. During winter, the earth surrounding a properly designed cellar can help protect stored vegetables from sudden freezing conditions. During warmer weather, the same surrounding soil can help reduce temperature swings and keep the storage area cooler than the outside air.
This does not mean an underground cellar maintains refrigerator temperatures year-round. Its performance depends on local climate, soil temperature, burial depth, insulation, ventilation, and seasonal weather. In warm climates, the cellar may remain too warm for long-term storage of certain crops during summer and early fall.
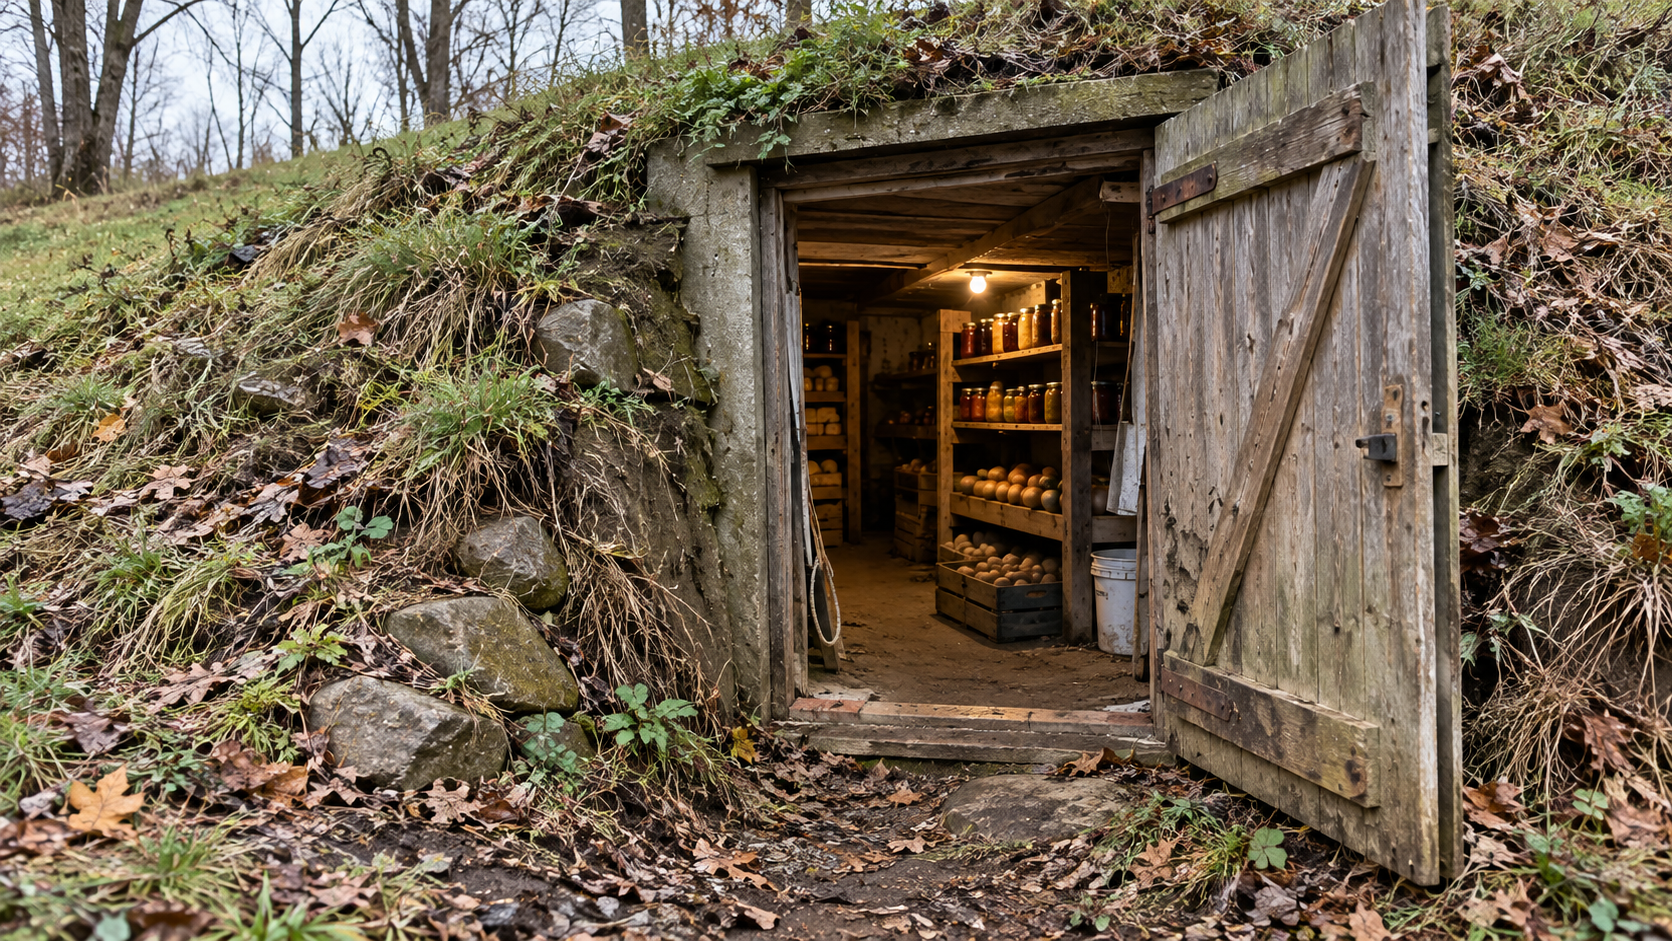
A traditional walk-in cellar usually contains a storage room, a weather-resistant entrance, shelves or bins, a ventilation system, and a roof designed to support the surrounding earth. Some are built into hillsides, while others are constructed in an excavation and covered with soil after the structure is completed.
How a Root Cellar Preserves Food Without Electricity
Freshly harvested vegetables remain biologically active after they are removed from the garden. They continue to respire, lose moisture, and gradually use stored energy. Warm temperatures accelerate many of these processes, while unsuitable humidity can cause vegetables to shrivel or encourage decay.
A successful root cellar slows deterioration by controlling three important environmental conditions: temperature, relative humidity, and airflow. Darkness is also useful because it helps prevent light exposure that can contribute to greening in potatoes.
For many traditional root crops, temperatures close to freezing without actually freezing the produce, combined with high relative humidity, provide favorable storage conditions. Other crops, including winter squash, onions, garlic, and sweet potatoes, require different environments and should not automatically be placed in the same room.
| Storage Factor | Typical Goal | Why It Matters |
|---|---|---|
| Temperature | 32–40°F for many root crops | Slows respiration and deterioration without freezing produce |
| Relative humidity | 90–95% for many root crops | Reduces moisture loss and shriveling |
| Ventilation | Controlled fresh-air exchange | Helps regulate temperature, humidity, and accumulated gases |
| Light | Dark storage conditions | Protects light-sensitive crops, particularly potatoes |
These are general storage targets, not universal settings for every vegetable. A root cellar intended for carrots and beets should be managed differently from a storage room primarily holding cured pumpkins or onions.
Choosing the Best Location for an Underground Root Cellar
The location of a root cellar has a major influence on construction costs, structural requirements, drainage performance, and long-term storage conditions. Selecting a suitable site before excavation begins can prevent problems that would otherwise require expensive repairs.
A location that looks convenient during dry summer weather may become saturated during winter rains or spring snowmelt. Likewise, a hillside that appears ideal for a buried entrance may contain unstable soil or direct groundwater toward the proposed storage room.
Look for Naturally Well-Drained Ground
Good drainage should be one of the first considerations. A root cellar benefits from cool, humid air, but that is entirely different from allowing groundwater to enter the structure. Standing water, saturated walls, and persistent leaks can damage building materials, promote mold growth, and contaminate stored food.
Whenever possible, select ground that remains relatively dry during heavy rainfall and does not collect runoff from surrounding areas. A gentle slope may provide opportunities for gravity drainage, but the actual feasibility depends on soil conditions and where water can legally and safely discharge.
Low-lying ground, flood-prone areas, and locations with a seasonally high water table are generally poor candidates for a conventional underground cellar. A partially buried or above-ground insulated design may be more practical on these properties.
Consider Soil Type and Stability
Soil conditions affect both excavation safety and the completed structure. Sandy soils, clay soils, fill material, and rocky ground behave differently when excavated and when exposed to moisture. Clay may retain water and exert additional pressure as conditions change, while loose or disturbed soil can be particularly prone to collapse.
A geotechnical evaluation can identify relevant soil characteristics, groundwater conditions, and foundation concerns. The results help determine the excavation protection system and structural design rather than relying on assumptions about what the soil can support.
Plan Around Frost Depth and Local Climate
The local frost depth influences foundation and insulation design, but burying a cellar below the frost line does not automatically guarantee ideal food storage conditions. The entrance, roof, exposed walls, and ventilation openings can still admit freezing air.
In colder regions, additional insulation and an insulated entrance vestibule may be necessary. In warmer regions, naturally elevated ground temperatures may limit how cold the cellar becomes, even when it is deeply buried.
Before committing to a design, investigate typical seasonal ground temperatures, winter conditions, and the storage requirements of the crops the cellar will hold. A root cellar should be designed for the actual climate rather than assuming a single construction method works everywhere.
Check Utilities, Access, and Property Restrictions
Before excavation, arrange for underground utility locating through the appropriate local service, commonly reached by calling 811 in the United States. Private utility lines may require separate locating services.
Also check property setbacks, building permits, grading restrictions, septic system locations, drainage easements, and access for construction equipment. A cellar should not undermine an existing foundation, retaining wall, driveway, or other nearby structure.
Finally, consider how the cellar will be used during bad weather. A location close enough to reach safely during winter storms is generally more practical than one requiring a long walk across steep, muddy, or icy ground.
Three Common Underground Root Cellar Designs
There is no single root cellar design suitable for every property. The most practical arrangement depends on terrain, groundwater conditions, available space, desired storage capacity, and construction budget.
1. Hillside Root Cellar
A hillside root cellar is constructed into sloping ground, allowing much of the structure to remain surrounded by earth while providing an entrance from the exposed downhill side. This arrangement is associated with many traditional farm cellars.
One advantage is the possibility of entering the cellar without descending a long stairway. The surrounding earth provides temperature moderation, while a properly designed drainage system may be able to direct water toward a lower discharge point.
However, hillside construction requires careful management of runoff, groundwater, and lateral earth pressure. Water moving downhill can collect behind the cellar unless the drainage and waterproofing systems are properly designed.
2. Fully Buried Walk-In Root Cellar
A fully buried root cellar is constructed inside an excavation and then surrounded or covered with earth. Access may be provided through a stairway, entrance shaft, or specially designed access structure.
This approach can provide substantial earth contact, but it is also one of the more demanding construction options. The roof must support the weight of soil and other applicable loads, the walls must resist lateral earth pressure, and the entire structure must be protected against groundwater infiltration.
Because entry and emergency escape can be more difficult, access design deserves particular attention. A single steep ladder beneath a heavy hatch is not an ideal entrance for a storage room that will be visited regularly.
3. Partially Buried or Earth-Bermed Root Cellar
An earth-bermed cellar uses soil against selected exterior walls while leaving part of the structure exposed. Depending on the design, it may require less excavation than a fully buried room and may offer easier access.
The exposed walls and roof still require appropriate insulation and weather protection. Earth berms also introduce lateral pressure and drainage considerations, so they cannot simply be piled against ordinary shed walls.
For some properties, this arrangement offers a reasonable compromise between temperature moderation, construction complexity, and everyday convenience.
| Design | Main Advantage | Main Challenge |
|---|---|---|
| Hillside cellar | Convenient ground-level entrance | Runoff and hillside soil pressure |
| Fully buried cellar | Extensive contact with surrounding earth | Structural loads, drainage, and access |
| Earth-bermed cellar | Potentially easier access and less excavation | Insulation and retaining-wall design |
How Big Should an Underground Root Cellar Be?
A root cellar should be large enough to hold the intended harvest while leaving room for ventilation, inspection, and safe movement. Building an unnecessarily large cellar can increase construction costs and make humidity and temperature management more difficult.
A compact storage room may be sufficient for a household growing potatoes, carrots, beets, and several other winter crops. A larger homestead producing substantial quantities of storage vegetables may benefit from a dedicated walk-in room with separate shelving and storage zones.
Before choosing dimensions, estimate the volume of produce expected at harvest, the number and size of storage containers, the space occupied by shelves, and the clear floor area needed to reach everything safely.
Remember that the interior dimensions are not the same as the excavation dimensions. Structural walls, drainage assemblies, waterproofing, and construction working space all affect the overall footprint.
| Illustrative Interior Size | Floor Area | Potential Use |
|---|---|---|
| 6 × 8 feet | 48 sq. ft. | Compact household vegetable storage |
| 8 × 10 feet | 80 sq. ft. | Moderate harvest with organized shelves and bins |
| 10 × 12 feet | 120 sq. ft. | Larger homestead storage with greater separation |
These dimensions are planning examples rather than approved construction plans or guaranteed storage capacities. The actual size and configuration should be determined by the harvest, available site, structural design, and storage conditions.
Materials and Components Needed for a Permanent Root Cellar
A permanent underground root cellar requires materials capable of performing in a damp, earth-contact environment. Unlike an ordinary backyard shed, the structure must manage soil loads, groundwater, condensation, and long-term exposure to moisture.
The exact materials depend on the approved construction design. Reinforced concrete and properly engineered reinforced masonry are common possibilities for earth-retaining construction, while prefabricated structures may be suitable when specifically rated and approved for the intended burial conditions.
| Component | Common Materials | Purpose |
|---|---|---|
| Foundation | Engineered concrete footings or slab | Supports the structure and distributes loads |
| Retaining walls | Reinforced concrete or engineered masonry | Resists surrounding soil and water pressure |
| Roof | Engineered structural roof assembly | Supports earth cover and applicable loads |
| Waterproofing | Below-grade membrane and compatible detailing | Limits water intrusion |
| Drainage | Drainage aggregate, filter fabric, approved drains | Directs groundwater away from the structure |
| Ventilation | Ducts, dampers, screens, weather hoods | Controls air exchange |
| Entrance | Insulated exterior door and weather seals | Provides access while limiting heat transfer |
| Interior storage | Removable shelves, ventilated bins, pallets | Keeps produce organized and accessible |
Materials should be selected as a compatible system. For example, a waterproofing membrane must work with the substrate, drainage assembly, insulation, and protection board specified for the project. Substituting materials without checking compatibility can compromise the entire moisture-control system.
How to Build an Underground Root Cellar: Step-by-Step
The following construction sequence explains the major stages involved in creating a permanent underground root cellar. It is intended to help property owners understand the work, plan the project, and evaluate construction proposals. It is not a substitute for site-specific structural drawings, excavation plans, engineering calculations, or local permits.
Step 1: Evaluate the Site and Develop the Construction Plan
Begin with a site assessment rather than excavation. Determine whether the property has suitable soil, manageable groundwater, adequate drainage, and sufficient room for both the finished cellar and the temporary excavation required during construction.
The design should establish the cellar’s interior dimensions, foundation system, retaining-wall construction, roof assembly, access arrangement, ventilation locations, waterproofing details, and drainage discharge route.
A qualified designer should account for soil pressure, groundwater, frost conditions, roof loads, construction loads, and any nearby structures. If a hillside is involved, slope stability and surface-water diversion also need to be addressed.
Obtain any required permits and inspections before construction. At this stage, it is far less expensive to revise a drawing than to correct an underground structure that has already been built.
Step 2: Locate Underground Utilities and Prepare the Work Area
Arrange for underground utility locating and verify the location of private lines that may not be covered by the public locating service. Identify overhead power lines, nearby foundations, septic systems, drainage infrastructure, and other site hazards.
Plan where excavated soil will be placed or removed. Spoil piles, heavy equipment, and stored building materials must remain far enough from excavation edges to avoid creating additional collapse hazards. Establish safe equipment access and prevent children, visitors, and animals from entering the construction area.
Excavation should be performed using a protective system appropriate to the soil conditions and depth. Depending on the project, this may involve engineered sloping, shoring, shielding, or another approved method.
Step 3: Excavate According to the Approved Plan
Once the site is prepared, excavation can begin according to the approved construction and safety plans. The excavation must accommodate not only the cellar itself but also any required working space, drainage components, waterproofing installation, and protective excavation system.
Excavation dimensions and slopes must not be improvised. Changes in soil conditions, unexpected fill material, groundwater seepage, or nearby structural movement may require the work to stop while the site is reassessed.
Rainfall can quickly change excavation stability. Surface water should be diverted away from the opening, and accumulated water must be managed before work continues. Workers should not enter an excavation containing uncontrolled water or showing signs of instability.
When the excavation reaches the planned foundation elevation, the exposed bearing surface should be inspected for suitability. Soft, disturbed, or saturated material may require remediation before foundation work proceeds.
Step 4: Install the Foundation and Floor System
The foundation provides support for the walls and roof while helping the structure resist settlement and movement. Its design depends on soil-bearing conditions, frost requirements, structural loads, and the chosen construction method.
Some root cellars use concrete floors, while traditional cellars sometimes use earth or gravel surfaces to help maintain humidity. However, an exposed earth floor is not automatically appropriate for every underground structure. Groundwater conditions, radon potential, sanitation, drainage, and structural requirements must be considered.
A well-designed floor system should avoid standing water and allow the interior to be cleaned and inspected. If a concrete slab is used, the designer may specify vapor-control measures, drainage provisions, and details that prevent moisture from migrating into the room.
If a moisture-permeable floor is desired for humidity management, that decision should be incorporated into the overall water-control and ventilation design rather than made after construction.
Step 5: Construct the Earth-Retaining Walls
The cellar walls must resist pressure from the surrounding earth and any groundwater that may accumulate outside the structure. These forces are fundamentally different from the loads carried by ordinary above-ground shed walls.
Reinforced concrete walls and properly designed reinforced concrete masonry systems are common structural options. The required wall thickness, reinforcement, connections, and construction details depend on the actual soil conditions and design loads.
Unreinforced concrete blocks, landscape retaining blocks, plywood panels, or ordinary timber framing should not be assumed suitable for a buried walk-in cellar. Even materials that appear substantial can fail when used outside their intended structural application.
Door openings, ventilation penetrations, and connections between walls and the roof require special detailing. These locations can become weak points if structural reinforcement or waterproofing is interrupted.
Step 6: Build the Roof to Support the Earth Cover
The roof is one of the most critical structural components of a fully or partially buried cellar. In addition to its own weight, it may need to support soil, retained moisture, snow, maintenance loads, and other loads specific to the site.
Wet soil can be substantially heavier than dry soil, and load distribution changes depending on the roof geometry and surrounding construction. For this reason, an ordinary residential roof frame or shed roof should never be buried without an engineered design.
The roof system must also be connected properly to the supporting walls. Waterproofing, insulation, drainage, and protection layers should be integrated into the approved roof assembly.
A roof that appears strong enough during construction may still be unsafe once soil is placed over it. Backfilling should not begin until the structure has achieved the required strength and the applicable inspections have been completed.
Step 7: Waterproof the Exterior and Install Drainage
Underground structures are exposed to moisture from rainfall, groundwater movement, and damp surrounding soil. Preventing liquid water from entering the cellar is essential for both structural durability and food storage.
Exterior waterproofing is generally more effective than attempting to seal leaks from inside after construction. The waterproofing system should protect below-grade walls, the roof where applicable, joints, and penetrations.
Drainage components may include drainage boards, filter fabric, free-draining aggregate, and perimeter drains. Their purpose is to reduce water accumulation and direct it toward a suitable discharge location.
However, a drainage pipe without a reliable outlet may accomplish very little. Gravity drainage requires a suitable discharge elevation, while some sites may require a properly designed sump and pump system. A cellar that depends on an electric sump pump should not be described as completely independent of electricity during prolonged outages.
Where groundwater pressure cannot be controlled reliably, a different cellar location or an above-ground design may be the better choice.
Step 8: Install the Ventilation System
Ventilation allows the storage environment to exchange air with the outdoors. It helps remove excess moisture, odors, and gases released by stored produce while providing a way to adjust cellar temperatures when outdoor conditions are favorable.
A traditional passive system often uses a low air inlet and a higher exhaust opening. The arrangement can encourage airflow through temperature differences and wind effects, although actual performance varies with weather, duct configuration, and pressure conditions.
Ventilation openings should include weather protection, pest-resistant screening, and accessible dampers or other suitable controls. Ducts should be arranged to prevent rainwater entry and unwanted condensation accumulation.
Airflow must be managed carefully during winter. Leaving vents fully open during severe freezing weather can damage stored vegetables, while inadequate ventilation can contribute to excess moisture and poor air quality.
For larger or unusually configured cellars, a qualified designer may recommend a more controlled ventilation system. The goal is not maximum airflow at all times but enough air exchange to maintain appropriate storage conditions.
Step 9: Construct a Safe, Insulated Entrance
The entrance is often the part of a root cellar most exposed to outdoor temperature changes. A poorly insulated door can allow freezing air to enter during winter and warm, humid air to enter during summer.
A durable, weather-resistant exterior door with appropriate insulation and seals can reduce these temperature swings. In cold climates, an entrance vestibule or two-door arrangement may provide additional protection.
Steps, landings, handrails, lighting, and emergency access should be planned for regular use. Doors must be operable from inside without a key or special tool, and the access route should not create a trapping hazard.
Where electrical lighting is installed, use equipment and wiring suitable for the damp environment and applicable electrical codes. Battery-powered lighting may provide a useful backup during power outages.
Step 10: Backfill and Restore the Surrounding Ground
Backfilling is not simply a matter of pushing excavated dirt against the completed walls. The material, placement method, compaction, and sequence must be compatible with the structural design and waterproofing system.
Improper backfilling can damage waterproofing membranes, displace drainage components, or overload walls before the structure is ready. Heavy equipment should not operate over or immediately beside the structure unless the design specifically allows it.
The finished ground should direct surface runoff away from the entrance and vulnerable joints. Any required drainage outlets must remain accessible and protected from blockage.
Before the cellar is placed into service, inspect the completed structure for water intrusion, damaged finishes, obstructed ventilation, and other deficiencies.
Step 11: Install Shelving and Storage Bins
Once the structure is complete and dry, the interior can be organized for produce storage. Shelves should be sturdy, easy to clean, and arranged to allow air circulation around stored vegetables.
Wooden slatted shelves, removable bins, and ventilated crates are traditional options. Storage containers should not block air inlets or exhaust openings, and produce should be kept away from walls where condensation may occur.
Leave sufficient aisle space to inspect crops and remove spoiled items without disturbing the entire harvest. Heavy bins should be positioned where they can be lifted safely, and shelves should be secured against tipping.
Separate storage zones are useful because not every crop requires the same conditions. Where a single room cannot provide the necessary temperature and humidity differences, incompatible crops should be stored elsewhere.
Step 12: Test the Cellar Before Filling It With Food
A newly completed cellar should be monitored before it is filled with a valuable harvest. Measure temperature and relative humidity at several locations, including near the floor, on upper shelves, and close to the entrance.
Observe how conditions change between daytime and nighttime and during different weather patterns. Check whether ventilation adjustments produce the intended results, whether condensation develops, and whether water enters after heavy rain.
A cellar completed during warm weather may not reach appropriate cold-storage temperatures until outdoor conditions become favorable. Likewise, a cellar that performs well in winter may be unsuitable for storing the same crops throughout summer.
Testing provides an opportunity to correct environmental problems before hundreds of pounds of produce are placed at risk.
How Much Does It Cost to Build an Underground Root Cellar?
The cost of a permanent root cellar varies widely according to its size, location, structural design, soil conditions, access for machinery, groundwater management, and local labor rates. A small hillside project on stable, well-drained ground may be considerably less expensive than a fully buried concrete structure requiring extensive excavation and engineered drainage.
Major expenses commonly include site investigation, design and permits, excavation, foundation work, retaining walls, the structural roof, waterproofing, drainage, backfilling, and the entrance assembly.
Interior shelving is usually a relatively small part of the total project cost. The underground structural shell and the work required to keep it safe and dry are generally the larger financial considerations.
| Cost Category | What Influences the Expense |
|---|---|
| Design and permits | Engineering requirements, inspections, and local regulations |
| Excavation | Soil conditions, rock, equipment access, and spoil removal |
| Structural construction | Concrete, reinforcement, roof loads, and labor |
| Water management | Waterproofing, drainage, and groundwater conditions |
| Interior equipment | Shelving, bins, monitoring, lighting, and ventilation controls |
How Much Does It Cost to Build a Root Cellar Yourself?
Building your own root cellar can reduce labor expenses significantly, especially if you already own basic tools and have suitable ground for construction. However, the cost depends on whether you are building a small non-walk-in storage pit, a partially buried hillside cellar, or a permanent underground room.
For budgeting purposes, the following DIY ranges illustrate the difference between simple storage projects and more substantial underground construction.
| DIY Root Cellar Type | Estimated Cost | Project Description |
|---|---|---|
| Small buried storage pit or barrel | $100–$500 | Non-walk-in seasonal vegetable storage with limited capacity |
| Partially buried hillside cellar | $2,000–$5,000+ | Smaller structure using favorable terrain and substantial owner labor |
| Fully underground walk-in cellar | $5,000–$15,000+ | More extensive excavation, structural construction, waterproofing, and drainage |
These are approximate DIY planning ranges rather than contractor quotes. Lower-cost examples may exclude engineering, permits, equipment rental, professional excavation assistance, and unexpected groundwater problems. A properly engineered underground structure may cost considerably more, even when the homeowner performs much of the work.
Homeowners can often save money by building shelving, installing storage bins, completing landscaping, and performing other suitable nonstructural tasks themselves. However, excavation protection, earth-retaining walls, buried roofs, and groundwater management must be properly designed and constructed. Cutting corners on these components can create serious safety hazards.
For additional budgeting information, see Off-Grid Sage’s DIY Root Cellar Building Guide and Angi’s Root Cellar Cost Guide.
Because underground construction costs are highly site-specific, a single national price estimate can be misleading. Obtain local estimates based on the same completed design and scope of work, including drainage, waterproofing, excavation protection, and site restoration.
For households with limited budgets, it may be more economical to begin with an insulated storage room, a small properly designed buried storage container, or another non-walk-in method before investing in a permanent underground structure.
Root Cellar Temperature, Humidity, and Ventilation
Building the cellar is only half the job. Once it is operational, maintaining the correct storage environment determines how well the harvest keeps.
Most root vegetables store best under cold, humid conditions, but the exact requirements vary. Potatoes generally prefer slightly warmer and less humid conditions than carrots or beets, while winter squash and sweet potatoes need substantially warmer storage.
Managing Temperature
During cool weather, controlled ventilation may help lower the cellar temperature. During freezing conditions, airflow may need to be restricted to prevent produce from freezing. The appropriate adjustments depend on actual thermometer readings rather than outdoor temperature alone.
Temperature differences can also develop within the room. Cold air tends to settle near the floor, while warmer air collects higher up. Measuring several locations helps identify suitable positions for different crops.
Do not assume that deeper burial always produces colder conditions. In regions with relatively warm ground temperatures, the cellar may never reach the ideal range for certain crops without seasonal outdoor cooling.
Maintaining Relative Humidity
Carrots, beets, and many other root crops lose quality when stored in excessively dry air. High relative humidity helps prevent moisture loss, but wet surfaces, dripping condensation, and standing water create different problems.
Humidity can be managed through ventilation, the amount of produce stored, and suitable storage containers. Some crops benefit from being packed in clean, slightly damp storage media, provided the material does not become waterlogged.
If humidity remains too high and condensation forms, inspect ventilation and temperature conditions before introducing more moisture. Persistent wetness may indicate a drainage or waterproofing problem rather than a normal storage condition.
Preventing Mold and Condensation
Mold problems often develop when damaged produce, excessive moisture, poor air circulation, and unsuitable temperatures occur together. Regular inspections are important because one decaying vegetable can affect nearby stored crops.
Keep containers clean, remove visibly spoiled produce promptly, and avoid packing vegetables so tightly that air cannot circulate. If mold develops on building surfaces, investigate the underlying moisture source rather than relying on repeated surface cleaning alone.
Any persistent musty odor, unexplained water accumulation, or visible structural deterioration deserves attention before the cellar continues to be used for food storage.
Best Vegetables to Store in an Underground Root Cellar
The best root cellar crops are generally mature, undamaged vegetables selected for good keeping quality. Late-season varieties often store better than tender early-season crops, although variety, growing conditions, curing, and handling all influence storage life.
Harvest vegetables carefully to avoid cuts and bruises. Remove severely damaged produce from long-term storage, and follow crop-specific guidance for curing and cleaning. Not every vegetable should be washed before storage.
| Crop | Temperature | Relative Humidity | Storage Notes |
|---|---|---|---|
| Potatoes | 38–40°F | 80–90% | Keep dark and away from fruit |
| Carrots | 32–40°F | 90–95% | Protect against drying |
| Beets | 32–40°F | 90–95% | Store sound roots after trimming tops |
| Turnips | 32–40°F | 90–95% | Inspect regularly for soft spots |
| Cabbage | 32–40°F | 90–95% | Separate from odor-sensitive foods |
| Onions | 32–35°F ideal | 60–70% | Cure and keep relatively dry |
| Winter squash | 50–55°F | 60–75% | Requires warmer, drier storage |
| Sweet potatoes | Above 50°F | 80–90% | Cure properly; avoid chilling |
These storage conditions illustrate why a single root cellar cannot provide the ideal environment for every crop. A cold, humid room suitable for carrots may be unsuitable for winter squash or sweet potatoes. Separate rooms, insulated compartments, or alternative storage locations may be necessary.
How Long Can Vegetables Last in a Root Cellar?
Storage life depends on crop variety, maturity, condition at harvest, temperature, humidity, and how consistently those conditions are maintained. Under favorable conditions, some storage crops can remain usable for several months, while others deteriorate much sooner.
Potatoes and many root vegetables can provide a substantial portion of winter food supplies when properly handled. Cabbage, onions, squash, and other crops have their own storage limitations and should be checked regularly.
Do not treat published storage-life estimates as guarantees. A crop damaged during harvest or stored above its recommended temperature may deteriorate much faster than expected.
Why Apples and Potatoes Should Be Stored Separately
Apples and certain other fruits release ethylene as they ripen. This naturally occurring plant hormone can accelerate undesirable changes in nearby vegetables, including sprouting in potatoes.
For that reason, fruits and vegetables are generally better stored in separate spaces. Strong-smelling vegetables such as cabbage and turnips can also transfer odors to other foods.
Where a cellar is used for multiple crops, separation should account for airflow as well as physical distance. Putting apples and potatoes on opposite shelves may not provide meaningful separation if the same air circulates freely throughout the room.
Can a Root Cellar Store Food During a Long-Term Power Outage?
One of the greatest advantages of a naturally cooled root cellar is that its basic temperature-moderating function does not require a running refrigerator or freezer. During an extended blackout, it may continue protecting suitable vegetables as long as outdoor and underground conditions remain within an acceptable range.
This makes a root cellar particularly useful for households that grow significant quantities of storage crops. Rather than relying entirely on electrical refrigeration, a family can preserve part of its harvest using a combination of cool storage, canning, dehydration, and other established methods.
However, a root cellar does not replace every type of food preservation. It is not a safe substitute for refrigeration of raw meat, dairy products, cooked leftovers, or other foods that require controlled refrigerated temperatures.
Likewise, an underground room that stays at 50°F or warmer cannot safely function as a conventional refrigerator simply because it feels cool when someone enters it.
For emergency preparedness, the most dependable approach is to match each food to an appropriate preservation method and maintain several storage options rather than depending on one system.
Common Underground Root Cellar Mistakes to Avoid
Many root cellar problems begin during planning or construction, long before the first vegetables are stored. Avoiding the following mistakes can improve performance and reduce the likelihood of expensive repairs.
Building Where Groundwater Collects
Persistent groundwater can create pressure against the structure and allow moisture to enter through poorly protected joints or penetrations. A location that requires constant pumping may be unsuitable for a cellar intended to operate during long-term power failures.
Using Walls or Roofing Not Designed for Burial
Ordinary shed walls, unsupported block walls, and lightweight roofing materials are not appropriate substitutes for engineered earth-retaining construction. Soil loads can cause sudden structural failure, especially when groundwater or heavy equipment adds pressure.
Ignoring Ventilation
Without appropriate air exchange, excess moisture, odors, and gases can accumulate. Poor ventilation may also make it difficult to cool the cellar during favorable outdoor weather.
Allowing Freezing Air to Enter Uncontrolled
Ventilation is useful, but cold winter air can freeze vegetables near intake openings. Adjustable controls and temperature monitoring are important, particularly during severe cold spells.
Mixing Crops With Incompatible Storage Requirements
Carrots and winter squash do not require the same environment. Attempting to store every vegetable under identical conditions often shortens the keeping quality of at least some of the harvest.
Storing Damaged or Decaying Produce
Bruised, cut, diseased, or already rotting vegetables are poor candidates for long-term storage. Inspect the harvest before storage and remove deteriorating produce during routine checks.
Failing to Monitor Conditions
A cellar that performed well during one winter may behave differently during a warmer season or after drainage conditions change. Regular temperature, humidity, and moisture inspections are necessary for reliable performance.
Root Cellar Maintenance Throughout the Year
A properly constructed root cellar should receive routine attention even when it is not being used heavily. Preventive maintenance helps protect the structure and reduces the likelihood of losing stored food.
Before the fall harvest, clean storage bins and shelving, remove old plant material, inspect screens and ventilation openings, and look for evidence of rodents or insects. Check the entrance seals and confirm that the door opens and closes properly.
During the storage season, inspect produce regularly for soft spots, sprouting, shriveling, and mold. Monitor temperatures during unusually warm or cold weather, and adjust ventilation when conditions require it.
After heavy rain or snowmelt, look for water intrusion, blocked drainage outlets, or new damp areas. Structural cracks, wall movement, roof distress, or persistent leaks should be evaluated before continued use.
| When | Maintenance Task |
|---|---|
| Before harvest | Clean shelves, inspect drainage, test ventilation, and check for pests |
| Weekly during storage | Check temperature, humidity, and produce condition |
| After major storms | Inspect for water intrusion, runoff problems, and drainage blockage |
| After storage season | Remove debris, clean containers, and address moisture or structural issues |
Underground Root Cellar Frequently Asked Questions
How Deep Does an Underground Root Cellar Need to Be?
There is no universal depth that guarantees proper storage temperatures. Burial depth must be determined by local ground temperatures, frost conditions, groundwater, structural requirements, and the selected design. A partially buried hillside cellar may perform well without being fully underground, while a deeper cellar in a warm region may still be too warm for some crops.
Can You Build a Root Cellar With Concrete Blocks?
Concrete masonry can be used in certain underground structures when the walls, reinforcement, foundations, connections, and waterproofing are properly engineered. Ordinary unreinforced concrete block walls should not be assumed capable of resisting buried soil loads.
Does a Root Cellar Need Electricity?
A traditional passive root cellar can operate without mechanical refrigeration, and its basic storage function may require no electricity. However, some installations use electric lighting, fans, monitoring systems, or sump pumps. A cellar that depends on a sump pump for groundwater control is not fully independent of electrical power.
Can a Root Cellar Be Used During Summer?
It depends on the local climate and actual interior temperature. In many areas, underground temperatures during summer remain above the ideal range for storing potatoes, carrots, and similar crops. A root cellar should not be assumed to provide year-round refrigeration without measured evidence.
Can You Bury a Shipping Container and Use It as a Root Cellar?
A standard shipping container should not be buried without a structural design specifically addressing earth pressure, roof loading, corrosion, waterproofing, and access. Shipping containers are primarily designed for different loading conditions, and their sidewalls and roofs may fail when exposed to unsupported soil loads.
Can You Build a Root Cellar Without a Hill?
Yes. Fully buried and earth-bermed designs are possible on relatively level properties, provided the site has suitable soil, drainage, groundwater conditions, and a properly engineered structural design. However, the construction work may be more extensive than for a suitable hillside location.
What Is the Difference Between a Root Cellar and a Buried Storage Pit?
A walk-in root cellar is a permanent enclosed structure with an entrance, structural walls, roof, ventilation, and usable interior space. A buried storage pit is generally a much smaller, non-occupiable arrangement used to protect suitable crops under controlled conditions. A storage pit should never be treated as a safe underground room or entered as though it were one.
Is an Underground Root Cellar Worth Building?
For households growing substantial quantities of storage vegetables, a properly designed root cellar can provide long-term value by reducing dependence on electrical refrigeration and extending the usefulness of the harvest. However, construction costs can be significant, and the benefits depend on climate, crop selection, storage volume, and how frequently the cellar will be used.
For smaller gardens, an insulated storage space or other root cellar alternative may provide better value without the cost and complexity of underground construction.
Final Thoughts
An underground root cellar is one of the oldest and most practical examples of using the natural environment to preserve food. When properly designed and maintained, it can extend the storage life of many homegrown vegetables, reduce dependence on electricity, and strengthen a household’s ability to manage food supplies during extended emergencies.
The key to a successful cellar is understanding that food storage conditions and underground construction requirements are equally important. Cool temperatures and high humidity are valuable only when the structure remains safe, dry, ventilated, and accessible.
For properties with suitable soil and drainage, a permanent underground root cellar can become a valuable part of a long-term self-sufficiency plan. For properties where excavation is impractical or groundwater is difficult to control, a smaller insulated storage system may be a safer and more economical solution.
Whatever design is chosen, the goal remains the same: preserve more of the harvest, reduce waste, and maintain a dependable supply of food when conventional systems are unavailable.
Further Reading
Building an underground root cellar is just one part of creating a dependable, long-term food storage system. The following guides cover alternative storage methods, survival gardening, and preparing for extended emergencies.
- Root Cellar Alternatives for Homes Without a Basement – Explore practical ways to store vegetables without constructing a traditional underground cellar.
- How to Build a Self-Sufficient Garden for a Family of Four – Learn how to plan a productive garden capable of supplying a substantial portion of a family’s food.
- Best High-Calorie Crops for a Survival Garden – Discover calorie-dense crops that can strengthen long-term food security.
- How to Survive a Long-Term Power Outage (6–12 Months) – Prepare for extended disruptions to electricity, food supplies, water, and other essential services.
Additional Resources
These university extension and government resources provide additional guidance on vegetable storage conditions and safe excavation practices.
- University of Missouri Extension – Home Storage of Fruits and Vegetables in Root Cellars – Recommended storage temperatures, humidity levels, and handling practices for common fruits and vegetables.
- OSHA – Trenching and Excavation Safety – Important guidance on excavation hazards, soil stability, protective systems, and safe construction practices.