How to Stay Warm Without Power (Safe Emergency Heat That Works)
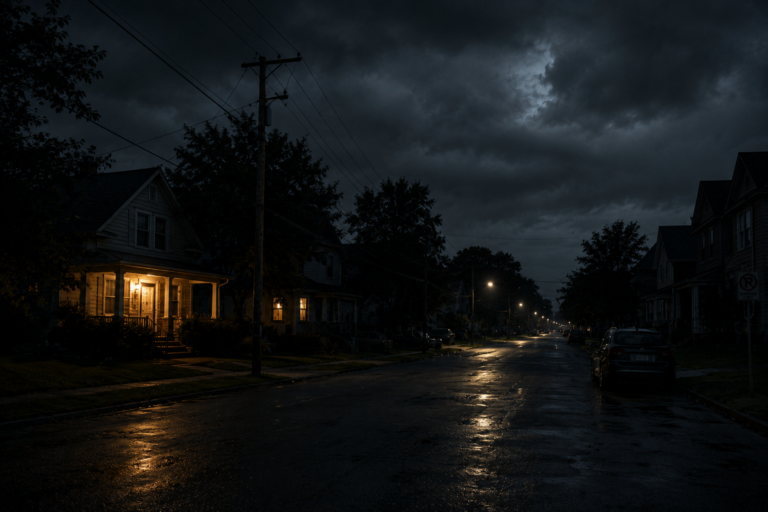
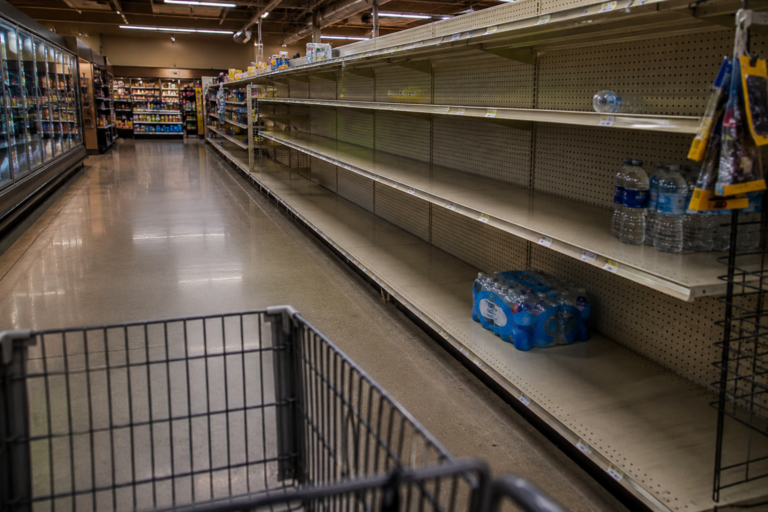
When the grid goes down in winter, your house can lose heat fast — sometimes 10°F every hour once the furnace stops. Within a single night, interior temps can fall below 40°F, turning comfort into survival.
The reality is that grid-down cold kills quietly. Every year, people die of hypothermia inside their own homes because they underestimate how fast the chill sets in after the power cuts.
This post contains affiliate links. I may earn a small commission at no extra cost to you. Learn more.
But as a prepared homeowner or survivalist, you’re not going to let that happen.
You’re going to take control — using backup heat sources, passive insulation, and safe emergency systems to keep your family alive, comfortable, and alert.
But here’s the reality: most people think they’re prepared—until their heat source fails, their fuel runs out, or they realize they can’t contain the warmth they’re producing.
This guide isn’t just about heat—it’s about building a system that actually works when conditions get worse.
💡 Think of this as your winter version of “Grid-Down Survival Power.” Same principles — only now, the energy priority isn’t lights or Wi-Fi… it’s warmth, hydration, and safety.
Emergency heat planning works best when it’s part of a complete preparedness system.
If the outage stretches beyond the first day, your situation changes fast—especially after the first 72 hours when fuel, heat, and safety all become harder to manage. For a full breakdown of what happens next, see what really happens during the first 72 hours of a disaster.
To build a complete system covering water storage, backup power, communication, and long-term outages, start with the Emergency Preparedness Master Plan.
If you’re planning for outages that last more than a few hours, emergency heat should be part of a full grid-down strategy—not a standalone fix. For power systems, fuel planning, and redundancy, see Grid-Down Survival Power: The Off-Grid Energy Playbook.
Recommended Gear: See our complete Emergency Power & Lighting Gear List for recommended solar generators, backup batteries, lanterns, flashlights, and blackout-ready power systems.
The following 11 strategies are practical, affordable, and proven by both off-grid homesteaders and seasoned preppers. Each can be implemented before a storm, giving you control even when the grid fails.
Quick Picks: Best Emergency Heat Options (2026)
- Best Overall: Mr. Heater Buddy (indoor-safe propane)
- Best Budget: Single-tank kerosene heater (1-K fuel)
- Best Electric Backup: Heated blanket + power station
- Best No-Fuel Option: Passive insulation + zone heating
Don’t overcomplicate this. If you’re starting from zero, pick one reliable heat source and build around it. Then add backup layers so you’re not relying on a single point of failure.
If you only choose ONE emergency heat solution:
• Apartments / indoor use → Mr. Heater Buddy (indoor-safe propane)
• Long overnight heat → Kerosene heater (1-K fuel)
• No fuel available → Passive insulation + zone heating
• Battery-only setups → Heated blanket + power station
If you only buy one thing this winter, start with an indoor-safe propane heater and build redundancy from there.
Safety note: Never use fuel-burning heaters without ventilation. Always run a battery-powered carbon monoxide detector in the same room and follow manufacturer instructions.
Reliable lighting is just as important as heat during winter outages.
See our guide to the best emergency lights for power outages so you’re not navigating your home in the dark.
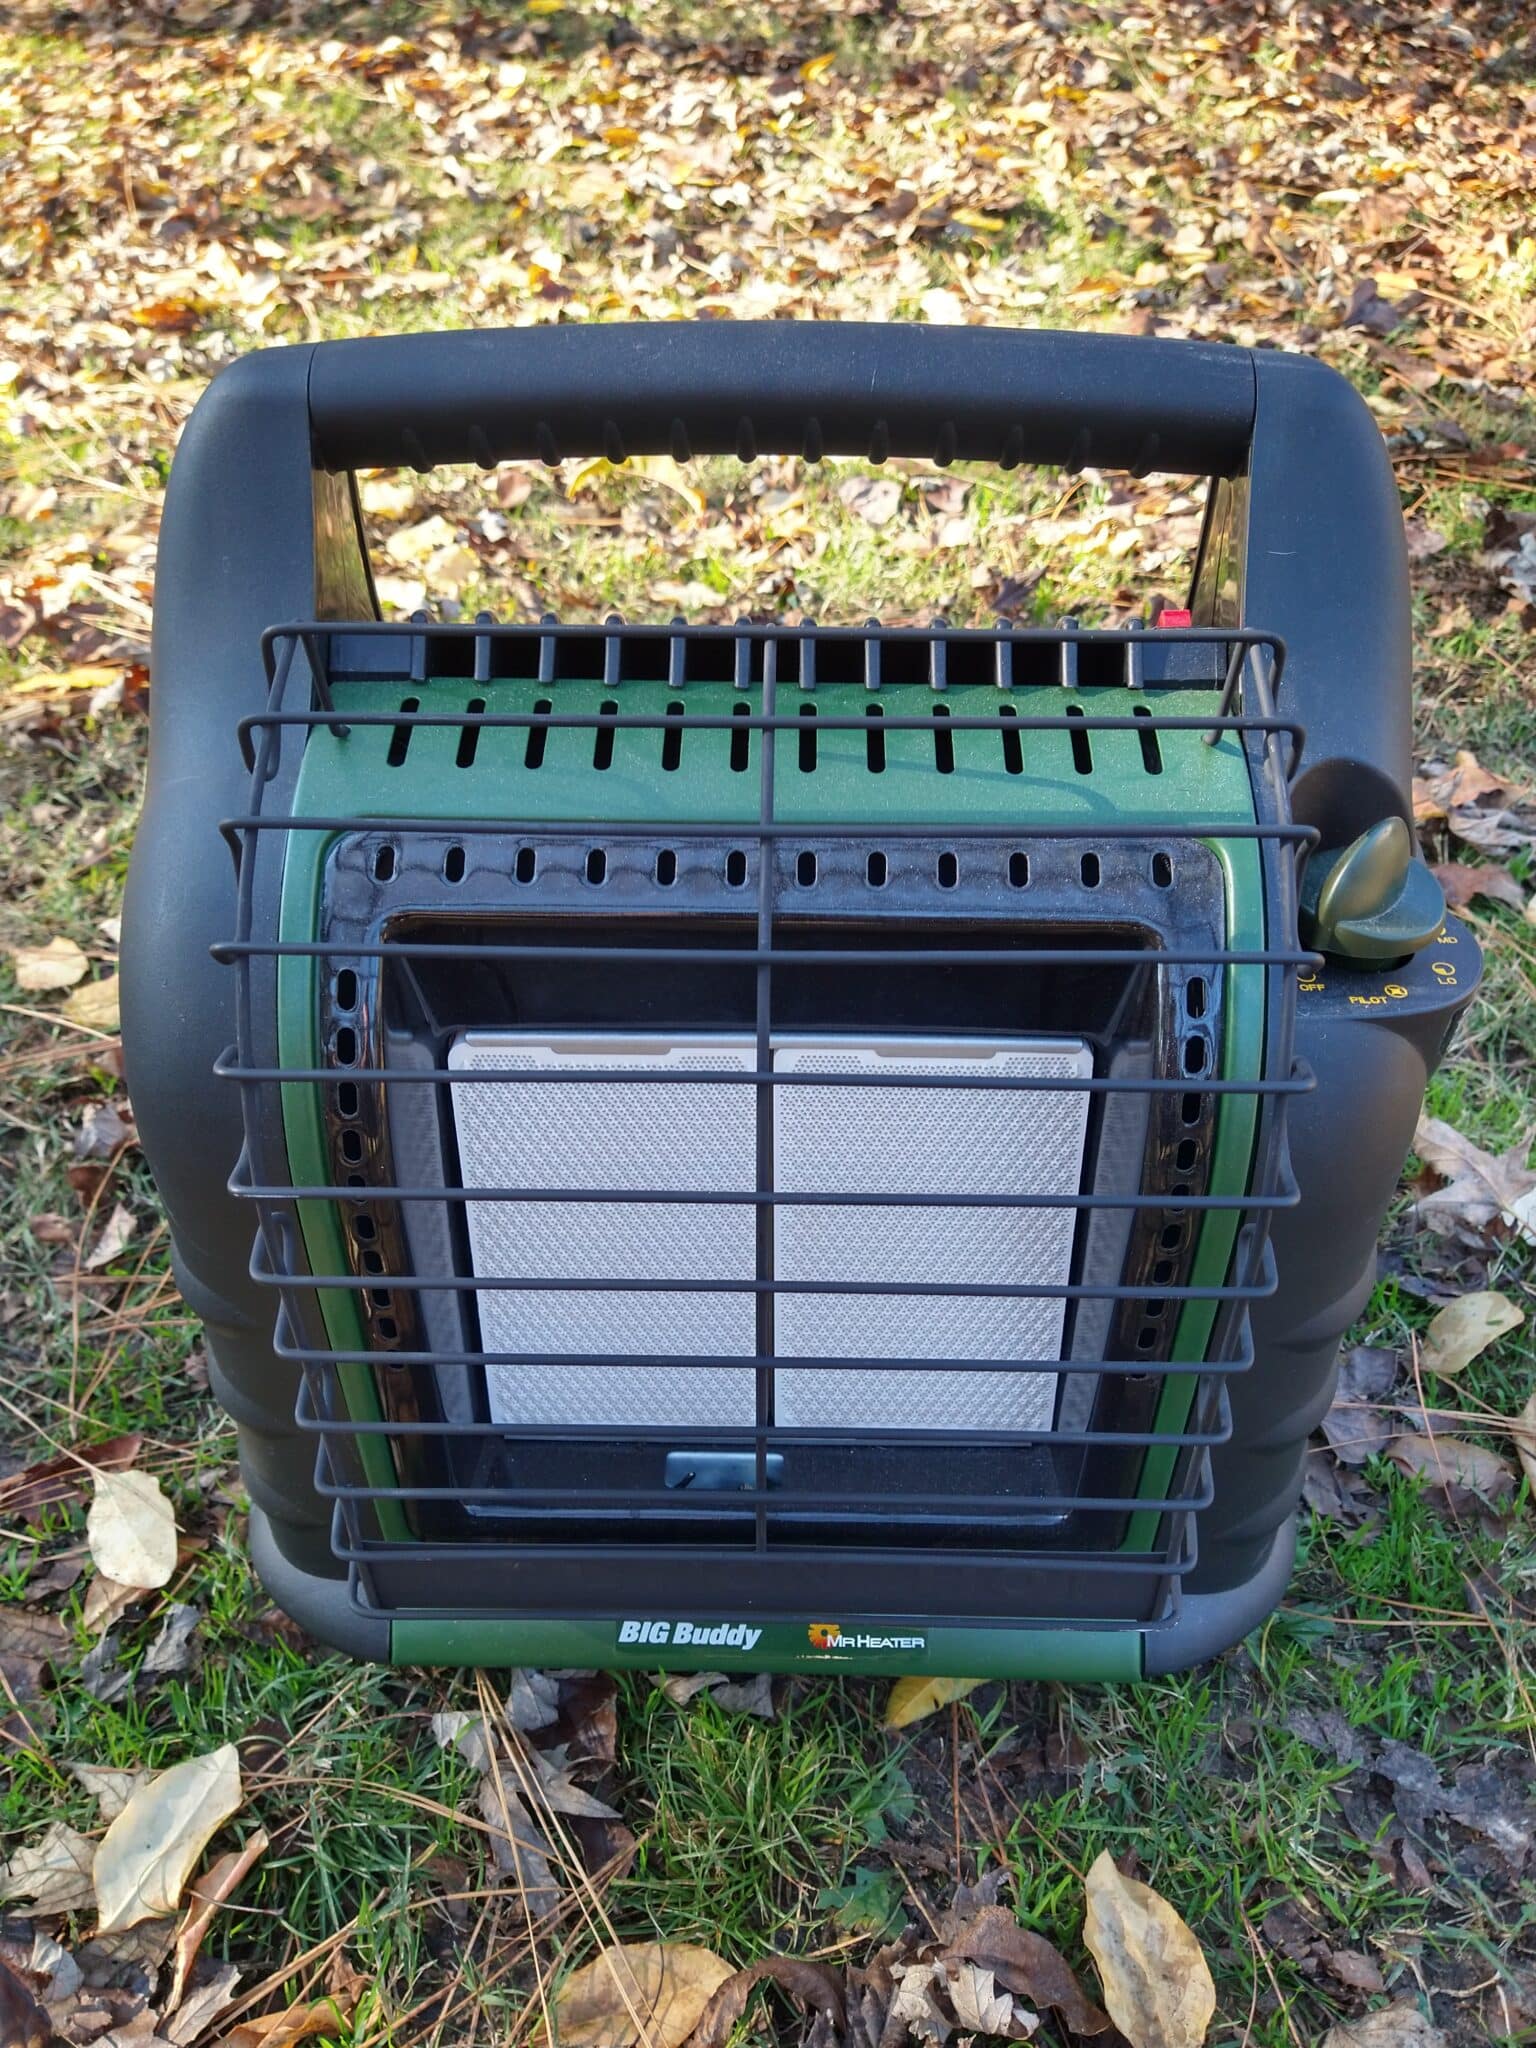
1. Emergency Heat Without Electricity Using Indoor-Safe Propane Heaters
If you only invest in one piece of winter emergency gear, make it an indoor-rated propane heater. When the electric baseboards go cold, the Mr. Heater Buddy or Buddy Flex is the prepper’s best friend.
These compact radiant heaters burn propane cleanly and efficiently, offering 4,000–9,000 BTU/hr, enough to warm most living rooms or bedrooms. They’re built for safety with:
- ODS sensors (Oxygen Depletion Sensors) that automatically shut off the flame if indoor oxygen drops.
- Tip-over protection that kills the gas instantly if the unit falls.
- Low-odor ceramic burners that don’t fill the room with fumes.
Power tip: Buy a 20-lb tank adapter hose so you’re not stuck with 1-lb cylinders. One standard BBQ tank can fuel a Buddy heater for 40–50 hours on low.
Setup Guide
- Place heater on a hard, flat surface away from curtains or bedding.
- Crack a window 1–2 inches for fresh air.
- Use a battery CO detector in the same room.
- Keep a fire extinguisher within arm’s reach.
Why preppers love propane
- Stores indefinitely if sealed tight.
- Burns clean — no soot, minimal smell.
- Available everywhere from gas stations to farm stores.
You can also connect Buddy models to bulk tanks via a filter (a must-have to prevent oil contamination from hoses). A simple one-time setup gives you instant heat whenever the power fails.


2. Kerosene Heaters for Long Burn Times (Old-School Reliability)
When propane runs out, kerosene takes over.
A full 1-K kerosene heater can produce 20,000–23,000 BTU/hr and run continuously for 8–12 hours on one tank. Unlike propane, kerosene doesn’t require pressure; gravity and wicking handle the job.
Why preppers still use kerosene
- It’s incredibly energy-dense — one gallon equals about 135,000 BTU, more than propane or butane.
- Can be stored for years with fuel stabilizer (Kleen-Heat or PRI-D).
- Works in near-freezing temperatures where propane pressure drops.
Safety checklist
- Always burn clear 1-K kerosene (not dyed #1 diesel).
- Store fuel in blue kerosene cans (color-coded for safety).
- Keep 3 feet of clearance on all sides.
- Extinguish flame before refueling — never pour hot.
- Crack a window for ventilation, even in bitter cold.
💧 Bonus comfort tip: Set a small pot of water on top — adds moisture and gentle radiant heat.
Kerosene gives you a longer-duration heat plan compared to small propane bottles. Many preppers rotate both fuels: propane for quick start-ups, kerosene for overnight burns.

3. Wood Stoves, Fireplaces & DIY Flue Solutions (Real Heat, Real Control)
If you’re lucky enough to have a wood stove or working fireplace, you already possess one of the few heating systems that laugh at blackouts. Unlike electric heat pumps or gas furnaces that need a blower, a wood stove’s convection is fully passive — fire, metal, and airflow.
Why wood wins
- Zero dependence on grid energy.
- Fuel is renewable and locally sourced.
- Provides both radiant and convective heat, keeping walls and floors warm, not just air.
- Can be used for cooking, boiling water, or drying wet clothes during extended outages.
Smart use tips
- Stack wood loosely to encourage airflow and complete combustion.
- Burn seasoned hardwoods like oak, maple, or hickory (avoid pine indoors).
- Keep a heat-powered stove fan — it converts thermal energy into motion, circulating warm air silently.
- Clean your flue once per year. Creosote buildup is a fire hazard.
- Keep a metal ash bucket and lid handy. Never dump ashes on the ground; they hold heat for 24+ hours.
DIY heat hack: If you’re using a vented wood-burning fireplace, add a fireplace heat exchanger or “heatilator.” It channels hot air into the room instead of letting it escape up the chimney.
🔥 Related guide: Ultimate Survival Fire Starters Guide 2025 – a must-read if you rely on primitive ignition when the matches run out.
4. Battery-Powered Personal Heat (12V & Low-Watt Options)
When all you’ve got is a portable power station, every watt counts. Modern units like the EcoFlow DELTA 2 Max, Jackery 2000 Plus, or Bluetti Elite 200 can handle low-draw heat gear but struggle with traditional space heaters.
If you’re building a blackout power setup, our guide explains what size solar generator you actually need during an outage.
Let’s do the math:
A small 1,000-watt space heater drains a 1,000Wh battery in about one hour. Not ideal.
Instead, go for targeted heat solutions that sip power.
✅ Efficient options
- Heated blankets/throws (40–80W) – warm your body, not the air.
- 12V heated vests or socks (20–40W).
- Hand warmers (rechargeable via USB).
- Heated sleeping bags for overnight warmth.

💡 Pro tip: Combine a heated vest with a reflective survival blanket to trap that warmth — you’ll stay toasty for hours on minimal battery use.
Safety reminder: Avoid connecting resistive loads (like big heaters) to low-end power banks; they can overheat or trip breakers. Always use gear rated for DC or inverter power.
Battery-powered heat only works if your system is sized correctly. Most setups fail because they underestimate power demand. See how to build a system that actually lasts in our grid-down power guide.
🔗 Internal references:
5. Trap the Heat You Have — Passive Insulation Wins Big
This is where your survival advantage multiplies. Heat retention is the silent weapon of winter preppers.
You can’t always produce more heat, but you can lose less of it — and that’s equally powerful.
Focus on these five insulation moves:
- Windows: Use 3M window film or bubble wrap sealed with painter’s tape. Even thin plastic creates a dead-air layer that traps radiant warmth.
- Curtains: Hang thermal or blackout curtains and close them tightly after sundown.
- Doors: Roll up towels or use draft stoppers to block airflow under doors.
- Floors: If you have tile or laminate, throw down rugs or blankets. Floors bleed heat.
- Ceiling fans: Reverse rotation to “winter mode” — low and clockwise — pushing warm air down.
Advanced move:
If your house has a big open layout, hang heavy blankets to create “micro-rooms.” The smaller the air volume, the longer your heat lasts.
A family of four in a tented-off living room can maintain 55–60°F even when the rest of the house drops below freezing.
Read More: Two-Week Power Outage Guide and Grid-Down Survival Power both teach load management — apply the same mindset to heat loss.
6. Use Water Wisely — Humidity = Hidden Warmth
Most people don’t realize how dry air makes you feel colder.
Low humidity accelerates evaporation from your skin, stealing heat. By adding controlled moisture, you can gain 2–4°F of perceived warmth without burning extra fuel.
Simple humidity hacks:
- Place a metal pan of water on top of your kerosene heater or wood stove.
- Hang wet towels or shirts in front of (not on) a heater.
- Boil a pot of water periodically — a quick humidity reset.
- Keep houseplants or even a bucket of snow near the heater; it’ll slowly evaporate and balance the air.
Be careful not to overdo it — above 50% humidity, you risk condensation on windows and mold on cold walls.
Aim for a comfortable 30–40% range, and use a cheap hygrometer to monitor it.
7. Protect Your Pipes From Freezing (Before They Burst)
Water expands as it freezes — and that’s what makes frozen pipes one of the most expensive blackout disasters. A burst pipe can dump hundreds of gallons per hour, flooding your home when power finally returns.
Luckily, prevention is simple and doesn’t require electricity.
Pipe Protection Checklist
- Drip your faucets: Even a slow trickle keeps water moving and reduces freezing risk.
- Open cabinet doors: Let warm air circulate around sink plumbing.
- Wrap exposed pipes: Foam sleeves, towels, or even newspaper work in a pinch.
- Insulate crawl spaces: Cold air pooling beneath floors is what freezes pipes fastest.
- Know your shut-off valve: Label it and make sure every adult in the house can close it quickly.
Pro tip: Fill a few bathtubs before the temperature plunges — one for washing, one for toilet flushes, one for emergency drinking water (use purification tabs).
Long outages also require safe water storage.
Our guide on the right way to store emergency water explains how to keep drinking water safe during grid failures.
If temperatures stay below 20°F for more than 24 hours, consider turning off and draining your main line until power returns. It’s better to live without running water than to come back to a flooded basement.
How to Prepare for a Two-Week Power Outage covers safe water rotation and sanitation backups.
8. Cook for Warmth (and Morale)
When the grid goes dark, hot food becomes psychological armor.
A warm meal can boost morale, body temperature, and mental clarity. Cooking safely, though, requires some creativity and gear discipline.
Safe emergency cooking options
- Propane camp stoves: Ideal for garages or covered porches — always with ventilation.
- Backpacking stoves: Compact and efficient, but meant for quick boils, not long stews.
- Thermal cookers: These “heat retainers” let you boil food briefly, then finish cooking off-heat inside an insulated chamber — saving fuel.
- Solar ovens: Yes, they work in winter if there’s sun. Position facing low-angle sunlight.
Comfort meals that warm from the inside
- Oatmeal or cream of wheat
- Soup mixes (instant or canned)
- Rice + canned protein
- Hot cocoa, tea, or bouillon cubes
Stocking shelf-stable meals ahead of time makes winter outages much easier.
See our guide to survival foods that last the longest without refrigeration.
The simple act of cooking helps heat your space — a bonus when it’s 40°F indoors.
For outdoor preppers, fire pits and rocket stoves are fallback options, but never use them inside; carbon monoxide will kill faster than the cold.
- Campfire-Free Cooking
- DIY Soda Can Stove for minimalist setups.
Reality Check: Why Most Homes Fail in Winter Blackouts
Most homes aren’t built to retain heat without power.
- Insulation is incomplete
- Heat escapes faster than people expect
- Fuel runs out sooner than planned
- People try to heat too much space
That’s why survival isn’t about heating your home—it’s about controlling a smaller space efficiently.
9. Zone Heating — The “One-Room Survival Strategy”
Instead of chasing heat across your entire home, collapse your living space.
This is one of the most effective survival tactics during long outages, used by both military outposts and arctic expeditions.
During extended winter outages, staying connected can be just as critical as staying warm. Learn how to maintain contact without phones or internet using a complete off-grid communication system.
How to set up your heat zone
- Choose the smallest room on the warmest side of the house (often south-facing).
- Hang blankets or tarps over doors and hallways.
- Move bedding, food, and pets inside that room.
- Set up your heater, lantern, and CO detector in safe zones with airflow.
- Sleep close together — shared body heat can add several degrees.
💡 Thermal layering trick: Line walls with reflective emergency blankets (silver side facing inward). They bounce radiant heat back toward you, reducing energy loss.
This single-room approach is how people survive multi-day blackouts in subzero weather without central heat — it’s simple, proven, and costs almost nothing to prepare.
10. Use Sunlight & Natural Heat During the Day
Even a pale winter sun can make a difference if you learn to harness it.
A south-facing window can deliver up to 100–250 BTU/hr per square foot — that’s free heat waiting to be used.
Daytime heat capture
- Open all south-facing curtains at sunrise.
- Place dark objects (like bricks, water jugs, or cast-iron pans) in sunlight — they act as thermal batteries.
- Close the curtains again immediately at dusk to lock in that heat.
- Reflect sunlight deeper into rooms using mirrors or aluminum foil panels.
Passive gain tip: Fill black-painted water jugs and place them near windows. By night, they release stored warmth slowly, keeping the room stable.
This low-tech trick complements your main heat sources and gives you a slight but steady temperature buffer throughout the day.
11. Plan Redundancy — Generators, Transfer Switches & Long-Term Safety
The ultimate safeguard against winter blackouts is redundancy — not relying on one system alone.
Propane or kerosene may keep you warm, but only a generator setup ensures full home control: heat, lights, communication, and fridge power.
Backup power hierarchy
- Portable generators: Affordable, flexible, and perfect for running space heaters or pellet stoves. SeeCan a solar generator run a refrigerator during a blackout?
- Dual-fuel models: Propane + gasoline = reliability. (No fuel shortages during propane spikes.)
- Transfer switch kits: Prevent backfeeding power into grid lines — a must for safety.
- Battery-solar hybrids: Quiet, clean, and maintenance-free for short-term outages.
Safety reminders
- Keep all generators 20+ feet from doors and windows.
- Never use in garages.
- Use heavy-duty outdoor-rated cords only.
- Check oil and fuel stabilizer every 30 days during the season.
🔗 Related reads:
- Whole-Home Transfer Switches (2025)
- Top 7 Dual-Fuel Generators for Survival Power
- Generator Grounding & Bonding Made Simple
Mistakes That Can Get You Killed in a Winter Blackout
- Running heaters without ventilation — carbon monoxide kills silently
- Relying on one heat source — if it fails, you’re exposed
- Trying to heat the whole house — wastes fuel and energy
- Ignoring insulation — heat loss is the real enemy
- No backup power plan — batteries die, systems fail
The difference between staying warm and freezing isn’t just gear—it’s avoiding these mistakes.
☑️ Emergency Heat Gear Checklist
✅ Indoor-safe propane heater (Mr. Heater Buddy)
✅ Kerosene heater + 1-K fuel
✅ Carbon monoxide & smoke detectors
✅ Fire extinguisher (ABC-rated)
✅ 3M window insulation film
✅ Thermal curtains / heavy blankets
✅ Draft stoppers or rolled towels
✅ CO-safe battery lantern
✅ Power station or dual-fuel generator
✅ Warm layers — wool blankets, gloves, socks
✅ Backup water & ready-to-heat food
Building a reliable blackout power setup? See our recommended emergency power and lighting gear here.
Prepper Insights
- Heat = Energy + Containment. Generate a small, controllable heat source, then trap it.
- Safety is survival. Never sacrifice air for warmth. Ventilate, monitor, and step outside if you feel dizzy or sleepy.
- Stack redundancy. Propane + passive insulation + generator backup = layered defense.
- Practice now. Test-run heaters, check batteries, and simulate a blackout for one night before winter storms hit.
Final Thoughts — Warmth Is Survival
In a winter blackout, heat is no longer comfort—it’s survival.
The people who make it through aren’t the ones with the most gear—they’re the ones who understand how to manage heat, conserve energy, and plan ahead.
👉 Don’t rely on one solution. Build a layered system that includes heat, power, communication, and backup planning.
👉 If your heat fails, everything else starts to fail with it.
Build a system that covers power, communication, water, and shelter before you need it.
Further Reading
From The Savvy Survivalist
- Grid-Down Survival Power – Your complete off-grid energy playbook.
- Whole-Home Transfer Switches 2025 – Safest way to connect portable generators.
- Two-Week Power Outage Guide – Stay fed, hydrated, and warm for 14 days.
- Ultimate Fire Starters Guide – Light a fire in any weather.
- Top Dual-Fuel Generators 2025 – Best backup options for heat and power.
- Campfire-Free Cooking Guide – Cook safely indoors or off-grid.
External Resources