Long Term Water Storage: Complete Prepper Guide
Long-term water storage is one of the most important parts of emergency preparedness. When municipal water systems fail during extended blackouts, natural disasters, or infrastructure emergencies, having a dependable supply of safe drinking water can make the difference between staying comfortably at home and facing a serious water shortage.
This post contains affiliate links. I may earn a small commission at no extra cost to you. Learn more.
Whether you’re preparing for a two-week power outage or building a 30-day emergency water reserve, knowing how much water to store, which containers to use, and how to maintain your supply is essential.
In this guide, we’ll cover practical water-storage quantities, food-grade containers, safe treatment methods, storage conditions, maintenance schedules, and recommended equipment to help you build a reliable household water reserve.
This guide is part of our complete Water Purification & Storage Systems hub, which covers filtration, water storage, and emergency purification strategies.
For a broader approach to household readiness, see our Emergency Preparedness Plan.
Quick Start: How Much Emergency Water Do You Need?Plan for at least 1 gallon per person per day for drinking and basic sanitation. For a more generous reserve that accounts for cooking and additional hygiene needs, consider 2 gallons per person per day.
For a family of four, that means approximately 120 gallons for 30 days at the minimum planning rate, or 240 gallons at the higher planning rate. Additional water may be needed for pets, hot weather, medical needs, and other household uses.
Use our Water Storage Calculator to estimate a realistic target for your household.
Why Long-Term Water Storage Matters
Most households depend on municipal water systems or electrically powered well pumps for their daily water supply. When those systems are disrupted, access to clean water can become uncertain—even if the faucets initially continue running.
Several emergencies can interrupt water availability or compromise water quality:
- Hurricanes and flooding: Floodwater can damage treatment facilities, contaminate water sources, and disrupt distribution systems.
- Earthquakes: Broken water mains and damaged infrastructure can interrupt service for extended periods.
- Extended power outages: Water treatment plants, pumping stations, and private wells may depend on electricity or limited backup power.
- Infrastructure failures: Equipment breakdowns, contamination incidents, and treatment disruptions can lead to boil-water or do-not-drink advisories.
Major emergencies have demonstrated how quickly dependable water access can be lost. After Hurricane Maria struck Puerto Rico in 2017, damaged infrastructure left many communities struggling to obtain safe drinking water. The Flint, Michigan water crisis also demonstrated the serious consequences of contamination and failures in drinking-water protection.
The practical lesson: Emergency water storage provides an immediate reserve while utility crews restore service, authorities address contamination, or your household establishes an alternative safe water source.
Stored water should be your first layer of protection, supported by appropriate filtration, disinfection supplies, and a backup water plan. No single filter or treatment method removes every possible contaminant.
Recommended Gear: Browse our Emergency Water Storage & Filtration Gear List for water containers, filtration equipment, and emergency water-storage accessories.
How Much Water Should You Store?
The amount of emergency water your household needs depends on the number of people, the length of the outage, local temperatures, and how much water you expect to use for drinking, cooking, and basic sanitation.
The CDC recommends storing at least 1 gallon of water per person per day, with a three-day supply as a starting point and a two-week supply when possible. Households preparing for extended blackouts may choose to store enough for 30 days or longer.
Emergency Water Storage Guidelines
- Minimum planning amount: 1 gallon per person per day for drinking and basic sanitation.
- Expanded planning amount: 2 gallons per person per day to provide additional water for cooking, washing, and household needs.
- Short-term emergency reserve: At least 3 days of water.
- Recommended preparedness goal: Work toward 14 days when storage space and budget allow.
- Long-term preparedness goal: Consider a 30-day reserve for extended outages and infrastructure disruptions.
Hot weather, strenuous activity, pregnancy, certain medical conditions, and other circumstances can increase drinking-water requirements. Store additional water for pets and household members with special needs.
How Much Water Does a Family of Four Need?
For a family of four, the following table shows how storage requirements change depending on the duration of the emergency.
| Emergency Duration | 1 Gallon Per Person/Day | 2 Gallons Per Person/Day |
|---|---|---|
| 3 Days | 12 Gallons | 24 Gallons |
| 7 Days | 28 Gallons | 56 Gallons |
| 14 Days | 56 Gallons | 112 Gallons |
| 30 Days | 120 Gallons | 240 Gallons |
Calculate Your Household’s Water Needs
Use our Water Storage Calculator to estimate how much water to store based on household size, pets, and emergency duration.
Don’t Forget Pets, Cooking, and Sanitation
Pets and livestock need their own emergency water reserves. The amount varies with animal size, diet, weather, and activity level. Consult your veterinarian or agricultural extension guidance when planning water supplies for animals.
Cooking dry foods, washing dishes, personal hygiene, and cleaning can also increase water consumption. If your household depends heavily on dehydrated or shelf-stable foods, account for the water required to prepare those meals.
For food-storage planning, read our guide to survival foods that last the longest without refrigeration.
Start Small and Expand Your Water Reserve
You do not need to purchase hundreds of gallons of storage capacity at once. Begin with enough drinking water for three days, expand toward two weeks, and gradually build a larger reserve if your space and budget allow.
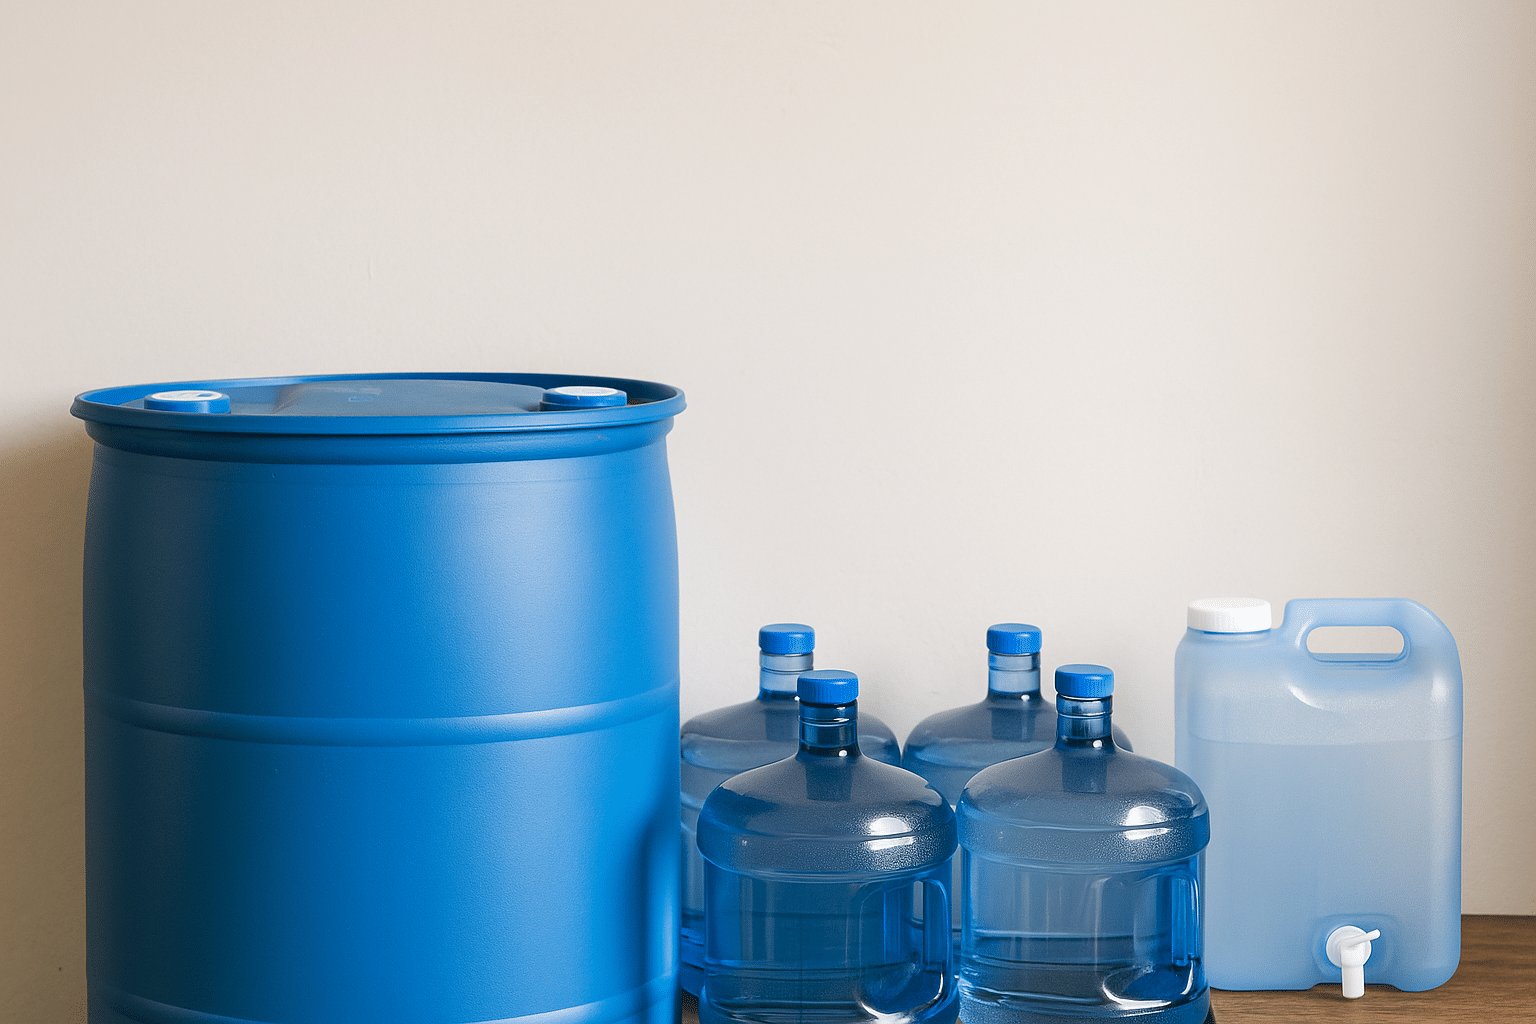
Smaller portable containers are useful for everyday access and evacuation planning, while larger food-grade barrels provide more efficient bulk storage at home.
Remember that water is heavy: one gallon weighs approximately 8.34 pounds. A full 55-gallon barrel contains roughly 459 pounds of water, excluding the container itself. Place large containers on a floor or support structure capable of safely carrying their weight.
Before filling containers with collected or potentially unsafe water, review our Top 10 Water Purification Methods guide. Water affected by fuel, pesticides, or other hazardous chemicals may not be safe even after boiling or ordinary disinfection.
Essential Water Storage Gear (Recommended Setup)
Building a dependable long-term emergency water supply starts with choosing the right storage containers. Food-grade barrels work well for bulk household storage, while smaller portable containers make it easier to dispense water, rotate supplies, and move water when necessary.
The following four product categories can help you build a practical water-storage system. Choose containers designed for potable water, and verify the exact product specifications before purchasing.
1. 55-Gallon Food-Grade Water Barrel — Best for Bulk Storage
A 55-gallon food-grade water barrel is one of the most practical options for households building a larger emergency water reserve. Its capacity makes it useful for storing water for extended blackouts, municipal water interruptions, and other emergencies.
Choose a barrel specifically rated for drinking-water storage, with a secure lid or bung openings. Opaque containers help limit light exposure, while a compatible food-safe siphon or manual pump makes dispensing water easier.
- Best for: Bulk household water storage.
- Capacity: Approximately 55 gallons.
- Advantages: Large storage capacity and efficient use of floor space.
- Considerations: Heavy when full, difficult to relocate, and may require a separate dispensing pump.
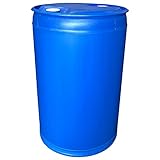
Storage tip: A full 55-gallon barrel contains approximately 459 pounds of water before accounting for the barrel itself. Position it on a stable, adequately supported surface before filling.
2. Stackable 5–7 Gallon Water Containers — Best for Flexible Storage
Smaller water containers are ideal for households that want a manageable emergency supply without relying entirely on large barrels. They are easier to fill, rotate, dispense from, and distribute between different storage locations.
Look for food-grade construction, secure caps, comfortable carrying handles, and a dispensing spigot if needed. Only stack filled containers when the manufacturer specifically approves that arrangement.
- Best for: Apartments, smaller homes, vehicle kits, and supplemental household storage.
- Capacity: Commonly 5–7 gallons per container.
- Advantages: Portable, modular, and easier to maintain than large barrels.
- Considerations: Multiple containers are needed to build a substantial reserve.

Buying tip: A 7-gallon container holds approximately 58 pounds of water, excluding the container. Consider whether every household member can safely lift and carry it when full.
3. Water Bricks — Best for Modular Water Storage
Modular water-storage containers, often called water bricks, allow you to expand your emergency supply gradually. Their compact design can be useful when storage space is limited or when you want smaller quantities of water distributed across several containers.
These containers are especially useful for organizing emergency supplies in closets, storage rooms, and dedicated preparedness areas. Verify that the specific product is approved for potable water and follow its stacking and filling instructions.
- Best for: Modular emergency water storage and limited-space preparedness.
- Advantages: Smaller individual containers, flexible organization, and gradual expansion.
- Considerations: Higher cost per gallon is possible, and individual capacities vary by product.

4. Water Preserver Concentrate — Optional Long-Term Storage Treatment
Some emergency water-preservation products are marketed for extending the storage period of properly prepared drinking water. However, a water-preservation additive is not a substitute for clean source water, sanitized containers, secure sealing, and appropriate storage conditions.
Products advertising multi-year storage periods may have specific requirements involving water quality, dosage, container materials, and storage temperature. Follow the manufacturer’s current labeling and instructions rather than assuming that every product provides the same storage life.
- Best for: Households considering a manufacturer-approved extended-storage treatment.
- Important: Verify the product’s intended use, active ingredients, dosage, and storage claims.
- Limitation: Do not use water preservatives to make chemically contaminated or otherwise unsafe water drinkable.
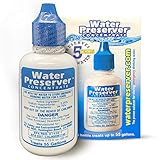
Water safety reminder: For ordinary home-filled emergency water storage, the CDC recommends replacing stored water every six months. Follow the specific manufacturer’s instructions for any treatment product that claims a longer storage period.
Which Water Storage Containers Should You Buy First?
If you’re just starting, consider purchasing two or three portable food-grade water containers. These are easier to manage and can provide a useful initial emergency reserve.
As your preparedness budget and available space increase, add larger barrels or additional modular containers to reach your household’s water-storage target.
For example, a family of four planning around 2 gallons per person per day would need approximately 240 gallons for 30 days. Four 55-gallon barrels plus four 5-gallon containers would provide that amount, assuming all containers are filled to their rated capacity.
Store bulk water in a location that can safely support the weight, and keep smaller containers accessible for everyday dispensing and emergency transport.
Types of Water Storage Containers
Not every container is suitable for long-term drinking-water storage. The material, previous use, capacity, and sealing system all affect how safely water can be stored during an emergency.
For the best results, choose containers specifically manufactured for potable water. Look for food-grade materials, secure closures, and manufacturer instructions confirming that the container is suitable for storing drinking water.
1. Food-Grade Plastic Water Barrels
Large food-grade plastic barrels are a practical choice for storing substantial quantities of emergency water at home. Many are made from high-density polyethylene (HDPE), a durable plastic commonly used for food and beverage containers.
- Best use: Bulk emergency water storage.
- Typical capacity: 30 to 55 gallons or more.
- Advantages: High capacity, durable construction, and relatively efficient use of storage space.
- Limitations: Difficult to move when full and may require a manual pump or siphon.
Choose an opaque container when possible to reduce light exposure. Make sure the barrel has never held chemicals, fuel, pesticides, or other hazardous substances.
2. Portable 5–7 Gallon Water Containers
Portable water containers offer a balance between storage capacity and convenience. They are useful for smaller homes, apartments, emergency vehicles, and households that want to distribute their water supply across several locations.
- Best use: Accessible household water reserves and portable emergency supplies.
- Typical capacity: 5 to 7 gallons.
- Advantages: Easier to fill, rotate, transport, and dispense than large barrels.
- Limitations: Require more individual containers to reach a large storage target.
Some models are designed to stack, but others are only stackable when empty. Always follow the manufacturer’s instructions before stacking filled containers.
3. Modular Water Storage Bricks
Modular water bricks are smaller containers designed to help households organize and expand their water reserves. They can be useful in closets, storage rooms, and other areas where larger barrels may not fit.
- Best use: Space-conscious emergency water storage.
- Advantages: Flexible arrangement, smaller individual capacities, and easier organization.
- Limitations: May cost more per gallon than bulk water barrels.
Before purchasing, confirm that the specific model is rated for drinking water and that its caps, seals, and stacking design are suitable for your intended use.
4. Commercially Bottled Water
Unopened commercially bottled water is another practical emergency-storage option. It requires little preparation and is especially convenient for households beginning with a three-day or two-week emergency supply.
- Best use: Ready-to-drink emergency water and portable evacuation supplies.
- Advantages: Convenient, sealed, and easy to distribute.
- Limitations: Packaging may be less durable than dedicated storage containers, and individual bottles can take up considerable space.
Keep commercially bottled water in its original sealed packaging and follow the manufacturer’s storage and date-label instructions.
Water Storage Containers to Avoid
Some household containers are unsuitable for storing drinking water, even if they appear clean.
- Containers previously used for chemicals: Never reuse containers that held pesticides, gasoline, cleaning chemicals, or other toxic substances.
- Milk jugs: These can be difficult to clean thoroughly and may be less durable than purpose-built water containers.
- Non-food-grade containers: Do not assume that an ordinary storage tote, bucket, or barrel is safe for drinking water.
- Damaged containers: Avoid containers with cracks, deteriorating seals, leaks, or other defects that could allow contamination.
Water Storage Safety Tip
Use containers specifically designed for potable water, sanitize reusable containers before filling, and label each container with the filling date.
Store your water away from direct sunlight, fuels, pesticides, cleaning products, and other potentially hazardous materials. Even a food-grade container cannot compensate for an unsafe water source or improper handling.
Next step: Once you’ve selected suitable containers, proper cleaning and sanitization are essential before filling them with drinking water.
Preparing and Sanitizing Water Storage Containers
Before filling reusable containers with drinking water, clean and sanitize them properly. Even a new food-grade water container may contain dust or residue from manufacturing, packaging, or storage.
Proper sanitization helps reduce the risk of introducing harmful microorganisms into your emergency water supply.
How to Sanitize a Water Storage Container
For containers that can be safely cleaned and sanitized, follow these steps based on CDC emergency water-storage guidance:
- Wash the container: Clean it with soap and water, making sure to reach the interior surfaces, cap, and dispensing components.
- Rinse thoroughly: Remove soap residue using clean water.
- Prepare a sanitizing solution: Mix 1 teaspoon of unscented household liquid chlorine bleach containing 5%–9% sodium hypochlorite with 1 quart of water.
- Coat the interior: Pour the solution into the container, close it securely, and shake so the solution contacts all interior surfaces.
- Allow contact time: Wait at least 30 seconds.
- Empty the container: Pour out the sanitizing solution.
- Finish preparation: Allow the container to air-dry completely, or rinse it with water that is known to be safe for drinking.
After sanitizing, fill the container with safe drinking water and close it tightly. Avoid touching the inside of the cap or container opening with your hands.
Important: These instructions are for sanitizing suitable storage containers, not for treating an entire supply of contaminated drinking water. Water disinfection requires a separate procedure.
Additional Water Container Safety Precautions
- Use containers specifically designed for drinking-water storage.
- Follow the manufacturer’s cleaning instructions for containers with built-in spigots, valves, or special seals.
- Never use containers that previously held fuel, pesticides, or other toxic chemicals.
- Inspect caps, seals, and dispensing equipment before filling.
- Label each container with its filling date and identify it as drinking water.
- Store filled containers in a cool location away from sunlight and hazardous substances.
Emergency Water Storage Check
If your household lost running water today, would you have enough safe drinking water for everyone for at least three days? What about two weeks?
Start with a manageable supply and expand it gradually. Properly prepared containers allow you to build a larger emergency water reserve without having to purchase everything at once.
Water Treatment Before Storage
Proper water treatment is essential when building a long-term emergency water supply. However, not every water source requires the same treatment. The safest approach depends on whether you’re storing water from a reliable drinking-water supply or collecting water that may contain harmful microorganisms.
1. Storing Safe Municipal Tap Water
If your municipal tap water is confirmed safe to drink and there are no active water-quality advisories, you can fill properly cleaned and sanitized food-grade containers directly from the tap.
You generally do not need to add extra bleach to already safe, treated municipal drinking water. The priority is preventing contamination during filling, sealing, storage, and dispensing.
- Use clean, sanitized, food-grade drinking-water containers.
- Fill containers with water known to be safe for drinking.
- Secure the lids immediately after filling.
- Label each container with the filling date.
- Store containers in a cool, dark location away from chemicals.
- Replace ordinary home-filled stored water every six months, following CDC guidance.
2. Treating Water That May Contain Germs
If your water comes from an uncertain source or may be contaminated with disease-causing microorganisms, it must be made safe before being used for drinking or emergency storage.
When water is suspected of containing germs, boiling is generally the preferred emergency treatment method.
Boiling Water for Emergency Storage
- If the water is cloudy, allow sediment to settle or filter it through a clean cloth or coffee filter.
- Bring the clear water to a full rolling boil.
- Boil for 1 minute, or 3 minutes at elevations above 6,500 feet.
- Allow the water to cool naturally.
- Transfer it into clean, sanitized, food-grade containers and seal tightly.
Boiling effectively kills disease-causing bacteria, viruses, and parasites. However, it does not remove fuel, toxic chemicals, or radioactive contamination.
Disinfecting Water With Household Bleach
When boiling is not possible, unscented household liquid chlorine bleach may be used to disinfect water against many harmful microorganisms. Use only regular, unscented bleach containing 5%–9% sodium hypochlorite and follow the product label or current CDC instructions.
For emergency disinfection using bleach with a sodium hypochlorite concentration of 5%–9%, the CDC provides the following guidance:
| Water Amount | Clear Water | Cloudy, Colored, or Very Cold Water |
|---|---|---|
| 1 Gallon | 8 drops | 16 drops |
| 5 Gallons | 40 drops | 80 drops |
Remove as much sediment as possible before disinfection. Mix the bleach thoroughly into the water and allow it to stand for at least 30 minutes before use. Store disinfected water in clean, sanitized containers with tight-fitting lids.
Important: Bleach disinfection is less effective against certain parasites, including Cryptosporidium. It is not a substitute for boiling when boiling is available and appropriate.
3. Water That Cannot Be Made Safe by Boiling or Bleach
Water contaminated with gasoline, pesticides, industrial chemicals, or other toxic substances cannot reliably be made safe by boiling or ordinary household disinfection.
Do not assume that clear water is safe. Chemical contamination may be present without a noticeable smell, taste, or color.
Critical Water Safety Warning
If authorities issue a do-not-drink or do-not-use advisory because of chemical contamination, follow their instructions. Do not attempt to make the affected water drinkable with household bleach, boiling, or an ordinary camping filter.
Use commercially bottled water or another source confirmed safe for drinking until the advisory is lifted.
4. Follow Official Emergency Water Treatment Guidance
Emergency water-treatment recommendations can vary depending on the source of contamination. Always follow local health department advisories and the latest official instructions.
For additional treatment options, see our Top 10 Water Purification Methods guide.
Ideal Storage Conditions for Long-Term Emergency Water
Where you store your emergency water can be just as important as the containers you choose. Heat, sunlight, freezing temperatures, damaged seals, and exposure to hazardous substances can affect the condition of your water supply and the durability of its containers.
For the best results, choose a cool, dry, dark location with a stable temperature. A basement, interior storage room, or temperature-controlled pantry may be suitable, provided the floor can safely support the weight of the stored water.
Best Conditions for Storing Emergency Drinking Water
- Cool, stable temperatures: A temperature range around 50–70°F is a practical target when available, although it is not a mandatory safety requirement. Avoid prolonged exposure to excessive heat.
- Protection from sunlight: Keep containers away from direct sunlight and use opaque, food-grade containers when practical.
- Secure, sanitary containers: Use tightly sealed containers designed for potable water to reduce the risk of contamination.
- Safe placement: Place containers on stable, adequately supported flooring. Use shelving or pallets only when they are rated to support the full weight and will not cause containers to tip.
- Separation from chemicals: Store drinking water away from gasoline, pesticides, paint, solvents, cleaning chemicals, and other hazardous substances.
- Easy access: Keep at least part of your emergency water supply where household members can safely reach it during an outage.
Where Should You Store Large Water Barrels?
Large water barrels are best positioned in a ground-level storage area, basement, or another location with adequate structural support. Remember that 55 gallons of water weighs approximately 459 pounds before adding the weight of the container.
Avoid placing large, filled barrels on ordinary household shelving or elevated platforms unless their load capacity has been verified.
Garages, attics, and outdoor sheds may expose water containers to excessive heat or freezing temperatures. If these are your only available storage locations, use containers rated for those conditions and inspect them regularly.
Long-Term Water Storage Tip
Divide your emergency water supply between accessible portable containers and larger bulk-storage containers when practical. This makes everyday dispensing easier and provides flexibility if you need to evacuate or one storage location becomes inaccessible.
Proper storage conditions help protect your emergency water reserve, but they do not replace container sanitation, safe filling practices, or regular inspection and rotation.
Water Storage Rotation and Maintenance Schedule
Storing emergency water is only the first step. Regular inspections, proper labeling, and a consistent rotation schedule help keep your household water supply ready for an emergency.
For water you fill into containers at home, the CDC recommends replacing it every six months. Commercially bottled water and water stored using specialized preservation products may have different storage instructions.
How Often Should You Rotate Emergency Water?
- Home-filled drinking water: Replace every six months, following CDC emergency water-storage guidance.
- Commercially bottled water: Keep bottles sealed and follow the manufacturer’s storage and date-label instructions.
- Water treated with preservation products: Follow the specific product’s labeling, including its preparation requirements and claimed storage period.
- Water in damaged or contaminated containers: Do not wait for the scheduled rotation date. Stop using the water for drinking if contamination is suspected.
Monthly Water Storage Inspection Checklist
A quick monthly inspection can help identify problems before an emergency occurs.
- Check containers for cracks, leaks, swelling, or other visible damage.
- Inspect lids, caps, seals, spigots, and dispensing equipment.
- Confirm that containers remain securely closed and properly labeled.
- Check for exposure to direct sunlight, excessive heat, or freezing conditions.
- Make sure nearby chemicals, fuels, or cleaning products cannot contaminate the water supply.
- Verify that large containers remain stable and accessible.
How to Rotate Stored Drinking Water
- Check the filling date: Identify home-filled containers approaching six months in storage.
- Empty the old supply: Water that is not suspected of contamination may be suitable for certain non-drinking uses, such as watering ornamental plants.
- Inspect the container: Check for damage, residue, and deterioration.
- Clean and sanitize: Prepare reusable containers according to the cleaning and sanitizing instructions covered earlier in this guide.
- Refill with safe drinking water: Use a confirmed safe water source.
- Seal and label: Record the new filling date before returning the container to storage.
Simple Water Rotation Reminder
Choose two dates approximately six months apart each year to inspect and replace your home-filled emergency drinking water. For example, rotate your supply in April and October.
Keep a written inventory showing each container’s capacity, location, and last filling date. This makes it easier to track a large emergency water reserve.
Can You Tell if Stored Water Is Safe by Looking at It?
Not always. Cloudiness, unusual odors, visible growth, or damaged containers are warning signs, but harmful microorganisms and chemical contaminants may be present even when water looks and smells normal.
Never taste questionable water to determine whether it is safe. If you suspect contamination, use another confirmed safe drinking-water source and follow public health guidance.
Regular rotation and inspection reduce storage problems, but neither guarantees that water is safe if it was contaminated when collected or stored improperly.
Special Climate Considerations for Emergency Water Storage
Climate plays an important role in planning and maintaining a long-term emergency water supply. Extreme heat can increase daily drinking-water requirements, while freezing temperatures can damage containers and make stored water difficult to access.
Whether you live in a hot southern climate or an area with freezing winters, adjust your water-storage plan to account for seasonal conditions.
Storing Emergency Water in Hot Climates
Hot weather increases the risk of dehydration, especially during extended power outages when air conditioning may be unavailable. People working outdoors, children, and individuals with certain medical needs may require additional drinking water.
- Store additional water: Plan for increased drinking-water needs during extreme heat or strenuous activity.
- Choose a cool storage location: Keep containers indoors or in the coolest practical area of your home.
- Limit sunlight exposure: Use opaque, food-grade containers and keep them away from direct sunlight.
- Protect containers from excessive heat: Avoid leaving drinking-water supplies in hot vehicles, attics, or unventilated sheds for extended periods.
- Inspect supplies regularly: Check for damaged seals, leaks, or changes in container condition.
During summer blackouts, consider keeping a portion of your drinking water in smaller containers that can be moved to a cooler location when necessary.
Storing Emergency Water in Cold Climates
Freezing temperatures create a different set of challenges. Water expands as it freezes, potentially damaging rigid containers, fittings, and dispensing valves.
- Prevent freezing when possible: Store emergency drinking water in an insulated or temperature-controlled area.
- Use suitable containers: If freezing is possible, verify that the container manufacturer permits freezing and follow its fill-level instructions.
- Protect spigots and valves: These components may be especially vulnerable to freeze damage.
- Keep accessible drinking water indoors: Maintain a smaller reserve where it is unlikely to freeze.
- Inspect containers after thawing: Check for cracks, leaks, or damaged seals before using the water.
Do not assume that every plastic water barrel or portable container can safely withstand freezing. Some containers may crack or deform when filled water expands.
Planning for Seasonal Temperature Changes
Households experiencing both hot summers and freezing winters should review their water-storage locations as the seasons change.
For example, a garage may offer convenient storage during mild weather but expose containers to excessive summer heat or freezing winter temperatures. An interior storage room may provide more consistent conditions throughout the year.
Seasonal Water Storage Tip
Before summer and winter, inspect your emergency water containers, confirm that your storage location remains suitable, and adjust your reserve for seasonal drinking-water needs.
Keep several gallons in an accessible indoor location so you have drinking water available even if your main storage area becomes too hot, freezes, or is temporarily inaccessible.
The goal is to maintain a safe, accessible drinking-water supply throughout the year—not simply to store the largest possible quantity.
Advanced Water Storage Solutions for Long-Term Preparedness
For households preparing for extended power outages, natural disasters, or prolonged interruptions to municipal water service, portable containers and 55-gallon barrels may be only the beginning.
Larger storage systems can provide hundreds or even thousands of gallons of water. However, these systems require additional planning for water quality, structural support, maintenance, and safe distribution.
1. Rainwater Harvesting Systems
Rainwater harvesting allows homeowners to collect precipitation from rooftops and store it for later use. A properly designed system can provide supplemental water for gardening, livestock, cleaning, and other non-drinking purposes.
A basic rainwater harvesting system may include:
- Roof gutters and downspouts: Direct rainwater toward the collection system.
- Leaf screens and debris filters: Help reduce leaves and larger contaminants.
- First-flush diverters: Divert some of the initial runoff that may contain accumulated roof debris.
- Storage tanks: Hold collected rainwater for later use.
- Overflow and drainage systems: Help manage excess water during heavy rainfall.
Important: Rainwater is not automatically safe to drink. Roof runoff can contain microorganisms, bird droppings, metals, roofing-material residues, and other contaminants. First-flush diverters and ordinary sediment filters do not make collected rainwater potable.
If you intend to use harvested rainwater for drinking, the system needs appropriate treatment, testing, and maintenance based on the contaminants that may be present. Follow local public health guidance and applicable regulations.
2. Above-Ground and Underground Water Cisterns
Water cisterns provide large-capacity storage for households, rural properties, and homesteads. Depending on the system, they can hold several hundred to thousands of gallons.
Cisterns may be installed above ground or underground, with each option offering different advantages.
- Above-ground cisterns: Generally easier to inspect and access, but may require protection from sunlight, freezing, and physical damage.
- Underground cisterns: Can reduce exposure to temperature extremes but involve excavation, drainage planning, and additional installation considerations.
- Potable-water compatibility: Tanks, liners, plumbing, and fittings must be suitable for drinking water if the system will supply household drinking water.
- Maintenance: Large systems require inspection, cleaning, secure access covers, and appropriate water-quality monitoring.
Remember that water weighs approximately 8.34 pounds per gallon. A 1,000-gallon cistern contains about 8,340 pounds of water, excluding the tank itself.
Large tanks require proper foundations, structural support, and installation according to manufacturer instructions and local requirements.
3. Gravity-Fed Water Storage Systems
Gravity-fed systems use the elevation of a water tank to create pressure without relying on an electric pump during water delivery.
These systems can be useful for off-grid cabins, homesteads, and emergency water distribution, provided the tank is installed at an appropriate height and the system is designed for the intended flow and pressure.
- Advantage: Water can flow without electricity when adequate elevation and supply are available.
- Limitation: Low tank elevation may provide insufficient pressure for normal household fixtures.
- Safety: Elevated tanks require properly engineered structural support.
- Water quality: Gravity-fed delivery does not filter or disinfect water by itself.
As a general rule, each foot of vertical water height provides approximately 0.43 PSI of static pressure. Actual pressure and flow at a fixture will also depend on plumbing losses and system design.
4. Backup Power for Private Wells and Water Pumps
Households that rely on electrically powered wells should consider how they will access water during an extended blackout. Even if a well contains plenty of water, an electric pump may not operate when utility power is unavailable.
Possible backup arrangements include:
- Portable or standby generators: Can operate compatible well pumps when properly sized and connected.
- Solar power and battery systems: May support compatible pumping equipment when designed for the pump’s voltage, startup surge, and daily energy requirements.
- Stored-water pressure tanks: Can provide a limited amount of water after power is lost, depending on the system.
- Dedicated water-storage tanks: Allow water to be stored while electricity is available and accessed later through an appropriate dispensing system.
Well pumps can have substantial startup power requirements, and many use 240-volt electrical service. A portable power station that operates small household electronics may not be capable of starting a well pump.
For help comparing backup power requirements, read our guide on what size solar generator you need for a blackout.
Building a More Resilient Household Water System
For long-term preparedness, consider combining three layers of water security:
- Stored drinking water: A ready-to-use reserve for immediate emergencies.
- Backup water access: A compatible well-pump backup, stored-water tank, or another dependable supply.
- Water treatment: Appropriate filtration, disinfection, and testing for the specific water source and possible contaminants.
These layers provide more flexibility than relying on a single tank, filter, or electrically powered water source.
Before installing a large water-storage system, check applicable local requirements for rainwater collection, plumbing connections, backflow prevention, and potable-water storage.
Emergency Water Sources When Stored Supplies Run Low
Even a well-planned emergency water reserve can eventually run low during an extended blackout, natural disaster, or prolonged municipal water interruption. Identifying backup water sources before an emergency can help your household prepare for disruptions lasting several weeks or longer.
However, not every available water source is safe to drink. Some emergency sources may contain harmful microorganisms, chemicals, sediment, or other contaminants that require specialized treatment.
1. Water Stored in Your Home’s Water Heater
A conventional tank-style water heater may contain several dozen gallons of water that could serve as an emergency resource. However, water from the tank should not automatically be considered safe for drinking.
Its suitability depends on the original water quality, the condition of the plumbing system, whether contamination or a backflow event occurred, and any public health advisories affecting the water supply.
- Identify your water heater type: Tankless systems do not provide the same stored-water reserve as conventional tank-style heaters.
- Follow manufacturer instructions: Shut down the heater and isolate the water supply as directed before attempting to drain the tank.
- Prevent burns: Stored water may be hot enough to cause serious injury. Allow it to cool before handling.
- Assess water safety: Do not use water for drinking if the system may have been contaminated by floodwater, chemicals, or an unsafe municipal supply.
- Use appropriate treatment: If microbial contamination is possible, follow official drinking-water treatment guidance.
Important: Do not operate an electric water heater with an empty tank. Follow the manufacturer’s instructions for safely restoring service after draining.
2. Water From Toilet Tanks
The clean-water reservoir behind a conventional toilet may contain water that originated from the household’s potable water supply. This is different from water in the toilet bowl, which should never be used for drinking.
Toilet-tank water should only be considered as a last-resort emergency source when the tank has not been treated with cleaning chemicals, disinfectant tablets, dyes, or other additives and the incoming water supply was safe.
- Never use water from the toilet bowl for drinking.
- Do not use toilet-tank water if cleaning tablets or chemicals have been added.
- Do not use it if the plumbing system or incoming water may have been contaminated.
- When safety cannot be established, reserve questionable water for suitable non-drinking uses rather than consuming it.
Because contamination may not be visible, commercially bottled water or properly stored emergency drinking water is a safer first choice.
3. Rainwater Collection
Rainwater collection can provide supplemental water for gardening, cleaning, and other household activities during extended emergencies.
However, rainwater collected from rooftops, gutters, or open containers may contain bacteria, parasites, metals, roofing-material residues, and environmental pollutants.
- Use clean collection equipment designed for the intended purpose.
- Keep storage tanks covered to limit debris and mosquito breeding.
- Use leaf screens and first-flush diverters to reduce some debris entering the system.
- Do not assume ordinary sediment filtration makes rainwater safe to drink.
- Use appropriate treatment and testing before considering collected rainwater for drinking.
Water safety warning: Boiling or chlorine disinfection can address many microbial hazards, but neither reliably removes chemical contamination. Water containing hazardous chemicals may require specialized treatment or should be avoided entirely.
4. Rivers, Streams, Ponds, and Lakes
Natural surface-water sources may provide emergency water when stored supplies are exhausted. However, untreated surface water can contain disease-causing microorganisms and chemical pollutants.
Before using surface water for drinking:
- Evaluate the source: Avoid water near industrial facilities, agricultural chemical runoff, fuel spills, floodwater, or other suspected contamination.
- Remove sediment: Allow cloudy water to settle and use a clean cloth or suitable prefilter to reduce visible particles.
- Treat microbial contamination: Use an appropriate combination of filtration, boiling, or disinfection based on the water source and equipment capabilities.
- Consider chemical hazards: Ordinary portable filters and household disinfection methods do not remove every contaminant.
- Follow public health guidance: If the water may contain hazardous chemicals, use another confirmed safe source.
Clear, cold, or fast-moving water is not necessarily safe to drink. Appearance alone cannot establish water quality.
5. Private Wells and Backup Pumping Systems
If your household relies on a private well, a compatible backup generator, solar-powered pumping system, or dedicated water-storage tank may help maintain access during a blackout.
However, a well that has been flooded or contaminated should not be used for drinking until appropriate inspection, disinfection, and testing have confirmed that the water is safe.
Well-pump backup systems also need to account for electrical startup requirements, operating voltage, and the amount of water your household uses each day.
Use our Emergency Power Planner to estimate the energy requirements of essential equipment during an extended outage.
Plan for Safe Water Access During an Extended Blackout
Finding another water source is only part of emergency preparedness. Your household also needs safe containers, a suitable treatment method, and enough power or manual equipment to collect and distribute water.
During prolonged outages, dependable lighting also makes it easier to inspect equipment, safely access storage areas, and handle water supplies after dark.
Our guide to the best emergency lights for power outages explains practical lighting options for maintaining a functional home when electricity is unavailable.
Important: Not All Emergency Water Can Be Made Safe
If water is suspected of containing gasoline, pesticides, industrial chemicals, or other toxic substances, do not assume boiling, chlorine bleach, or a standard camping filter will make it drinkable.
Follow local health department instructions and use bottled water or another confirmed safe source when chemical contamination is possible.
Build a Three-Layer Emergency Water Plan
- Primary supply: Store enough safe drinking water for your household’s planned emergency duration.
- Backup source: Identify a dependable alternative such as a protected well, additional stored water, or another confirmed safe supply.
- Treatment and access: Maintain appropriate water-treatment equipment, clean containers, and a way to access water without grid electricity.
A layered approach provides more flexibility than depending entirely on stored water or a single filtration device.
For additional treatment methods, review our Top 10 Water Purification Methods guide.
Backup Water Purification When Stored Water Runs Out
Even a well-stocked emergency water reserve can eventually run low during a prolonged blackout or infrastructure failure. Having a reliable backup water-treatment system gives your household another option when access to safe drinking water becomes limited.
However, not all water filters provide the same protection. Some are designed primarily to improve taste and reduce sediment, while others can remove certain disease-causing microorganisms. Choosing the right treatment method depends on the water source and the contaminants you need to address.
1. Gravity Water Filters for Household Emergencies
Gravity-fed water filters can be useful for families during extended power outages because they operate without electricity. Water moves through the filter elements using gravity, allowing households to process water without an electric pump.
- Best for: Home emergency preparedness and off-grid water treatment.
- Advantages: No electricity required, convenient for household use, and suitable for processing multiple batches of water.
- Limitations: Contaminant removal varies by filter model and cartridge. Not every gravity filter removes viruses or chemical pollutants.
Before purchasing, check the manufacturer’s independent testing or certification information for the specific contaminants the system claims to reduce.
2. Portable Survival Water Filters
Portable water filters are useful for evacuation kits, camping, hiking, and emergency situations where carrying large quantities of drinking water is impractical.
Many portable filters are designed to remove bacteria and protozoa from freshwater sources. However, some do not reliably remove viruses, dissolved chemicals, or heavy metals.
- Best for: Bug-out bags, vehicle emergency kits, and portable backup treatment.
- Advantages: Lightweight, compact, and convenient for treating water away from home.
- Limitations: Filter performance depends on the model, pore size, maintenance, and contaminant type.
For evacuation planning, see our Ultimate 72-Hour Bug Out Bag Guide for additional emergency supplies and portable water-treatment considerations.
3. Water Purification Tablets and Chemical Disinfectants
Water purification tablets can provide a lightweight backup treatment option when boiling is unavailable. Common formulations use chlorine dioxide or other disinfecting agents to reduce certain microorganisms.
Effectiveness depends on the active ingredient, water temperature, clarity, and required contact time. Some treatments require several hours to address certain parasites.
- Best for: Emergency kits and backup disinfection.
- Advantages: Compact, lightweight, and easy to store.
- Limitations: Treatment times and microorganism coverage vary. Chemical disinfection does not reliably remove hazardous chemical contaminants.
Always follow the exact product instructions and confirm which microorganisms the treatment is designed to address.
Recommended Backup Water Filtration Equipment
A dependable emergency water-treatment plan should include equipment appropriate for the water sources your household may need to use. Consider a household gravity filter for stationary use and a smaller portable filter or suitable disinfectant for evacuation emergencies.
The following Amazon product is included as an additional water-treatment option. Check its current specifications and contaminant-reduction claims before relying on it for emergency drinking water.
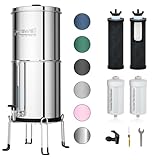

Important Water Filtration Safety Warning
A filter that removes bacteria and protozoa may not remove viruses. Likewise, a filter designed to improve taste or odor may not make contaminated water safe to drink.
Boiling and ordinary chemical disinfection can address many microbial hazards, but they do not reliably remove fuel, pesticides, industrial chemicals, or other toxic substances.
When chemical contamination is suspected, use a different water source confirmed safe for drinking and follow public health guidance.
Which Backup Water Treatment Method Is Best?
For most households, the strongest emergency strategy combines stored drinking water with more than one appropriate treatment method.
- At home: Maintain an accessible reserve of safe drinking water and suitable household water-treatment equipment.
- During evacuation: Carry drinking water along with a portable filter or another appropriate backup treatment method.
- For questionable natural water sources: Select treatment based on likely microbial and chemical hazards rather than assuming one filter can remove everything.
For a more detailed comparison of emergency water-treatment techniques, read our Ultimate Water Purification Guide.
Build a Practical 30-Day Emergency Water Storage Setup
Building a 30-day emergency water supply does not have to happen all at once. Start with enough safe drinking water for a short-term emergency, then gradually increase your storage capacity as your budget and available space allow.
For a family of four, a 30-day supply requires approximately 120 gallons at the minimum planning rate of 1 gallon per person per day, or 240 gallons at the expanded planning rate of 2 gallons per person per day.
Step 1: Start With a Manageable Emergency Water Reserve
If you’re beginning from scratch, consider the following starter setup:
- Two to four portable 5–7 gallon containers: Provide accessible drinking water that is easier to rotate and transport.
- One 55-gallon food-grade water barrel: Adds substantial bulk storage capacity.
- Manual water pump or siphon: Makes dispensing water from a large barrel more convenient.
- Water-treatment supplies: Keep appropriate treatment equipment available for backup water sources.
- Storage labels and inventory: Record filling dates, capacities, and rotation schedules.
This starter arrangement provides approximately 65–83 gallons, depending on the number and capacity of the smaller containers.
It is a useful initial reserve, but it does not meet the expanded 240-gallon target for a family of four preparing for 30 days.
Step 2: Expand to a Full 30-Day Water Reserve
For a household of four planning around 2 gallons per person per day, the following combination provides 240 gallons of storage capacity:
| Water Storage Container | Quantity | Total Capacity |
|---|---|---|
| 55-Gallon Food-Grade Barrels | 4 | 220 Gallons |
| 5-Gallon Portable Water Containers | 4 | 20 Gallons |
| Total Water Storage Capacity | 8 Containers | 240 Gallons |
This is one example, not the only way to reach your goal. You can combine barrels, modular water bricks, portable containers, and commercially bottled water according to your household’s needs.
Actual usable water volume may vary based on container fill limits and dispensing losses. Additional water may be needed for pets, medical requirements, and other household uses.
Step 3: Plan for Water Weight and Storage Space
Water is heavy. At approximately 8.34 pounds per gallon, 240 gallons weighs about 2,002 pounds before including the weight of the containers.
Large barrels should be positioned on stable flooring capable of supporting their full weight. Do not place heavy water containers on ordinary shelving or elevated platforms unless their load capacity has been verified.
Keep smaller portable containers accessible for drinking, cooking, and emergency transport.
Step 4: Maintain and Rotate Your Emergency Water Supply
Once your storage system is established, maintain it with a simple routine:
- Label every reusable container with its filling date.
- Replace ordinary home-filled drinking water every six months.
- Inspect containers, seals, and dispensing equipment regularly.
- Keep water away from sunlight, excessive heat, and hazardous chemicals.
- Follow manufacturer instructions for commercially bottled water and specialized preservation products.
- Maintain appropriate backup water-treatment supplies.
Build Your Emergency Water Supply Gradually
You don’t need to purchase 240 gallons of storage capacity in a single shopping trip. Start with a three-day reserve, expand toward two weeks, and work toward your long-term goal as space and budget allow.
Prioritize food-grade containers, safe storage conditions, and dependable access to drinking water over unnecessary accessories.
Frequently Asked Questions About Long-Term Water Storage
How Long Can Drinking Water Be Stored Safely?
For drinking water filled into containers at home, the CDC recommends replacing the water every six months. Use clean, sanitized, food-grade containers and store them in a cool location away from sunlight and hazardous chemicals.
Unopened commercially bottled water should be stored according to the manufacturer’s instructions. Some specialized water-preservation products advertise longer storage periods, but their claims depend on the specific product, water quality, container type, and directions for use.
Can Stored Drinking Water Go Bad?
Water itself does not spoil like food, but stored drinking water can become unsafe if harmful microorganisms or chemicals are introduced during filling, storage, or dispensing.
Damaged seals, dirty containers, and improper handling can increase contamination risks. Water that looks and smells normal is not necessarily safe, so appearance alone should never be used to determine drinking-water safety.
Is It Better to Store Drinking Water or Rely on Water Filters?
Both are important, but storing a ready-to-use supply of safe drinking water should be your first priority.
Stored water provides immediate access during an emergency without requiring you to locate and treat a new water source. Filters, boiling equipment, and appropriate disinfectants provide additional options if stored supplies run low.
Remember that not every filter removes viruses, and ordinary boiling or disinfection does not reliably remove hazardous chemical contaminants.
Can I Store Emergency Drinking Water in My Garage?
A garage may be suitable for emergency water storage if temperatures remain reasonably stable and the containers are protected from freezing, excessive heat, direct sunlight, and hazardous substances.
However, many garages experience significant seasonal temperature changes. They may also contain gasoline, pesticides, paints, and other chemicals that should be kept away from drinking-water supplies.
An interior storage room, basement, or another cool, protected location is generally preferable when available.
How Much Water Does a Family of Four Need for 30 Days?
At the minimum planning rate of 1 gallon per person per day, a family of four needs approximately 120 gallons for 30 days.
At an expanded planning rate of 2 gallons per person per day, the same household needs approximately 240 gallons.
Additional water may be needed for pets, hot weather, medical needs, cooking, and sanitation.
Use our Water Storage Calculator to estimate your household’s requirements.
Should I Add Bleach to Water Before Storing It?
Not automatically. If your municipal tap water is confirmed safe to drink, you generally do not need to add extra bleach before filling properly sanitized drinking-water containers.
Water from an uncertain source may require treatment, but the appropriate method depends on the type of contamination. Follow current CDC emergency water-treatment guidance rather than adding bleach to every container as a routine precaution.
What Is the Best Container for Long-Term Water Storage?
The best container depends on your available space, storage capacity, and how you intend to access the water.
- 55-gallon food-grade barrels: Useful for large household reserves.
- 5–7 gallon portable containers: Convenient for smaller homes, rotation, and transport.
- Modular water bricks: Useful for flexible storage in limited spaces.
- Commercially bottled water: Convenient for ready-to-drink emergency supplies.
Choose containers specifically intended for potable water and follow the manufacturer’s instructions for cleaning, filling, and storage.
How Should I Prepare for Water Shortages During Winter Blackouts?
Keep drinking water in a location protected from freezing, maintain a backup supply that does not depend on electricity, and ensure that you can access stored water safely if your home’s heating system stops working.
For additional seasonal preparedness advice, read our Winter Blackout Survival Guide and Emergency Heat Without Electricity guide.
Recommended Emergency Water Storage Gear
Looking for food-grade water containers, backup filtration equipment, and emergency water-storage accessories?
Browse our Emergency Water Storage & Filtration Gear List on Amazon.
Free Blackout Preparedness Planner
Building an emergency water reserve is only one part of preparing your household for an extended power outage. Food storage, backup power, heating, communications, and evacuation planning are equally important.
Our free 17-page Blackout Preparedness Planner helps you organize these essential supplies and identify gaps in your emergency preparations.
Download Your Free Blackout Preparedness Planner
Use this printable planner to organize your emergency water, food, fuel, medical supplies, communication plans, and household preparedness priorities.
Conclusion: Build a Reliable Long-Term Water Supply
Long-term water storage is one of the most practical investments you can make in household emergency preparedness. Whether you’re preparing for a three-day disruption, a two-week blackout, or a prolonged infrastructure failure, having safe drinking water readily available reduces your dependence on outside assistance.
Start by calculating how much water your household needs. For a family of four, a 30-day reserve may range from approximately 120 gallons at the minimum planning rate to 240 gallons at the expanded planning rate, before accounting for additional needs.
Choose food-grade containers designed for drinking water, sanitize them properly, and store them in a cool, protected location. Replace ordinary home-filled drinking water every six months and inspect containers regularly for damage or contamination risks.
For extended emergencies, consider adding a backup water source and appropriate treatment equipment. Stored water provides immediate protection, while additional sources and treatment methods can help your household adapt when an outage lasts longer than expected.
The most effective water-storage plan is one you can maintain. Begin with a manageable emergency reserve, expand it gradually, and make regular maintenance part of your preparedness routine.
Water planning is a core component of a complete Emergency Preparedness Plan. Combine your drinking-water reserve with food, power, sanitation, and communication planning for a more resilient household.
Further Reading: Emergency Water and Preparedness Guides
Continue building your emergency water and household preparedness systems with these related guides:
- Top 10 Water Purification Methods Reviewed — Compare filtration, boiling, disinfection, and other emergency water-treatment methods.
- Ultimate Water Purification Guide — Learn how to evaluate emergency water sources and choose appropriate treatment methods.
- Emergency Water Storage Calculator — Estimate your household’s water needs based on family size and emergency duration.
- Ultimate 72-Hour Bug Out Bag Guide — Prepare portable drinking water and other essential evacuation supplies.
- Complete Emergency Preparedness Plan — Build a coordinated household plan covering water, food, power, and emergency supplies.