
How to Build the Ultimate 72-Hour Bug-Out Bag: A Complete Guide
A 72-hour bug out bag is a portable emergency kit designed to help you evacuate quickly and meet your essential needs for at least three days. Whether you’re facing a wildfire, hurricane, flood, or another emergency that forces you to leave home, having the right supplies packed and ready can make evacuation safer and less stressful.
This post contains affiliate links. I may earn a small commission at no extra cost to you. Learn more.
But building a dependable bug out bag isn’t about stuffing a backpack with every survival gadget you can find. It’s about choosing practical, reliable equipment that covers your most important needs without making your pack too heavy to carry.
For most households, a well-planned 72-hour emergency survival kit should include drinking water, water treatment, food, weather protection, first aid supplies, lighting, communication equipment, important documents, and personal necessities.
In this complete guide, you’ll learn:
- What to pack in a 72-hour bug out bag for emergencies.
- How to choose essential survival gear without overpacking.
- Which water filters, shelters, fire starters, and emergency tools are worth carrying.
- How to prepare bug out bags for children, pets, and family members with special needs.
- How to organize, test, and maintain your emergency evacuation kit.
We’ll also cover common packing mistakes and provide a practical checklist you can use when building or upgrading your bag.
72-Hour Bug-Out Bag Checklist Builder
Create your personalized emergency evacuation checklist, track supplies, and print what you still need.
Supplies You Still Need
Recommended Gear Categories
Find our six recommended bug-out bag essentials below, including backpacks, water filters, emergency shelter, radios, lighting, and first-aid supplies.
Your progress is saved in this browser when browser storage is available. It will not automatically transfer to another device. Water quantities are household emergency supply estimates, not amounts you should carry in backpacks. Adjust for pack weight, refill options, climate, route, age, and medical needs.
The Savvy Survivalist — www.thesavvysurvivalist.com
Recommended Bug-Out Bag Essentials
Building your own 72-hour emergency kit?
These six gear categories cover important
parts of your evacuation checklist.
1. Bug-Out Backpack — 5.11 RUSH24 2.0

2. Water Filtration — LifeStraw

3. Emergency Shelter — Bivvy

4. Emergency Communication — Midland ER40

5. Emergency Lighting — Energizer PRO-400


6. First-Aid Kit — Surviveware 238-Piece Kit

Quick Start: The 72-Hour Bug Out Bag Essentials Start with the supplies you would need if you had to leave home today: safe drinking water, ready-to-eat food, appropriate clothing, shelter, essential medications, a first aid kit, a flashlight, and a way to receive emergency information.
Build your kit around your evacuation destination, local hazards, climate, and physical ability. A bag intended for driving to a designated shelter will look different from one designed for traveling on foot.
Recommended Amazon Gear: Browse our Bug Out Bag Essentials List on Amazon for emergency backpacks, water filtration, survival tools, shelter equipment, and other preparedness supplies.
A bug out bag is only one part of a complete emergency strategy. For evacuation planning, household supplies, and long-term preparedness, visit our Emergency Preparedness Master Plan.
Water and Hydration Essentials for Your 72-Hour Bug Out Bag
Safe drinking water is one of the most important supplies in any 72-hour bug out bag. Dehydration can quickly affect your energy, concentration, and physical performance, especially when traveling on foot or evacuating during hot weather.
The challenge is balancing water weight with your ability to replenish your supply. One gallon of water weighs approximately 8.3 pounds, making it impractical for many people to carry their entire three-day supply in a backpack.
A practical bug out bag should combine ready-to-drink water, refillable containers, a portable water filter, and a backup treatment method.
How Much Water Should You Carry?For emergency planning, the CDC recommends storing at least one gallon of water per person per day, with additional water for hot conditions, pregnancy, illness, and other needs.
For a three-day emergency, that means planning for at least three gallons per person. However, the amount you can physically carry depends on your pack weight, fitness, climate, and evacuation route.
Carry a realistic amount of drinking water and identify reliable refill opportunities before an emergency. Never assume that streams, public taps, or other water sources will be available or safe.
For household planning, use our Emergency Water Storage Calculator.
Essential Water Supplies for a Bug Out Bag
- Water bottles or hydration bladder: Carry enough water for the initial stage of your evacuation.
- Collapsible water container: Adds carrying capacity without taking up much space when empty.
- Portable water filter: Helps remove certain microorganisms from suitable freshwater sources.
- Water purification tablets: Provide a lightweight backup treatment method.
- Backup disinfection plan: Know how to boil water safely when conditions and equipment allow.
Platypus Platy 2L Collapsible Water Bottle
The Platypus Platy 2L is a lightweight, collapsible water container that provides approximately two liters of additional carrying capacity. When empty, it folds down to save valuable backpack space.
It’s particularly useful for collecting and transporting water at a designated refill point or carrying additional treated drinking water.
Remember that a collapsible bottle stores water but does not filter or disinfect it. Any water collected from an uncertain source must be properly treated before drinking.
Check the Platypus Platy 2L on Amazon
LifeStraw Personal Water Filter
The LifeStraw Personal Water Filter is a compact filtration option for emergency preparedness and outdoor travel. The standard LifeStraw personal filter is designed to reduce bacteria, parasites, and microplastics within its specified filtration capabilities.
Its lightweight construction makes it convenient for a bug out bag, especially when every ounce matters.
However, standard personal microfilters do not reliably remove viruses, dissolved chemicals, heavy metals, or fuel contamination. They should not be treated as a universal solution for every water source.
Check the LifeStraw Personal Water Filter on Amazon
Water Purification Tablets as a Backup
Water purification tablets provide another treatment option when a filter is unavailable, damaged, or unsuitable for the water source.
Different tablets use different disinfectants, and their effectiveness against bacteria, viruses, and parasites varies. Some treatments are ineffective against certain parasites, including Cryptosporidium.
Always follow the product’s directions for dosage, contact time, water temperature, and any required prefiltration.
See Water Purification Tablets on Amazon
Recommended Water Storage and Filtration Gear

Important: Water that contains fuel, toxic chemicals, or other hazardous contamination may not be made safe by boiling, ordinary filtration, or chemical disinfection. Find an alternative source when chemical contamination is suspected.
For additional treatment methods, read our Guide to Emergency Water Purification Methods.
Bottom line: A dependable hydration system uses multiple layers of protection. Start with safe drinking water, carry suitable storage containers, and pack filtration and treatment options appropriate for the water sources you may encounter.
Shelter and Sleep Essentials for Your 72-Hour Bug Out Bag
A reliable shelter system is one of the most important components of a 72-hour bug out bag. Exposure to cold temperatures, rain, wind, and extreme heat can become dangerous long before you run out of food.
Your shelter equipment should protect you from the elements without adding unnecessary weight or taking up too much backpack space. The right setup depends on your climate, season, evacuation route, and whether you expect to stay in a designated shelter or spend time outdoors.
For most emergency evacuation kits, a practical shelter system includes weather protection, an emergency bivvy or sleeping bag, and insulation from the ground.
Survival Priority: Stay Dry and Insulated Getting wet in cold or windy conditions increases the risk of hypothermia. Even relatively mild temperatures can become dangerous when clothing is soaked and the body cannot maintain its core temperature.
Choose shelter equipment that helps block rain and wind, retains warmth, and keeps you insulated from cold ground surfaces. An emergency bivvy alone may not provide adequate protection in freezing conditions.
Essential Shelter and Sleeping Gear
- Emergency bivvy: Compact protection against wind and moisture, with some reduction in heat loss.
- Lightweight tarp: Provides overhead shelter from rain, wind, and sun when properly pitched.
- Sleeping pad: Creates an insulating barrier between your body and the ground.
- Paracord and tent stakes: Help secure a tarp or temporary shelter.
- Season-appropriate sleeping bag: Consider one when cold weather or outdoor overnight stays are likely.
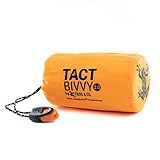
Survival Frog Tact Bivvy 2.0 Emergency Sleeping Bag
The Survival Frog Tact Bivvy 2.0 is a compact emergency bivvy designed to provide basic protection from wind and rain while helping reduce radiant heat loss.
Its small packed size makes it convenient for a bug out bag where space and weight are limited. Emergency bivvies are particularly useful as backup protection during unexpected overnight stops.
However, reflective emergency bivvies are not equivalent to insulated sleeping bags. They may also trap condensation, so ventilation and moisture management are important.
For cold-weather evacuations, combine an emergency bivvy with suitable insulation and a properly rated sleeping bag when necessary.
Check the Tact Bivvy on Amazon
Gold Armour Rainfly Tarp for Emergency Shelter
A Gold Armour Rainfly Tarp provides flexible shelter options without the weight of a traditional camping tent.
A 10-by-12-foot tarp can be configured as a lean-to, A-frame shelter, or overhead rain cover, depending on available anchor points and weather conditions.
For a bug out bag, a tarp offers several advantages:
- Provides protection from rain and direct sunlight.
- Can be pitched in several configurations.
- Offers useful coverage for equipment and supplies.
- Can be packed with lightweight cordage and stakes.
Practice setting up your tarp before an emergency. Proper positioning, secure anchor points, and adequate drainage are essential for effective weather protection.
See the Gold Armour Rainfly Tarp on Amazon
Closed-Cell Foam Sleeping Pad for Ground Insulation
A closed-cell foam sleeping pad is one of the most overlooked items in an emergency shelter system.
When sleeping outdoors, the ground can draw heat away from your body. A foam pad helps reduce conductive heat loss while providing a more comfortable sleeping surface.
Unlike inflatable sleeping pads, closed-cell foam models do not require pumps or valves and cannot lose their insulation because of a puncture.
Choose a pad with an appropriate insulation rating for the expected conditions. In cold weather, a higher-R-value pad or layered sleeping pads may be necessary.
Recommended Emergency Shelter Gear
Choosing Shelter Equipment for Different Emergencies
Not every evacuation requires the same sleeping system. Match your equipment to your most likely emergency scenarios.
- Urban evacuation: Prioritize compact emergency blankets, rain protection, and supplies appropriate for temporary public shelters.
- Woodland evacuation: Carry a tarp, ground insulation, suitable sleeping equipment, and the skills needed to establish a safe campsite.
- Winter evacuation: Include insulated sleeping equipment, warm clothing, and protection against wind and moisture.
- Summer evacuation: Prioritize shade, ventilation, insect protection, and adequate hydration.
Whenever possible, evacuate to a safe, established destination rather than relying on improvised outdoor shelter. Avoid camping in flood-prone areas, beneath unstable trees, or near other obvious hazards.
For additional cold-weather preparation, see our Winter Blackout Survival Guide.
Bottom line: Your bug out bag should include enough shelter equipment to protect you from expected weather conditions. A lightweight bivvy, versatile tarp, and insulated sleeping pad provide a useful foundation, but colder conditions may require a more substantial sleeping system.
Fire and Heat Essentials for Your 72-Hour Bug Out Bag
Reliable fire-starting equipment is an important part of a 72-hour bug out bag, especially if your evacuation plan includes spending time outdoors. A controlled fire can provide warmth, help boil water, cook food, and provide light when other equipment is unavailable.
However, starting a fire during an emergency is not always safe or practical. Wildfire conditions, evacuation restrictions, heavy rain, and a lack of suitable fuel can make open flames dangerous or impossible.
That’s why your emergency kit should include multiple ignition methods along with dependable shelter, insulating clothing, and other ways to stay warm without relying entirely on fire.
Fire Safety Comes First Never use campfires, charcoal grills, or fuel-burning camping stoves inside tents, vehicles, or enclosed shelters. These can create dangerous carbon monoxide levels and cause fires.
During wildfire emergencies or when local fire restrictions are in effect, avoid open flames. Follow evacuation orders and use safer alternatives for warmth, lighting, and food preparation.
Essential Fire-Starting Supplies for a Bug Out Bag
- Butane lighter: Provides a quick, convenient flame for ordinary conditions.
- Ferrocerium rod: Creates hot sparks and can work even after exposure to moisture.
- Waterproof tinder: Helps establish a flame when natural materials are damp.
- Stormproof matches: Provide another ignition option in difficult weather.
- Waterproof storage: Protects matches, tinder, and other sensitive supplies.
Exotac nanoSTRIKER XL Ferro Rod
The Exotac nanoSTRIKER XL is a compact ferrocerium fire starter designed for outdoor and emergency use. Unlike a traditional lighter, a ferro rod does not depend on pressurized fuel.
When scraped correctly with a suitable striker, the rod produces sparks capable of igniting properly prepared tinder.
Its main advantages include:
- Compact construction suitable for emergency backpacks.
- Operation without batteries or lighter fuel.
- Ability to produce sparks after being dried off.
- Reusable construction for repeated fire-starting attempts.
A ferro rod still requires practice and suitable tinder. It will not automatically ignite wet logs or establish a fire without proper preparation.
Check the Exotac nanoSTRIKER XL on Amazon
BIC Multi-Purpose Lighter for Fast Ignition
A BIC Multi-Purpose Lighter provides a convenient way to ignite tinder, camp stove burners, and other appropriate fire-starting materials.
For a practical emergency kit, consider carrying a standard pocket lighter and a backup ignition source in separate protective compartments.
Butane lighters can perform poorly in very cold conditions, and wind or moisture may interfere with ignition. Keep them dry and inspect them during routine gear checks.
Waterproof Tinder and Emergency Fire Starters
Even a dependable lighter or ferro rod is of limited use without suitable tinder. A compact emergency tinder kit makes fire starting easier when natural materials are wet or difficult to collect.
Useful tinder options include:
- Commercial fire-starting tabs: Compact, convenient, and designed for reliable ignition.
- Petroleum jelly-coated cotton balls: An inexpensive homemade option when stored in a sealed container.
- Wax-based fire starters: Can provide a longer burn time to help ignite larger kindling.
- Dry natural tinder: Fine wood shavings and other suitable materials collected where permitted.
Store your tinder in a waterproof bag or container. Keep ignition sources protected from accidental activation, and follow the manufacturer’s storage instructions.
See Emergency Supplies on Amazon
Recommended Fire-Starting Equipment

How to Stay Warm When You Cannot Build a Fire
Fire should never be your only plan for staying warm during an evacuation. In many emergencies, finding safe shelter and preventing heat loss are more important than building a campfire.
- Wear moisture-wicking base layers and weather-appropriate insulating clothing.
- Use a waterproof outer layer to reduce exposure to rain and wind.
- Keep dry socks and spare clothing in waterproof bags.
- Use a sleeping pad to reduce heat loss to the ground.
- Carry an appropriately rated sleeping bag when cold-weather exposure is possible.
- Seek an established warming center or emergency shelter whenever available.
For more ways to manage cold conditions safely, read our Emergency Heating Without Electricity Guide.
Bottom line: A reliable fire-starting kit should include a lighter, a ferro rod, and protected tinder. Practice using your equipment before an emergency, but always prioritize safe shelter and insulation when open flames are prohibited or hazardous.
Food and Nutrition Essentials for Your 72-Hour Bug Out Bag
Food is an essential part of a well-prepared 72-hour bug out bag. Although most healthy adults can survive several days without eating, inadequate nutrition can reduce energy, concentration, and physical performance during an already stressful evacuation.
Your emergency food supply should provide enough calories to support your expected activity level while remaining lightweight, compact, and easy to prepare.
The best approach is to combine ready-to-eat emergency food, calorie-dense snacks, and optional lightweight meals that require minimal cooking equipment.
How Much Food Should You Pack for 72 Hours? Plan for three days of food for each person. Many adults need roughly 2,000 to 2,500 calories daily, but individual requirements vary with body size, age, activity, health, and environmental conditions.
For an adult using 2,000 calories per day as a planning example, that equals approximately 6,000 calories for three days. Physically demanding evacuations may require more.
Prioritize foods that are familiar, shelf-stable, easy to eat, and appropriate for your dietary needs. Keep some supplies that can be eaten without heating or adding water.
Essential Emergency Foods for a Bug Out Bag
- Freeze-dried meals: Lightweight meal options that typically require drinking-quality water for preparation.
- Emergency food ration bars: Compact, ready-to-eat calories with relatively long storage lives.
- Trail mix and nuts: Calorie-dense snacks containing fats, protein, and carbohydrates.
- Jerky: Convenient protein that requires no cooking.
- Nut butter packets: Compact, energy-dense food that is easy to eat while traveling.
- Electrolyte drink packets: Optional supplies that may help replace electrolytes during prolonged sweating.
Mountain House Freeze-Dried Meals
Mountain House freeze-dried meals are popular with campers, backpackers, and emergency preparedness enthusiasts because they offer complete meal options in lightweight packaging.
Many Mountain House products have manufacturer-stated shelf lives of up to 30 years when stored according to their instructions, although shelf life varies by product.
Advantages of freeze-dried meals include:
- Lightweight packaging that fits into most emergency backpacks.
- Multiple meal choices, including breakfast and dinner options.
- Convenient preparation using hot water.
- Long storage life for qualifying products.
The main drawback is water consumption. Most freeze-dried meals require additional water, and some need heating for proper preparation. That makes them less convenient when clean water or cooking equipment is limited.
Pack at least some food that can be eaten directly from its packaging.
Check Mountain House Freeze-Dried Meals on Amazon
SOS Emergency Food Ration Bars
SOS emergency food ration bars provide compact, ready-to-eat calories without requiring cooking, refrigeration, or additional water for preparation.
Emergency ration bars are especially useful during evacuations when you cannot stop to prepare meals or safely operate a stove.
Many commercially packaged emergency ration products are designed for extended storage, but always check the manufacturer’s expiration date, serving information, and storage requirements.
When comparing ration packs, pay attention to the total calories in the package rather than assuming one package automatically provides enough food for three days.
See SOS Emergency Food Bars on Amazon
Trail Mix, Jerky, and High-Calorie Snacks
Not every meal in your bug out bag needs to be a specialized survival product. Ordinary shelf-stable foods can provide affordable, practical nutrition during an emergency.
Useful options include:
- Trail mix: Provides a combination of carbohydrates, fats, and protein.
- Beef or turkey jerky: Offers convenient protein in lightweight packaging.
- Peanut or almond butter packets: Supply concentrated calories with minimal preparation.
- Granola or protein bars: Convenient for quick snacks during travel.
- Dried fruit: Provides carbohydrates and variety without much weight.
Choose commercially packaged products suitable for storage without refrigeration. Rotate foods according to their expiration dates and avoid products that may melt, leak, or spoil in a hot vehicle.
Account for food allergies, dietary restrictions, and the needs of children or other household members.
Sterno Foldable Camping Stove for Emergency Cooking
The Sterno Foldable Camping Stove is a compact, portable cooking stand designed for camping, emergency preparedness, and outdoor cooking. Its folding metal frame makes it easy to store, while the built-in wind-shield panels help protect the flame during use.
Designed to work with compatible Sterno canned heat fuel, this stove provides a simple way to warm food and heat small amounts of water when electricity is unavailable. Its corrosion-resistant metal construction and foldable design make it a practical addition to an emergency cooking kit.
Unlike some lightweight backpacking stoves, the Sterno Foldable Camping Stove does not require a pressurized fuel canister. However, canned heat must be carried separately, and heating performance may be slower than that of higher-output camping stoves.
For a 72-hour bug out bag, this stove is best suited to vehicle-based evacuations, camping, or situations where you can safely prepare food outdoors. If you expect to travel long distances on foot, ready-to-eat meals may be more practical.
Safety: Use only compatible fuel according to the manufacturer’s instructions. Never operate the stove inside tents, vehicles, buildings, or enclosed shelters. Burning fuel creates a fire hazard and can produce dangerous carbon monoxide. Never use it as a space heater.
Check the Sterno Foldable Camping Stove on Amazon
Recommended Emergency Food Supplies

How to Pack Three Days of Emergency Food
Organizing food by day makes it easier to track how much you have available and avoid consuming too many supplies early in an evacuation.
Here is an example of a simple three-day food plan for one adult. Adjust quantities and calories to your individual needs.
| Day | Example Food Supplies |
|---|---|
| Day 1 | Emergency ration bars, trail mix, jerky, nut butter packets, and dried fruit. |
| Day 2 | Freeze-dried meals if water and cooking are available, plus ready-to-eat snacks. |
| Day 3 | Emergency ration bars, nuts, protein bars, and remaining shelf-stable meals. |
This example illustrates how to distribute food, not a complete calorie-counted meal plan. Check package nutrition labels to make sure your actual supplies meet your planned calorie target.
Store each day’s food in a separate resealable bag when practical. Keep frequently used snacks accessible without unpacking your entire backpack.
For more ideas about emergency food selection and storage, read our Guide to Survival Foods With a Long Shelf Life.
Bottom line: A reliable 72-hour bug out bag should provide enough food for three days without depending entirely on cooking equipment. Combine ready-to-eat emergency rations, high-calorie snacks, and optional freeze-dried meals to create a flexible food supply that works during different evacuation scenarios.
Clothing and Weather Protection for Your 72-Hour Bug Out Bag
The clothing you pack in your 72-hour bug out bag can make a major difference in your ability to travel safely during an emergency. Wet clothing, uncomfortable footwear, blisters, and exposure to extreme temperatures can quickly turn an evacuation into a dangerous situation.
Your emergency clothing system should protect against changing weather conditions while remaining lightweight and practical. Rather than packing several complete outfits, focus on versatile layers, dependable footwear, dry socks, and protection from rain, wind, and sun.
The best clothing choices depend on your climate, season, evacuation route, and whether you expect to travel on foot or by vehicle.
Quick Clothing Checklist for a 72-Hour Bug Out Bag
- Moisture-wicking base layer
- Lightweight insulating jacket or fleece
- Waterproof or water-resistant outer shell
- Two or three pairs of extra socks
- Broken-in walking shoes or hiking boots
- Weather-appropriate hat
- Durable work gloves
- Bandana or multipurpose neck covering
- Compact rain poncho
Store spare clothing in waterproof bags to keep it dry during heavy rain or flooding.
Build a Three-Layer Clothing System
A practical survival clothing system uses layers that can be added or removed as conditions change. This helps regulate body temperature and prevents excessive sweating during physical activity.
- Base layer: Merino wool or moisture-wicking synthetic fabric helps move perspiration away from your skin.
- Insulating layer: Fleece, wool, or suitable synthetic insulation helps retain body heat.
- Outer shell: A wind-resistant, waterproof jacket protects against rain and harsh weather.
Avoid relying on cotton clothing for cold, wet conditions. Cotton absorbs moisture and can take a long time to dry, increasing the risk of heat loss.
Merino Wool Base Layers for Emergency Clothing
Merino wool base layers are useful for emergency preparedness because they help manage moisture, provide insulation, and remain relatively comfortable across a range of temperatures.
Lightweight merino shirts and leggings can be worn beneath regular clothing during cold-weather evacuations without taking up excessive backpack space.
Synthetic base layers are another practical option, particularly for people who prefer faster drying times or lower-cost equipment.
Shop Merino Wool Base Layers on Amazon
Hiking Boots and Reliable Emergency Footwear
Footwear is one of the most important considerations when preparing for an evacuation. If roads become blocked or transportation is unavailable, you may need to walk farther than expected while carrying your emergency supplies.
Choose shoes or boots that are already broken in and appropriate for your terrain. Heavy hiking boots are not always necessary; comfortable trail shoes may be a better choice for some evacuation routes.
Look for:
- Reliable traction on wet or uneven surfaces.
- A comfortable fit with enough room for your toes.
- Durable construction suitable for your local terrain.
- Weather protection appropriate for the season.
- Support and cushioning for extended walking.
Merrell Moab 3 Mid Waterproof Hiking Boots are a reliable option for emergency evacuations, offering waterproof protection, cushioned support, and Vibram rubber outsoles for traction on uneven terrain. However, proper fit and comfort matter more than brand name, so always break in your boots before relying on them during an emergency.
Check Merrell Moab 3 Mid Waterproof Hiking Boots on Amazon
Wool Socks and Blister Prevention
Dry, comfortable socks help protect your feet during long evacuations. Moisture, friction, and poorly fitting footwear can cause blisters that make walking painful or difficult.
Pack at least two extra pairs of socks in a waterproof bag. Merino wool or suitable synthetic hiking socks are generally preferable to ordinary cotton socks for extended walking.
Darn Tough wool socks are a popular option for hiking and outdoor use because of their durable construction and moisture-management properties.
Change damp socks promptly, inspect your feet for irritation, and address developing hot spots before they become blisters.
See Darn Tough Wool Socks on Amazon
Work Gloves for Emergency Protection
A durable pair of work gloves can help protect your hands when moving debris, handling firewood, setting up shelter, or performing basic repairs.
Mechanix-style work gloves are a practical choice for general utility tasks because they offer flexibility and grip without the bulk of heavy winter gloves.
However, ordinary work gloves do not provide complete protection against sharp glass, hazardous chemicals, or electrical hazards. Use task-appropriate protective equipment and avoid handling dangerous debris whenever possible.
Check Mechanix Work Gloves on Amazon
Bandanas, Shemaghs, and Head Protection
A lightweight bandana or shemagh can serve several useful purposes during an emergency, including sun protection, a neck covering, and a temporary cloth wrap.
A Rothco shemagh is one example of a multipurpose fabric covering suitable for outdoor use.
It can help reduce exposure to windblown dust, but a shemagh or ordinary bandana is not a substitute for a properly fitted respirator when protection against hazardous airborne particles is necessary.
Include a wide-brimmed hat for summer conditions or an insulated hat for cold-weather evacuations.
Emergency Rain Ponchos and Waterproof Protection
Rain protection deserves a permanent place in most bug out bags. Wet clothing can increase heat loss, damage equipment, and make extended travel uncomfortable.
A compact emergency rain poncho provides lightweight coverage and can be stored in an exterior backpack pocket for quick access.
For repeated outdoor use, a durable waterproof jacket and rain pants generally provide better protection than a thin disposable poncho.
Choose rain gear that fits over your clothing and backpack without significantly restricting movement.
Check Emergency Rain Ponchos on Amazon
Adjust Your Bug Out Bag Clothing for the Season
Emergency clothing should be reviewed throughout the year. A backpack prepared for summer conditions may be inadequate during a winter storm.
- Spring: Pack waterproof layers, spare socks, and clothing suitable for changing temperatures.
- Summer: Prioritize lightweight clothing, sun protection, ventilation, and insect protection.
- Fall: Include an insulating layer, rain protection, and appropriate footwear.
- Winter: Add thermal layers, insulated gloves, a warm hat, and cold-weather footwear as needed.
For additional advice on preparing for cold conditions, see our Winter Blackout Survival Guide.
Bottom line: Your 72-hour bug out bag should include practical clothing that keeps you dry, comfortable, and mobile. Prioritize dependable footwear, spare socks, adaptable layers, and weather protection rather than packing unnecessary changes of clothing.
First Aid and Hygiene Essentials for Your 72-Hour Bug Out Bag
A well-stocked first aid kit is an essential part of every 72-hour bug out bag. During an evacuation, even minor injuries can become serious if you cannot clean wounds, protect damaged skin, or access medical supplies.
Your emergency medical kit should include basic wound-care supplies, personal medications, hygiene products, and equipment appropriate for your training and medical needs.
Rather than carrying a large collection of unfamiliar medical tools, focus on supplies you understand how to use and can access quickly.
Quick First Aid Checklist for a 72-Hour Bug Out Bag
- Adhesive bandages in assorted sizes
- Sterile gauze pads and roller bandages
- Medical tape and nonstick wound dressings
- Antiseptic wipes and hand sanitizer
- Nitrile examination gloves
- Blister treatment supplies
- Trauma shears and tweezers
- Emergency first aid instructions
- Personal prescription medications
- Appropriate over-the-counter medications
- Personal hygiene and sanitation supplies
Store medical supplies in a water-resistant pouch and inspect them regularly for damage, contamination, or expiration.
Surviveware Small First Aid Kit for Emergency Preparedness
The Surviveware Small First Aid Kit is a compact, organized first aid kit designed for outdoor activities, travel, and emergency preparedness.
Its compartmentalized design makes it easier to locate supplies without emptying the entire pouch. This can be particularly useful when treating minor injuries during an evacuation.
Depending on the product version, a Surviveware kit may contain:
- Adhesive bandages and wound dressings
- Gauze and medical tape
- Basic wound-cleaning supplies
- Emergency first aid accessories
- Organized compartments for additional medical items
Check the current product contents before purchasing. A compact first aid kit may not include prescription medications, specialized trauma supplies, or everything needed for your household.
Check the Surviveware Small First Aid Kit on Amazon
Essential Wound Care Supplies
Small cuts, scrapes, and blisters are common during outdoor travel and emergency evacuations. Carrying basic wound-care equipment allows you to address minor injuries before they interfere with mobility.
Useful supplies include sterile gauze, nonstick dressings, adhesive bandages, medical tape, and clean water or sterile saline for wound irrigation.
For minor wounds, control bleeding with direct pressure, rinse the wound with clean running water when available, and cover it with an appropriate dressing.
Seek medical care for deep wounds, animal bites, spreading redness, severe pain, or injuries that may require stitches or a tetanus vaccination assessment.
Emergency Bleeding Control Supplies
Serious bleeding requires immediate action. A standard first aid kit may not contain the specialized equipment needed to manage life-threatening hemorrhage.
For people who have received appropriate training, a separate bleeding-control kit may include:
- Commercially manufactured tourniquet
- Hemostatic gauze
- Pressure dressing
- Protective examination gloves
Call emergency services when possible. Apply firm direct pressure to severe external bleeding, and use a tourniquet for life-threatening bleeding from an arm or leg when indicated and according to your training.
Consider taking a recognized first aid and bleeding-control course before relying on specialized emergency medical equipment.
Personal Medications and Emergency Prescriptions
Prescription medications are among the most important personal supplies in a bug out bag. Missing essential doses during an evacuation can create serious medical problems.
Include an emergency medication supply when permitted by your prescriber, pharmacy, and applicable rules. Keep medications in properly labeled containers and follow their storage requirements.
Other useful items may include:
- Pain relievers appropriate for your medical needs
- Antihistamines for known allergies
- Personal emergency medications, such as prescribed epinephrine auto-injectors
- Necessary medical devices and supplies
- A written list of medications, doses, allergies, and emergency contacts
Some medications require refrigeration or protection from extreme temperatures. Plan for these requirements before an evacuation.
Do not take medications that are unsafe for you, and consult a pharmacist or healthcare professional when assembling supplies for children or people with chronic medical conditions.
Hygiene and Sanitation Supplies
Good hygiene helps reduce the spread of illness during emergencies, particularly when access to clean water, restrooms, and sanitation services is limited.
A compact hygiene kit should include:
- Travel toothbrush and toothpaste
- Hand sanitizer containing at least 60% alcohol
- Biodegradable or ordinary wet wipes
- Toilet paper or compact tissue packets
- Small trash bags for waste
- Menstrual hygiene products when needed
- Personal hygiene items appropriate for each household member
Wash your hands with soap and safe water whenever possible, especially after using the bathroom and before preparing food. Hand sanitizer is useful when soap and water are unavailable, but it does not eliminate every type of germ and works less effectively on visibly dirty hands.
Recommended First Aid Equipment

How to Organize Your Emergency Medical Kit
Organization matters when you need medical supplies quickly. Keep your first aid kit in a clearly identified compartment that can be reached without unpacking your entire bug out bag.
- Immediate-access supplies: Gloves, gauze, bandages, and emergency bleeding-control equipment.
- Personal medications: Keep them labeled, protected, and accessible.
- Minor injury supplies: Blister pads, adhesive bandages, and wound dressings.
- Hygiene items: Store separately from sterile medical supplies.
- Medical information: Keep a waterproof copy of essential health information and emergency contacts.
Review your kit at least every three months. Replace used supplies, inspect packaging, check expiration dates, and update medications as directed by your healthcare professional.
Bottom line: Your 72-hour bug out bag should contain a dependable first aid kit, essential medications, and basic hygiene supplies. Choose equipment appropriate for your training, keep it organized, and make sure everyone in your household knows where the medical supplies are stored.
Navigation and Communication Essentials for Your 72-Hour Bug Out Bag
Reliable navigation and communication equipment belongs in every 72-hour bug out bag. During a wildfire, flood, major storm, or extended power outage, familiar roads may become impassable, cellular networks may be overloaded, and emergency information can change rapidly.
Your evacuation plan should not depend entirely on a smartphone or internet connection. A dependable emergency kit combines offline maps, basic navigation tools, emergency signaling equipment, and a reliable way to receive official alerts.
These supplies help you follow evacuation routes, locate alternate destinations, communicate your location, and stay informed when ordinary services are disrupted.
Quick Navigation and Communication Checklist
- Local road maps and regional evacuation maps
- Reliable compass
- Smartphone with downloaded offline maps
- NOAA Weather Radio receiver
- Emergency whistle and signaling mirror
- Written emergency contacts and meeting locations
- Portable power bank and charging cable
- Optional two-way radio or satellite communicator
Review evacuation routes before an emergency and identify at least one alternate route to a safe destination.
Suunto MC-2G Compass for Emergency Navigation
The Suunto MC-2G Compass is a precision navigation compass designed for outdoor travel and map reading. Its sighting mirror, adjustable declination, and global needle make it a useful tool for people who regularly travel through unfamiliar or remote terrain.
Unlike electronic navigation devices, a traditional magnetic compass does not require batteries, cellular coverage, or satellite reception.
Advantages include:
- Battery-free operation for dependable backup navigation.
- Mirror sighting for more precise directional readings.
- Adjustable declination for use with topographic maps.
- Compact construction suitable for an emergency backpack.
A compass is most useful when paired with an appropriate map and the knowledge needed to use both. Practice taking bearings and identifying landmarks before relying on it during an evacuation.
Check the Suunto MC-2G Compass on Amazon
Paper Maps and Offline Navigation
Smartphone navigation is convenient, but downloaded maps and paper backups can be valuable when mobile data is unavailable.
Before an emergency, download offline maps covering your home, nearby communities, planned evacuation routes, and alternate destinations.
Keep a waterproof paper road map in your bug out bag. If your evacuation plan involves traveling through rural or wilderness areas, consider adding a detailed topographic map.
Mark important locations, including:
- Primary and alternate evacuation routes.
- Family meeting locations.
- Hospitals and designated emergency shelters.
- Major roads, bridges, and possible route restrictions.
- Prearranged destinations outside your immediate area.
Remember that offline maps may not show current road closures or changing evacuation orders. Follow official emergency instructions whenever available.
Emergency Whistle and Signaling Mirror
A pealess emergency whistle is one of the simplest signaling tools you can carry. It requires no batteries and can help attract attention when shouting is difficult or ineffective.
A signaling mirror can reflect sunlight toward distant rescuers or other people when visibility and lighting conditions permit.
These tools are particularly useful for outdoor evacuation routes, remote travel, and situations where electronic communication is unavailable.
Choose a durable whistle that works when wet and keep it attached to your backpack shoulder strap or another easily accessible location.
NOAA Emergency Weather Radio for Disaster Alerts
A NOAA Weather Radio receiver provides access to weather forecasts, warnings, and other emergency information transmitted through the National Weather Service’s radio network in supported coverage areas.
For a 72-hour bug out bag, consider a compact emergency radio with:
- NOAA Weather Radio reception.
- AM/FM reception for additional news and information.
- Rechargeable battery or replaceable battery operation.
- Hand-crank or solar charging as a secondary power option.
- Built-in flashlight or USB charging when useful.
Some emergency radios include SAME (Specific Area Message Encoding) alert functionality, which can provide location-specific warnings. However, not every hand-crank NOAA radio supports SAME alerts.
Check the specifications of your chosen model and test reception in the locations where you expect to use it.
For product comparisons, read our Best Emergency Solar Radios for Blackouts and Disasters.
Two-Way Radios and Backup Communication
Two-way radios can help family members communicate over short distances when cellular service is unavailable. FRS radios are a practical option for many households, although their usable range depends heavily on terrain, buildings, and other obstructions.
For longer-distance communication, some people may benefit from licensed GMRS equipment or a satellite messaging device, depending on their needs and operating requirements.
Keep in mind that ordinary walkie-talkies do not provide unlimited range and cannot automatically contact emergency services.
For a detailed comparison, see our Guide to the Best Walkie-Talkies for Grid-Down Communication.
Recommended Navigation and Communication Equipment

Create a Family Emergency Communication Plan
Communication equipment works best when everyone already knows what to do if family members become separated.
Before an emergency:
- Choose a nearby meeting location and an alternate destination outside your neighborhood.
- Identify an out-of-area emergency contact who can relay messages.
- Write important telephone numbers on a waterproof contact card.
- Agree on when and how family members should check in.
- Practice using radios and other communication devices.
- Keep phones charged and enable official emergency alerts.
Text messages may sometimes get through when voice calls are congested, but neither method is guaranteed during a major disaster.
For a streamlined evacuation setup, see our How to Build a Bug Out Bag in 5 Minutes guide.
Before finishing your emergency kit, also review our 15 Most Forgotten Survival Items to identify useful supplies you may have overlooked.
Bottom line: A reliable 72-hour bug out bag should include multiple ways to navigate, receive emergency information, and signal for assistance. Combine offline maps, a dependable compass, emergency radio, and a written communication plan rather than relying on a single electronic device.
Illumination and Backup Power Essentials for Your 72-Hour Bug Out Bag
Reliable lighting and portable backup power are essential components of a 72-hour bug out bag. During an evacuation, a power outage or loss of cellular service can make it difficult to navigate safely, communicate with family members, and access important emergency information.
A dependable emergency lighting system should include a hands-free light source, spare batteries or charging options, and a compact power bank for essential electronic devices.
For most evacuation kits, the best combination is a reliable headlamp, a charged USB power bank, and the correct charging cables. A small solar charger can provide additional flexibility, but it should not be your only source of electricity.
Quick Lighting and Power Checklist
- LED headlamp with adjustable brightness
- Backup flashlight or compact lantern
- Spare batteries or a compatible rechargeable battery
- USB power bank with sufficient capacity
- Phone charging cable and appropriate adapters
- Optional folding solar panel
- Water-resistant storage pouch for electronics
Charge your emergency electronics before severe weather and inspect their condition during routine bug out bag maintenance.
Petzl ACTIK CORE Headlamp for Emergency Lighting
The Petzl ACTIK CORE is a rechargeable headlamp designed for outdoor activities, camping, and emergency use. Its hands-free design makes it particularly useful when setting up shelter, organizing supplies, providing first aid, or moving through dark areas.
Depending on the model generation, ACTIK CORE headlamps offer several brightness settings, red-light functionality, and compatibility with Petzl’s rechargeable CORE battery system.
Some versions can also operate using compatible AAA batteries, providing an additional power option when recharging is unavailable. Check the specifications for the exact model you purchase.
Advantages of a dependable headlamp include:
- Hands-free lighting for essential tasks.
- Adjustable brightness to conserve battery power.
- Red-light settings on supported models.
- Compact construction suitable for an emergency backpack.
- Rechargeable operation with compatible backup battery options.
Choose a headlamp that provides enough illumination for walking and working without consuming excessive battery power.
Check the Petzl ACTIK CORE Headlamp on Amazon
Anker PowerCore 10000 Portable Power Bank
A 10,000mAh portable power bank provides useful backup electricity for charging smartphones and other compatible USB devices during an emergency.
The Anker PowerCore 10000 is one example of a compact battery bank designed for portable charging. Its relatively small size makes it convenient for a 72-hour emergency kit.
However, a power bank’s advertised milliamp-hour capacity does not equal the amount of energy ultimately delivered to your phone. Charging losses, device battery size, temperature, and battery condition all affect the number of charges available.
When choosing a power bank, consider:
- Battery capacity: A 10,000mAh model offers a useful balance of size and stored energy.
- Charging ports: Make sure the power bank supports your phone and other devices.
- USB-C compatibility: Useful for many modern smartphones and electronics.
- Weight: Larger battery banks provide more energy but add backpack weight.
- Recharge time: Check how long the unit takes to recharge before an emergency.
Store the power bank according to the manufacturer’s instructions and recharge it periodically. Avoid leaving lithium-ion batteries exposed to extreme heat, particularly inside parked vehicles.
Check the Anker PowerCore 10000 on Amazon
Foldable Solar Chargers for Extended Emergencies
A foldable solar charger can provide an additional charging option when grid electricity is unavailable for an extended period.
Portable solar panels are especially useful for backpacking, remote travel, and emergency situations where you may spend several days away from electrical outlets.
However, solar charging performance depends on sunlight, panel orientation, weather conditions, and the power requirements of your devices.
A compact solar panel may struggle to charge a smartphone directly during cloudy conditions or intermittent sunlight. For more reliable operation, use a compatible solar panel to recharge a power bank, then charge your devices from the stored energy.
When selecting a portable solar charger, look for:
- Foldable construction suitable for backpack storage.
- USB output or another connection compatible with your equipment.
- Weather resistance appropriate for outdoor use.
- Enough rated power for your intended charging needs.
- Reliable connections and suitable charging cables.
A solar charger is best treated as an optional supplement rather than a replacement for a fully charged power bank.
Recommended Emergency Lighting and Backup Power

How to Make Your Emergency Batteries Last Longer
Conserving electricity can extend the usefulness of your lighting and communication equipment during a prolonged evacuation.
- Use lower brightness settings: Reserve maximum headlamp output for situations that require it.
- Activate phone power-saving mode: Reduce unnecessary background activity and screen brightness.
- Disable unused wireless features: Turn off Bluetooth, Wi-Fi, or other features when not needed.
- Use airplane mode when appropriate: Reduce battery consumption while preserving the ability to reactivate communication.
- Protect batteries from temperature extremes: Cold temperatures can temporarily reduce available battery performance, while excessive heat can damage batteries.
- Keep a backup light: A small flashlight provides redundancy if your primary headlamp fails.
Remember that a charged phone does not guarantee communication if cellular towers or other network infrastructure are unavailable.
Choosing Between a Power Bank and a Portable Power Station
For a lightweight 72-hour bug out bag, a USB power bank is generally more practical than a large portable power station.
Power stations can be valuable for vehicle evacuations, medical equipment, and extended emergencies, but their additional weight makes them less suitable for carrying long distances on foot.
If you’re comparing backup power options for larger emergency needs, read our Solar Generator Sizing Guide.
For additional emergency lighting options, see our Best Emergency Lights for Power Outages guide.
Bottom line: A reliable 72-hour bug out bag should include hands-free lighting, backup illumination, a charged power bank, and compatible charging cables. Portable solar charging can provide additional flexibility, but dependable stored battery power should remain your primary solution for a short-term evacuation.
Cutting Tools and Repair Essentials for Your 72-Hour Bug Out Bag
A dependable cutting tool and a compact repair kit are valuable additions to any 72-hour bug out bag. Whether you’re repairing damaged equipment, cutting cordage, preparing food, or setting up temporary shelter, a few carefully selected tools can help you handle unexpected problems during an evacuation.
However, carrying too many heavy tools adds unnecessary weight. For most emergency backpacks, a reliable knife, a compact multi-tool, and a basic repair kit provide a practical balance of versatility and portability.
Choose tools based on the tasks you’re likely to encounter, your experience, and the restrictions that may apply at your evacuation destination.
Quick Cutting Tools and Repair Checklist
- Reliable fixed-blade or folding knife
- Compact multi-tool with pliers and screwdrivers
- Small roll of duct tape
- Heavy-duty sewing needle and thread
- Several zip ties in assorted sizes
- Safety pins and spare buckles
- Paracord or lightweight utility cord
- Small equipment repair patches
Pack only the tools you know how to use safely. Keep sharp blades secured in protective sheaths or closed positions.
Morakniv Companion Fixed-Blade Survival Knife
The Morakniv Companion is a popular outdoor knife designed for camping, general utility work, and basic bushcraft tasks. Its straightforward construction and comfortable handle make it a practical option for people who want a dependable cutting tool without spending heavily on specialized survival equipment.
The Companion is available in different blade materials and configurations, including stainless steel and carbon steel versions. Each has different maintenance requirements.
Useful applications include:
- Cutting cordage and lightweight rope.
- Preparing tinder and small wood shavings.
- Opening packaging and cutting food.
- Performing basic campsite and equipment tasks.
Although a fixed-blade knife can handle many outdoor jobs, it should not be treated as a replacement for an axe, saw, or pry bar. Avoid using the blade for heavy prying or other tasks that could cause it to break.
Keep the knife clean, dry, and properly secured. Check applicable knife laws and restrictions before traveling or entering an emergency shelter.
Check the Morakniv Companion on Amazon
Leatherman Wave+ Multi-Tool for Emergency Repairs
The Leatherman Wave+ is a versatile multi-tool that combines several commonly used tools into one compact unit.
It includes pliers, wire cutters, knife blades, screwdrivers, and other useful implements that can help with everyday repairs and emergency equipment maintenance.
For a bug out bag, a multi-tool can be especially useful for:
- Tightening loose screws on equipment.
- Repairing small mechanical components.
- Cutting wire or cordage within the tool’s rated capabilities.
- Adjusting or maintaining camping gear.
- Handling small tasks without carrying a full toolbox.
Its main drawback is weight. If you’re trying to build an ultralight emergency backpack, a smaller multi-tool may be sufficient.
Do not use an ordinary multi-tool on energized electrical equipment or for tasks beyond its intended design.
See the Leatherman Wave+ on Amazon
Build a Lightweight Emergency Repair Kit
A basic repair kit can keep small equipment problems from becoming major inconveniences during an evacuation.
You don’t need an entire toolbox. A few inexpensive supplies stored in a waterproof pouch can handle many common backpack, clothing, and shelter repairs.
Duct Tape
Duct tape can provide temporary repairs for torn equipment, loose straps, and damaged packaging. Wrap several feet around a small plastic card or another suitable holder to save space.
Zip Ties
Zip ties are useful for securing loose equipment, organizing cables, and making temporary repairs. Carry several sizes to accommodate different tasks.
Sewing Needle and Heavy-Duty Thread
A small sewing kit can help repair torn clothing, backpack fabric, and loose stitching. Choose a needle and thread suitable for the materials you’re likely to repair.
Paracord and Utility Cord
Lightweight cordage is useful for securing equipment, establishing tarp shelters, and replacing damaged tie-downs.
Keep in mind that ordinary paracord is not automatically suitable for climbing, rescue operations, or supporting a person’s weight.
Repair Patches and Spare Hardware
Adhesive repair patches, spare backpack buckles, and small replacement fasteners can help restore damaged equipment when replacements are unavailable.
Choose repair materials that are compatible with your backpack, shelter, and other essential gear.
Recommended Cutting Tools and Emergency Repair Equipment

Fixed-Blade Knife vs. Multi-Tool: Do You Need Both?
Whether you need both tools depends on your evacuation plan and expected activities.
| Tool | Best Uses | Considerations |
|---|---|---|
| Fixed-Blade Knife | Cutting cordage, preparing tinder, and general outdoor tasks. | Requires a secure sheath and appropriate handling. |
| Multi-Tool | Equipment repairs, pliers, screwdrivers, and small cutting tasks. | Can be relatively heavy for its size. |
| Basic Repair Kit | Temporary repairs to clothing, backpacks, and shelter equipment. | Requires compatible materials and basic repair skills. |
For a lightweight urban evacuation bag, a compact multi-tool and repair kit may be enough. For outdoor travel where shelter setup and general cutting tasks are more likely, a dependable knife may also be useful.
Remember that emergency shelters, airports, and other facilities may restrict knives and sharp tools. Always prioritize the requirements of your planned evacuation destination.
How to Maintain Your Emergency Tools
Inspect your cutting tools and repair supplies during regular bug out bag maintenance.
- Check knife blades for corrosion, damage, and dull edges.
- Clean and lubricate multi-tool joints according to the manufacturer’s instructions.
- Replace damaged or missing repair supplies.
- Inspect knife sheaths and tool storage pouches.
- Practice using tools safely before an emergency.
For additional gear ideas, review our 15 Most Forgotten Survival Items guide.
Bottom line: A reliable 72-hour bug out bag doesn’t need a large collection of cutting tools. A quality knife or multi-tool, paired with a compact repair kit, can handle many practical emergency tasks without adding excessive weight.
Security and Personal Safety Essentials for Your 72-Hour Bug Out Bag
Personal safety is an important consideration when preparing a 72-hour bug out bag. During a major disaster, evacuation routes may become congested, communication systems may fail, and unfamiliar surroundings can create additional risks.
However, effective emergency security is not simply about carrying defensive equipment. The most important priorities are situational awareness, avoiding confrontation, following official evacuation instructions, and maintaining reliable communication.
Your bug out bag should include practical safety supplies that help you remain visible when necessary, signal for assistance, and respond appropriately to unexpected situations.
Quick Personal Safety Checklist
- Reliable LED flashlight
- Emergency whistle or personal alarm
- Charged smartphone and backup power bank
- Written emergency contacts
- Identification and important documents
- Reflective equipment for roadside visibility
- Appropriate personal protective equipment
- Optional legal personal defense equipment
Prioritize equipment you can use safely and confidently. Always check restrictions at evacuation shelters and other destinations.
Situational Awareness During an Emergency Evacuation
The most effective personal safety strategy is often recognizing potential hazards early and avoiding them altogether.
During an evacuation, stay alert to changing conditions, damaged infrastructure, traffic congestion, unstable buildings, and unsafe roadways.
Practical precautions include:
- Follow official evacuation routes: Avoid entering restricted or hazardous areas.
- Travel with family or trusted companions: Establish meeting locations before leaving home.
- Keep emergency supplies accessible: Avoid unpacking your entire bag in crowded locations.
- Protect important documents: Carry identification and emergency contact information in a waterproof pouch.
- Avoid unnecessary confrontation: Move away from threatening situations whenever possible.
- Maintain communication: Keep your phone charged and share your destination with a trusted contact.
Remember that most emergency evacuations involve ordinary families trying to reach safety. Preparedness should focus on realistic hazards rather than assuming other evacuees are dangerous.
Personal Defense Spray: Legal and Practical Considerations
Some people choose to include a compact personal defense spray in their emergency supplies. Products such as SABRE pepper spray are designed for personal protection, but their suitability depends on local laws, individual circumstances, and the rules of your evacuation destination.
Pepper spray can cause serious eye and respiratory irritation, including accidental exposure to the person carrying it. It may also be restricted in certain buildings, transportation facilities, or emergency shelters.
If you choose to carry personal defense spray:
- Check applicable state and local regulations.
- Review the manufacturer’s safety instructions.
- Store it securely and away from children.
- Check expiration dates and storage temperature limits.
- Do not rely on it as a substitute for avoiding dangerous situations.
View SABRE Personal Defense Spray on Amazon
Tactical Flashlights for Visibility and Emergency Safety
A dependable flashlight serves several important purposes during an evacuation. It helps you identify obstacles, navigate dark areas, inspect equipment, and make yourself visible when appropriate.
A tactical-style LED flashlight may offer durable construction, adjustable brightness, and weather-resistant features.
When choosing a flashlight for your emergency bag, prioritize:
- Reliable operation and durable construction.
- Multiple brightness settings.
- Reasonable battery life.
- Water resistance appropriate for outdoor conditions.
- Compatible replacement batteries or charging options.
Do not assume a flashlight will reliably stop an attacker. Its primary role in an emergency kit should be illumination and safe navigation.
See Tactical LED Flashlights on Amazon
Emergency Whistles and Personal Alarms
An emergency whistle or personal alarm is a lightweight addition to your bug out bag that can help attract attention when you need assistance.
A pealess whistle is particularly useful because it does not require batteries and generally performs well in wet conditions.
Personal alarms provide another signaling option, although their effectiveness depends on battery condition, sound output, distance, and surrounding noise.
These devices may help you:
- Signal to nearby family members.
- Attract attention after an injury or accident.
- Help rescuers locate you within hearing distance.
- Communicate a need for assistance when shouting is difficult.
Neither device guarantees that someone will hear you or respond, so they should supplement rather than replace your emergency communication plan.
Check Emergency Survival Whistles on Amazon
Emergency Escape and Building Safety
Damaged buildings, blocked exits, and unstable structures can present serious hazards after earthquakes, fires, storms, and other disasters.
Rather than packing lockpicks or specialized entry equipment, most households are better served by knowing their evacuation routes and preparing for common building emergencies.
Useful precautions include:
- Identify at least two exits from frequently occupied areas when possible.
- Keep hallways and emergency exits clear.
- Know where household fire extinguishers are located.
- Consider an appropriate emergency escape ladder for upper-floor bedrooms.
- Never enter unstable buildings or restricted areas to retrieve supplies.
- Contact emergency services when someone is trapped or in immediate danger.
Specialized entry tools are not necessary for most 72-hour bug out bags and may create legal or safety problems if carried or used improperly.
Recommended Personal Safety Equipment

Keep Your Bug Out Bag Practical and Low Profile
A practical emergency backpack should be comfortable, organized, and suitable for your evacuation environment.
You do not need an oversized tactical backpack or an extensive collection of defensive equipment to prepare effectively.
Choose a durable bag that fits properly, distributes weight comfortably, and allows you to access essential supplies without drawing unnecessary attention.
Keep identification, medications, communication equipment, and emergency documents in secure, accessible compartments.
Review Your Emergency Evacuation Strategy
Personal safety depends heavily on knowing when to leave, where to go, and how to respond when your original plan becomes impractical.
Review our New Rules of Bugging Out guide for additional evacuation planning considerations.
Practice your evacuation plan with household members and update it whenever your transportation, family needs, or local conditions change.
Bottom line: The most valuable security equipment in a 72-hour bug out bag supports awareness, visibility, communication, and safe evacuation. Carry practical tools, understand their limitations, and prioritize avoiding dangerous situations over confrontation.
Family, Kids, and Pets: 72-Hour Bug Out Bag Essentials
A standard 72-hour bug out bag is often designed around the needs of one adult. However, preparing for an emergency becomes more complicated when you’re responsible for children, babies, older family members, or pets.
Every household member has different requirements for food, water, medications, clothing, and mobility. A successful family evacuation plan accounts for these needs before an emergency occurs.
The goal is to create a family bug out bag system that provides essential supplies for at least 72 hours without making individual backpacks too heavy to carry.
Quick Family Bug Out Bag Checklist
- Age-appropriate food and snacks for each family member
- Safe drinking water and suitable water containers
- Extra clothing, socks, and weather protection
- Prescription medications and medical supplies
- Diapers, wipes, and infant feeding supplies when needed
- Small comfort items for children
- Identification and emergency contact information
- Pet food, water, leash, carrier, and waste bags
- Mobility aids or specialized medical equipment when needed
Keep critical supplies in adult-controlled bags and give children only lightweight, age-appropriate items to carry.
How to Build a Bug Out Bag for Kids
Children have different physical and emotional needs during an emergency. A bag that works well for an adult may be too heavy, uncomfortable, or complicated for a young child.
A kids’ bug out bag should focus on comfort, identification, and simple supplies that the child can manage independently.
Consider packing:
- Familiar snacks: Shelf-stable foods your child already enjoys and can safely eat.
- Extra clothing: A complete change of clothes, underwear, and socks.
- Comfort items: A small stuffed animal, favorite toy, or activity book.
- Emergency identification: A contact card with parent or guardian information.
- Weather protection: A lightweight rain jacket or appropriate warm clothing.
- Small water bottle: Sized appropriately for the child’s age and abilities.
Choose foods appropriate for your child’s age and avoid choking hazards. Younger children should not be expected to carry their own essential survival supplies.
Shop Kid-Friendly Emergency Snacks on Amazon
Comfort and Emotional Preparedness for Children
Emergency evacuations can be stressful for children, especially when normal routines are interrupted.
Familiar objects and simple activities can provide reassurance during long periods of waiting, travel, or temporary sheltering.
Useful additions include:
- A favorite small stuffed animal or comfort blanket.
- Coloring supplies or a compact activity book.
- Family photographs.
- Age-appropriate books or quiet games.
- A written family emergency contact card.
Practice your family’s evacuation plan together. Explain where you would go, what each person should carry, and what children should do if they become separated from their caregivers.
Baby and Toddler Bug Out Bag Essentials
Babies and toddlers require additional supplies that may not be included in a standard emergency backpack.
If you have an infant or toddler, prepare a dedicated pouch containing:
- Diapers and baby wipes for at least three days.
- Diaper rash cream and disposable waste bags.
- Extra baby clothing and blankets appropriate for the weather.
- Ready-to-feed formula or other feeding supplies appropriate for your baby.
- Clean bottles and necessary feeding equipment.
- Baby medications and medical supplies as directed by a healthcare professional.
- A suitable baby carrier for situations where a stroller cannot be used.
Infant feeding requires special attention during disasters. Ready-to-feed infant formula is generally the safest formula option when clean water or reliable sanitation is unavailable because it does not require mixing with water.
If powdered formula is necessary, follow public health guidance for safe preparation and use only water that is appropriate for infant formula preparation. Do not dilute formula to stretch your supply.
See Travel Infant Formula Options on Amazon
72-Hour Bug Out Bag Supplies for Pets
Pets depend on their owners for food, water, shelter, and transportation during emergencies. A family evacuation plan should include appropriate supplies for every household animal.
Prepare a pet emergency kit with enough supplies to cover at least 72 hours, while considering additional reserves if evacuation or sheltering could last longer.
Essential pet supplies include:
- Pet food: At least three days of your pet’s regular food, stored in sealed containers.
- Drinking water: A separate supply based on your pet’s size, activity, and environmental conditions.
- Collapsible bowls: Lightweight containers for feeding and hydration.
- Leash and harness: Properly fitted equipment for controlling your pet during travel.
- Pet carrier: A secure carrier suitable for smaller animals.
- Waste bags: Supplies for cleanup and sanitation.
- Veterinary records: Copies of vaccination information and medication instructions.
- Identification: Updated tags and microchip contact information.
Check pet policies before choosing an evacuation destination. Not every emergency shelter or hotel accepts household pets, although service animals may be subject to different requirements.
Shop Collapsible Pet Bowls on Amazon
Emergency Medications and Special Medical Needs
Families should account for prescription medications, mobility limitations, allergies, and medical equipment when preparing their emergency supplies.
Depending on household needs, additional equipment may include:
- Prescription medications stored according to their instructions.
- Spare eyeglasses or contact lens supplies.
- Hearing aid batteries or charging equipment.
- Diabetes testing supplies and necessary medications.
- Mobility aids and related accessories.
- Medical identification information.
- Backup power planning for essential medical devices.
Discuss emergency medication supplies and storage requirements with your healthcare professional or pharmacist.
Some medications require refrigeration, and certain medical devices need a dependable electrical supply. These requirements should be addressed before a power outage or evacuation.
Recommended Family and Pet Emergency Gear

How to Divide Emergency Supplies Among Family Members
Instead of giving every family member an identical backpack, organize supplies based on each person’s abilities and responsibilities.
| Family Member | Suggested Supplies |
|---|---|
| Adults | Water, food, shelter, medical supplies, communication equipment, and essential family gear. |
| Older Children | Lightweight snacks, clothing, water bottle, identification, and comfort items. |
| Babies and Toddlers | Adult-carried diapers, feeding supplies, clothing, hygiene products, and medications. |
| Older Adults | Personal medications, mobility equipment, medical information, and supplies suited to individual needs. |
| Pets | Food, water, bowls, leash, carrier, identification, and veterinary records. |
Test the weight and fit of each backpack before an emergency. Adults should be prepared to carry additional supplies if children become tired or unable to manage their bags.
Create a Family Evacuation Plan Before Disaster Strikes
Emergency supplies are only one part of family preparedness. Everyone should understand the household evacuation plan and know what to do if normal communication systems fail.
Before an emergency:
- Identify primary and alternate evacuation destinations.
- Choose family meeting locations.
- Keep emergency contact information accessible.
- Plan transportation for children, older adults, and pets.
- Confirm that your destination can accommodate your household’s needs.
- Practice loading your vehicle or carrying your emergency backpacks.
For a broader approach to household preparedness, see our Complete Emergency Preparedness Plan.
Bottom line: A family bug out bag should be customized for the people and animals who depend on you. Prioritize age-appropriate food, medications, comfortable clothing, identification, pet supplies, and a realistic evacuation plan that everyone can follow.
Common 72-Hour Bug Out Bag Mistakes to Avoid
Building a 72-hour bug out bag involves more than purchasing survival equipment and filling a backpack. Even a well-stocked emergency kit can become ineffective if it is too heavy, poorly organized, missing essential supplies, or filled with equipment you have never tested.
One of the most common preparedness mistakes is focusing on the quantity of gear instead of how well the entire system works together.
Your bug out bag should be comfortable enough to carry, organized for quick access, and equipped to support your basic needs during a three-day emergency.
Seven Common Bug Out Bag Mistakes
- Packing more weight than you can comfortably carry.
- Prioritizing gadgets over water, shelter, and medical supplies.
- Relying on a single method for critical survival needs.
- Forgetting to inspect food, medications, and batteries.
- Never testing your equipment before an emergency.
- Ignoring weather conditions and evacuation destinations.
- Failing to create a realistic evacuation plan.
A practical emergency backpack should be built around your actual needs, physical abilities, and likely evacuation conditions.
Mistake 1: Overpacking Your Bug Out Bag
One of the biggest mistakes is filling an emergency backpack with equipment that is too heavy to carry comfortably.
Large knives, multiple cooking systems, excessive clothing, and unnecessary tactical accessories can quickly increase your pack weight without providing meaningful benefits.
Although some preparedness guides recommend a specific backpack weight, there is no universal weight that works for everyone.
Your ideal load depends on:
- Your body size and physical condition.
- How far you may need to travel on foot.
- Local terrain and weather conditions.
- How much water you must carry.
- Whether you are carrying supplies for children or other family members.
- Your planned evacuation destination.
Remember that one liter of water weighs approximately 2.2 pounds. Carrying three liters adds roughly 6.6 pounds before accounting for the container.
How to avoid this mistake: Pack essential supplies first, weigh your completed backpack, and test it on a realistic walk. Remove unnecessary items until the load is manageable.
Mistake 2: Ignoring Essential Survival Priorities
Survival gadgets may be interesting, but they should never replace the basic supplies needed to stay safe during an evacuation.
Your first priorities should include:
- Water: Safe drinking water, carrying capacity, and appropriate treatment methods.
- Shelter: Protection from rain, wind, cold, and excessive heat.
- Medical supplies: First aid equipment and essential medications.
- Food: Lightweight, shelf-stable meals and snacks.
- Communication: Emergency contacts, alerts, and backup communication methods.
- Navigation: Maps, evacuation routes, and dependable navigation tools.
Fire-starting equipment can be valuable for outdoor survival, but it may be unnecessary or unsafe to use in certain evacuation shelters, wildfire conditions, or enclosed spaces.
How to avoid this mistake: Build your backpack around the most likely emergencies in your area rather than collecting equipment simply because it is marketed as survival gear.
Mistake 3: Having No Backup for Critical Equipment
Equipment can fail unexpectedly. Water filters can become damaged, batteries can lose their charge, and electronic devices may stop working when exposed to moisture or extreme temperatures.
For essential functions, having a practical backup improves reliability.
Examples include:
- Water: Carry treated water and an appropriate backup purification method.
- Lighting: Pack a headlamp and a small backup flashlight.
- Navigation: Download offline maps and carry a paper map.
- Communication: Keep written contact information in addition to your smartphone.
- Fire: Where fire is appropriate and permitted, carry more than one reliable ignition method.
Redundancy does not mean carrying three of every item. Prioritize backups for equipment whose failure could create a serious safety problem.
How to avoid this mistake: Identify the supplies you cannot afford to lose and choose lightweight, dependable alternatives.
Mistake 4: Forgetting to Rotate Emergency Supplies
A bug out bag is not something you should pack once and ignore for several years.
Food can expire, batteries can discharge, clothing sizes can change, and medications may require replacement or special storage.
Inspect your emergency backpack approximately every three months and after any time you use its supplies.
During each inspection:
- Check expiration dates on food and medications.
- Inspect water containers for damage or leaks.
- Recharge power banks and rechargeable equipment.
- Check flashlights, radios, and spare batteries.
- Replace damaged or missing first aid supplies.
- Update clothing sizes and seasonal equipment.
- Review emergency contacts and important documents.
Follow manufacturer instructions for battery maintenance and medication storage. Some supplies may require more frequent attention.
How to avoid this mistake: Set a recurring reminder to inspect your emergency backpack at the beginning of each season.
Mistake 5: Never Testing Your Bug Out Bag
Many people purchase emergency equipment but never practice using it.
During a real evacuation, unfamiliar tools and poorly fitted backpacks can create unnecessary problems.
Testing your equipment before an emergency helps identify weaknesses while you still have time to correct them.
Start with a short practice walk while wearing your fully loaded backpack.
Pay attention to:
- Shoulder and hip discomfort.
- Uneven weight distribution.
- Loose straps or shifting equipment.
- Footwear problems or developing blisters.
- Difficulty accessing essential supplies.
Practice setting up your shelter, operating your water filter, using your emergency radio, and charging your devices.
How to avoid this mistake: Test equipment in safe, controlled conditions and become familiar with its operation before relying on it during a disaster.
Mistake 6: Ignoring Seasonal Weather Conditions
A bug out bag prepared for summer may not provide enough protection during freezing temperatures. Likewise, heavy winter clothing can add unnecessary weight during hot weather.
Adjust your emergency supplies based on the season and local climate.
- Spring: Waterproof clothing, rain protection, and extra dry socks.
- Summer: Sun protection, breathable clothing, insect repellent, and adequate drinking water.
- Fall: Insulating layers, weather-resistant clothing, and appropriate footwear.
- Winter: Thermal clothing, insulated gloves, warm headwear, and suitable cold-weather shelter equipment.
Also consider the weather conditions at your evacuation destination, which may differ from those at home.
How to avoid this mistake: Review seasonal clothing and shelter requirements during your quarterly equipment inspection.
Mistake 7: Having Gear but No Evacuation Plan
A fully stocked emergency backpack cannot replace a realistic evacuation strategy.
Without a destination, transportation plan, or alternate route, even well-prepared households may struggle to make decisions during a fast-moving emergency.
Your evacuation plan should identify:
- Primary and alternate destinations.
- Safe evacuation routes and possible road restrictions.
- Transportation options if your vehicle is unavailable.
- Meeting locations for separated family members.
- Emergency contacts outside your immediate area.
- Arrangements for children, pets, and family members with additional needs.
Keep a printed copy of essential information in your bug out bag and review the plan with everyone in your household.
How to avoid this mistake: Practice your evacuation procedures and update them when family circumstances or local conditions change.
Recommended Bug Out Bag Equipment

How to Know Whether Your Bug Out Bag Is Ready
Before considering your emergency backpack complete, ask yourself these questions:
- Can I comfortably carry the fully loaded backpack?
- Do I have safe drinking water and an appropriate backup plan?
- Can I protect myself from expected weather conditions?
- Are my food, medications, and batteries current?
- Do I know how to use every essential piece of equipment?
- Can I reach my first aid kit, flashlight, and communication devices quickly?
- Does everyone in my household know the evacuation plan?
If you cannot answer yes to these questions, identify the missing supplies or planning steps before purchasing additional gear.
For a streamlined approach, read our How to Build a Bug Out Bag in 5 Minutes guide.
Bottom line: The best 72-hour bug out bag is not necessarily the largest or most expensive. It is a manageable, dependable emergency kit that meets your essential needs, uses equipment you understand, and supports a realistic evacuation plan.
How to Pack and Maintain Your 72-Hour Bug Out Bag
Building a 72-hour bug out bag is only the first step in emergency preparedness. Your backpack must also be properly organized, comfortable to carry, and regularly maintained to remain dependable when you need it.
Even high-quality survival equipment can become ineffective if batteries are discharged, medications are outdated, or essential supplies are buried beneath unnecessary gear.
A practical bug out bag maintenance routine should focus on four priorities: weight distribution, equipment testing, supply rotation, and seasonal adjustments.
Bug Out Bag Maintenance Checklist
- Test the fully loaded backpack for comfort and fit.
- Keep frequently needed supplies easy to reach.
- Inspect food, water, medications, and batteries regularly.
- Recharge power banks and electronic equipment.
- Adjust clothing and shelter supplies for the season.
- Inspect straps, zippers, buckles, and waterproof storage.
- Replace missing, damaged, or expired supplies.
- Review your evacuation routes and emergency contacts.
Inspect your backpack approximately every three months and after any emergency, camping trip, or practice exercise where supplies were used.
1. Test Your Fully Loaded Bug Out Bag
One of the best ways to identify problems with your emergency backpack is to wear it during a realistic practice walk.
Start with a short, manageable walk using the same equipment you would carry during an evacuation. Gradually increase the distance if your physical condition and circumstances allow.
During the test, pay attention to:
- Shoulder pressure: Straps should not create excessive discomfort.
- Hip support: If your backpack has a hip belt, adjust it according to the manufacturer’s instructions.
- Weight distribution: The backpack should remain stable while walking.
- Footwear: Watch for rubbing, pressure points, or developing blisters.
- Equipment movement: Loose items should not shift excessively or create balance problems.
- Accessibility: You should be able to retrieve critical supplies without unpacking everything.
There is no single ideal backpack weight for everyone. The correct load depends on your physical abilities, terrain, evacuation distance, and the supplies required by your household.
Practical tip: Weigh your fully loaded backpack, including water. Remove unnecessary equipment if you cannot carry it comfortably.
2. Organize Your Bug Out Bag for Quick Access
Proper organization can save valuable time during an evacuation. Supplies you may need immediately should be accessible without emptying your entire backpack.
A simple packing system divides your gear into three areas.
Top and External Pockets: Frequently Used Supplies
Store items you may need quickly in easily accessible compartments.
- First aid kit and essential medications.
- Flashlight or headlamp.
- Emergency whistle.
- Paper maps and emergency contact information.
- Rain protection.
- Water bottle or hydration equipment.
Middle Compartment: Heavier Equipment
Place relatively heavy, dense equipment close to your back, generally around the middle of the backpack, while following the pack manufacturer’s guidance.
Examples may include:
- Food supplies.
- Cooking equipment, if included.
- Additional water containers.
- Compact tools and repair supplies.
Secure heavy items to prevent shifting and maintain balance while walking.
Bottom Compartment: Bulky, Less Frequently Used Supplies
Store lightweight, bulky items that are not usually needed while traveling toward the bottom of the backpack.
- Sleeping bag or emergency bivvy.
- Extra clothing.
- Insulating layers.
- Compact sleeping equipment.
Use waterproof bags or liners to protect clothing, bedding, and other moisture-sensitive supplies.
3. Rotate Food, Water, Medications, and Batteries
Emergency supplies require periodic inspection because storage conditions, expiration dates, and equipment reliability can change over time.
A quarterly inspection is a useful general schedule, although certain products may require more frequent attention.
Food Supplies
- Check expiration or best-by dates.
- Inspect packaging for tears, leaks, or damage.
- Replace food that has been exposed to unsuitable storage conditions.
- Rotate familiar shelf-stable foods into normal household use when appropriate.
Water and Purification Equipment
- Inspect water containers for damage or leaks.
- Replace stored water according to appropriate storage guidance.
- Check water purification tablet expiration dates.
- Inspect filters and follow manufacturer storage instructions.
Some water filters can be permanently damaged if they freeze after becoming wet. Check the manufacturer’s guidance before storing them in an unheated vehicle or outdoor location.
Medications and First Aid Supplies
- Check expiration dates.
- Replace used or damaged first aid supplies.
- Keep medications in appropriate labeled containers.
- Follow temperature and storage instructions.
- Update medication lists when prescriptions change.
Discuss emergency prescription reserves with your pharmacist or healthcare professional. Do not assume medications remain safe after prolonged exposure to excessive heat or freezing temperatures.
Batteries and Electronic Equipment
- Recharge portable power banks according to manufacturer instructions.
- Test flashlights and emergency radios.
- Inspect charging cables and connectors.
- Check spare batteries for corrosion or leakage.
- Replace damaged or unreliable electronic equipment.
4. Adjust Your Bug Out Bag for Every Season
A backpack prepared for hot summer weather may not provide sufficient protection during freezing temperatures.
Review your emergency equipment as seasonal conditions change.
| Season | Recommended Adjustments |
|---|---|
| Spring | Rain jacket, waterproof storage, extra dry socks, and appropriate footwear. |
| Summer | Sun protection, breathable clothing, insect repellent, and additional drinking water as needed. |
| Fall | Insulating layers, rain protection, and clothing suitable for changing temperatures. |
| Winter | Thermal layers, insulated gloves, warm headwear, and cold-weather shelter equipment. |
For additional cold-weather preparedness guidance, see our Winter Blackout Survival Guide.
5. Protect Your Emergency Supplies From Moisture and Damage
Even backpacks marketed as water-resistant may allow moisture to enter during prolonged rainfall or accidental immersion.
Protect important supplies using a combination of waterproof storage bags, sealed containers, and a suitable backpack liner.
Give extra protection to:
- Important documents and identification.
- Prescription medications.
- Electronic devices and charging equipment.
- Dry clothing and insulation.
- Matches and other moisture-sensitive fire-starting supplies.
Inspect waterproof pouches and containers periodically. Replace damaged seals, cracked containers, or bags that no longer close securely.
6. Keep Your Bug Out Bag Ready to Grab
Your emergency backpack should be stored somewhere accessible, secure, and protected from damaging environmental conditions.
A closet near an exit may be more suitable than an attic, damp basement, or vehicle exposed to extreme temperatures.
If you keep a separate emergency kit in your vehicle, inspect it more frequently and account for temperature-sensitive supplies.
Everyone in your household should know where emergency backpacks are stored and how to access them quickly.
7. Review Your Evacuation Plan With Your Equipment
Every time you inspect your bug out bag, take a few minutes to review your household evacuation plan.
Confirm that:
- Emergency contact information is current.
- Primary and alternate evacuation destinations are still appropriate.
- Maps and written directions remain usable.
- Children’s clothing and supplies still fit their needs.
- Pet supplies and veterinary information are current.
- Transportation arrangements remain realistic.
For a broader preparedness strategy, review our Complete Emergency Preparedness Plan.
Bottom line: A well-maintained 72-hour bug out bag should be comfortable to carry, easy to organize, and ready for immediate use. Regular inspections, practice walks, and seasonal adjustments help ensure your emergency supplies remain dependable when you need them most.
Complete 72-Hour Bug Out Bag Essentials Checklist
Before considering your emergency backpack complete, use this 72-hour bug out bag checklist to review the supplies needed for three days of emergency evacuation.
Your exact requirements will depend on your climate, destination, physical abilities, and household size. This checklist provides a practical starting point that you can customize for your situation.
72-Hour Bug Out Bag Packing Checklist
Water and Hydration
- Drinking water appropriate for your needs and carrying capacity.
- Refillable water bottle or hydration bladder.
- Portable water filter.
- Backup water purification method.
Emergency Food
- Three days of shelf-stable food appropriate for your calorie needs.
- Ready-to-eat emergency meals or food bars.
- Lightweight snacks such as trail mix or jerky.
- Compact eating utensils.
- Optional outdoor cooking equipment and suitable fuel.
Shelter and Sleeping Equipment
- Emergency bivvy or weather-appropriate sleeping bag.
- Lightweight tarp or emergency shelter.
- Compact sleeping pad or ground insulation.
- Paracord or utility cord.
Fire and Heat
- Reliable lighter.
- Waterproof matches or an alternative ignition method.
- Dry tinder stored in a waterproof container.
- Weather-appropriate insulation and clothing.
Clothing and Personal Protection
- Extra socks and underwear.
- Weather-resistant outer layer.
- Insulating clothing appropriate for the season.
- Comfortable, broken-in footwear.
- Work gloves.
- Hat and sun protection.
First Aid and Hygiene
- Compact first aid kit.
- Essential prescription medications.
- Personal medical information.
- Hand sanitizer and hygiene wipes.
- Toothbrush and basic hygiene supplies.
- Toilet paper and waste bags.
Navigation and Communication
- Paper maps of evacuation routes.
- Compass.
- Charged smartphone.
- Written emergency contact information.
- Emergency radio.
- Whistle or other signaling device.
Lighting and Backup Power
- LED headlamp or flashlight.
- Backup flashlight.
- Spare batteries or compatible charging equipment.
- Portable USB power bank.
- Charging cables.
Cutting Tools and Repairs
- Reliable knife or compact multi-tool, where permitted.
- Small roll of duct tape.
- Zip ties.
- Sewing needle and strong thread.
- Basic equipment repair supplies.
Important Documents and Emergency Supplies
- Copies of identification and essential documents.
- Emergency cash in small denominations.
- Spare keys.
- Waterproof document pouch.
- Printed evacuation plan.
Family and Pet Supplies
- Age-appropriate supplies for children.
- Infant feeding and diaper supplies, if needed.
- Comfort items for children.
- Pet food and drinking water.
- Pet leash, carrier, and collapsible bowls.
- Necessary medications and veterinary records.
Important: A 72-hour bag is intended to support short-term emergency needs, not guarantee complete self-sufficiency in every disaster. Store additional supplies at home or another safe location when possible.
Shop Recommended 72-Hour Bug Out Bag Gear
If you’re building your first emergency backpack or replacing outdated equipment, our Amazon gear collection brings together commonly used preparedness supplies.
Browse water filtration equipment, emergency shelter supplies, flashlights, portable power, and other essentials.
Build Your Emergency Backpack
Compare recommended equipment and choose supplies that match your budget, evacuation plan, and individual needs.
Browse Bug Out Bag Essentials on Amazon
As an Amazon Associate, The Savvy Survivalist earns from qualifying purchases.
Final Thoughts: Building a Reliable 72-Hour Bug Out Bag
A dependable 72-hour bug out bag is one of the most practical emergency preparedness projects you can complete. Whether you’re preparing for a wildfire, severe storm, flooding, prolonged power outage, or another evacuation emergency, having essential supplies organized and ready can make leaving home easier and safer.
However, the best bug out bag is not necessarily the most expensive or the one containing the most equipment.
A practical emergency backpack should meet five important requirements:
- Cover your essential needs. Prioritize safe drinking water, food, shelter, medical supplies, clothing, and communication.
- Remain manageable. Choose a backpack and equipment load that you can comfortably carry.
- Match your evacuation plan. Pack for your climate, destination, transportation, and household requirements.
- Use dependable equipment. Select supplies you understand and have practiced using.
- Stay ready. Inspect, test, and update your emergency supplies regularly.
Remember that your equipment needs may change throughout the year. A backpack prepared for summer conditions may require additional insulation during winter, while a family evacuation kit may need adjustments as children grow.
Preparedness is an ongoing process. Begin with the essential supplies you already own, identify the most important gaps, and improve your emergency backpack gradually.
Continue Building Your Emergency Preparedness Plan
Your bug out bag is only one component of a complete household emergency strategy. These related guides can help you prepare for additional scenarios:
- How to Build a Bug Out Bag in 5 Minutes — A streamlined approach to organizing essential evacuation supplies.
- Top 10 Bug Out Bags for Survivalists — Compare backpack options for emergency preparedness.
- 15 Most Forgotten Survival Items — Identify useful supplies that are easy to overlook.
- Complete Emergency Preparedness Plan — Develop a broader strategy for household emergencies, supplies, and evacuation planning.
Final recommendation: Assemble your 72-hour bug out bag now, test it under safe conditions, and review its contents regularly. The goal is not to prepare for every imaginable scenario, but to have a reliable, realistic emergency kit that helps you and your household respond when evacuation becomes necessary.